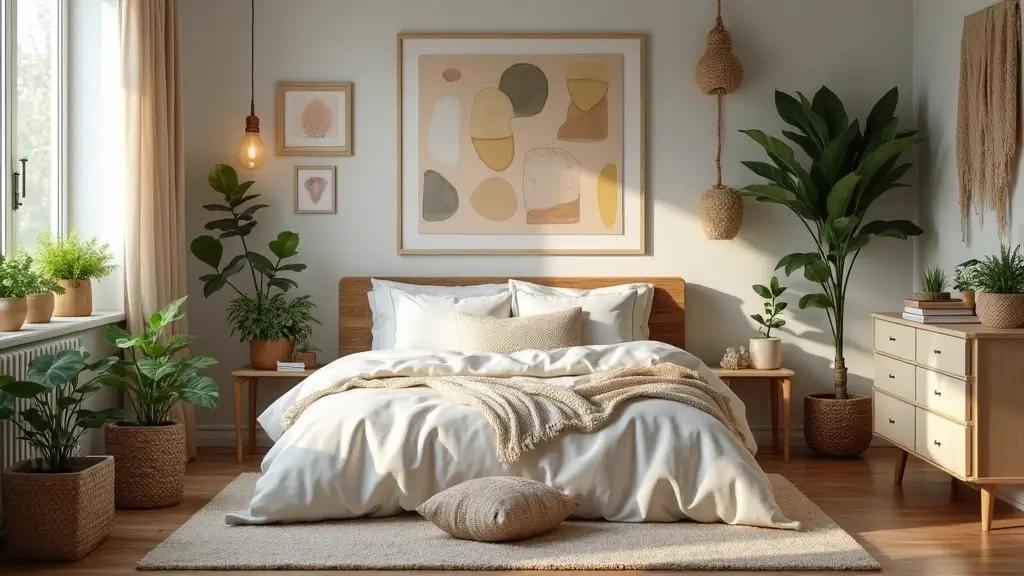
Your bedroom should feel like a small retreat. A big refresh can feel out of reach. Why I made this post is simple: I want to help you upgrade your space with easy DIY ideas that won’t break the bank. I aimed for projects you can finish in a weekend, with real, usable results. You’ll notice the difference once you start.
Who it’s for If you love a calm, cozy room but want simple fixes, this post is for you. If you rent, share a space, or juggle a busy life, you need ideas that work in real life. If lighting, texture, and small touches matter to you, you’ll find options you can actually try.
What you’ll get Here are 30 DIY bedroom decor ideas that cover walls, lighting, textiles, and tiny furniture tweaks. Each idea comes with straightforward steps, a quick materials list, and tips to adapt to your space. They are chosen to be doable with basic tools and common supplies. They promise to upgrade the feel of your room in hours, not days.
Think about painting a soft accent wall, swapping a tired lampshade, layering a plush rug, or building a lightweight headboard from wood and fabric. You can use peel-and-stick wallpaper for a bold pattern or add texture with woven throws and curtains. These touches make the space feel layered and inviting rather than flat.
All ideas include practical steps on where to start and how to adjust for smaller rooms. You’ll learn how to pick materials that last, how to measure a space, and how to get the most glow from lighting. There are plenty of renter-friendly options that come off cleanly when you move.
Start with one or two projects this weekend. Take a before photo and an after shot so you can see the difference. If you try something, tell a friend or share a photo. This collection is a menu you can tailor to your taste until your room feels truly yours.
1. Upcycled Furniture Revamp
Is your bedroom missing a personal touch but your budget is tight? Upcycled furniture can fix that. A tired chair, a dresser, or a side table becomes the hero with a little effort. You choose color, finish, and style, so the piece fits your room.
– Choose sustainable materials. Start with non-toxic paint, water-based finishes, and recycled wood when possible. These choices keep you safe and cut waste.
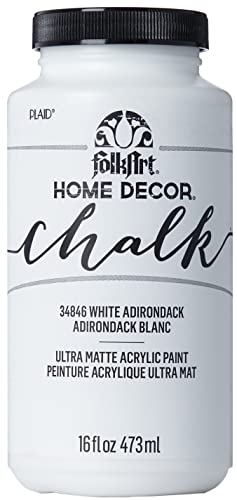
– Prep and paint smartly. Lightly sand to remove shine, wipe away dust, and prime if you need it. Chalk paint gives a soft matte look; bright colors make a bold statement. Seal with a wax for a smooth feel or with a clear topcoat for durability.
– Add hardware and texture. Swap old knobs for new ones that match your vibe. Try stenciling, fabric panels, or carved details to add depth and texture.
– Finish with flair. Distress the edges for a vintage touch, or keep lines clean for a modern look. Place the piece where it anchors the room and pair with simple bedding to let it shine.
Upcycling saves money, reduces waste, and gives your space a unique story. Ready to start? Next steps. Take photos as you go to track progress.

Unique Design: This boho wallpaper features a soft beige and light brown leaf pattern on a white background, accented with geometric lines, adding natural elegance and vibrant energy to your space

【SIZE&MATERIAL】17.3In X118.In=14.16sq.ft.Floral wallpaper,upgrading and thickening. Adopt vinyl and the latest removable glue,wallpaper sticks to any smooth, flat ,clean surface,No residue after removal.
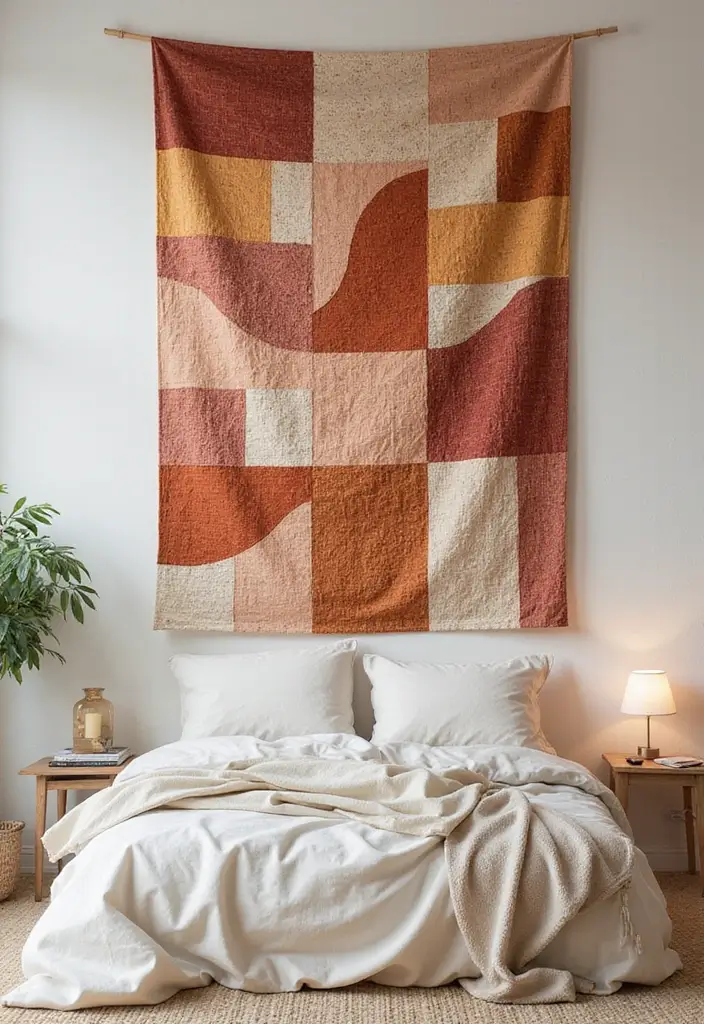
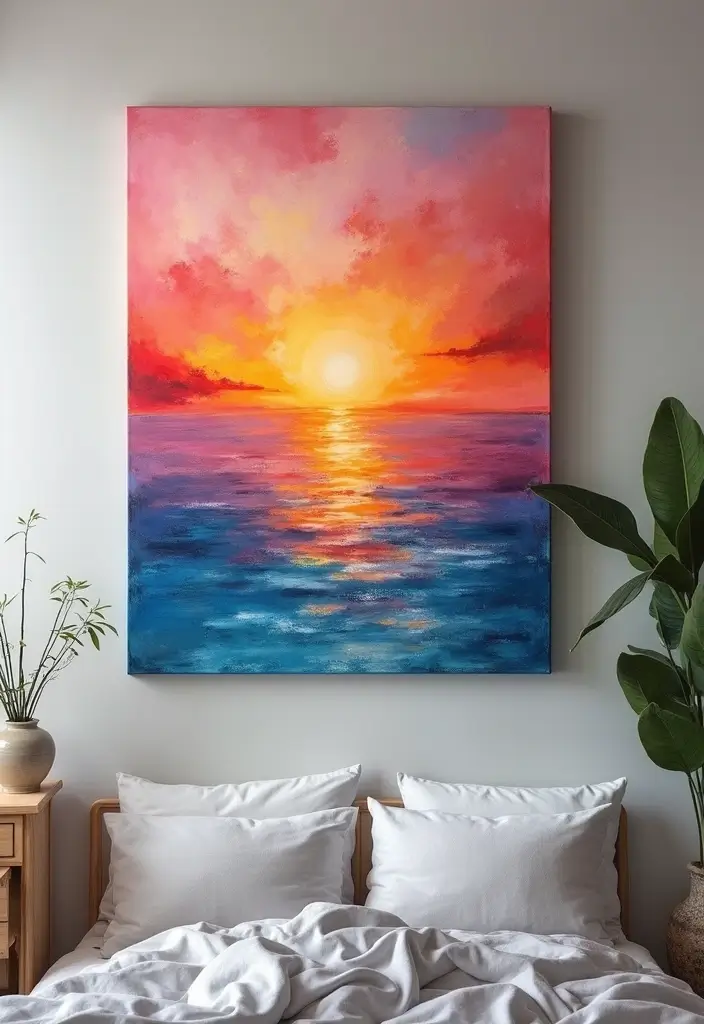
2. DIY Wall Art Using Natural Materials
You want wall art that feels real and calm. DIY wall art with natural materials gives you that without a big price tag.
What you need
– Sticks, small stones, and dried leaves from a safe walk
– A canvas, wood panel, or sturdy cardboard as a base
– Clear craft glue or double sided tape
– A pencil and ruler for neat lines
– A clear seal coat to protect the piece
How to arrange
– Gather pieces on your desk. Sort by color and size.
– Pick a pattern. A grid looks tidy; a free, organic cluster feels playful.
– Test layouts on the base first. Lay pieces in place without glue to decide.
– Leave some space between items. Negative space makes the art breathe.
Attach and finish
– Glue each piece in place. Press gently so it sticks.
– Allow time to dry fully before moving the piece.
– Apply a clear coat to seal the surface and guard against dust.
– Mount the art on the wall with safe hardware.
Tips and care
– Choose lightweight stones to keep the piece easy to hang.
– Avoid high humidity rooms. Dry air keeps glue from failing.
– Swap pieces over time to keep the look fresh.
This approach adds texture and a quiet, natural vibe to your bedroom.

[Framed Wall art]: Set of 2 piece contemporary blue and gold abstract framed canvas wall art, each 16x24 inches, 2 pieces totaling 24" H x 32" W. Each painting comes with a sturdy, rust-proof solid wood frame

High definition giclee modern grace canvas printing artwork, picture photo printed on high quality canvas. A perfect Christmas and New Year gifts for your relatives and friends.

Size and Package: Blue and gold wall decor approx 29"x58"; Suitable size makes it a great home decor addition to your home. Easy to hang - All Signs Come With Pre-Installed Hooks.
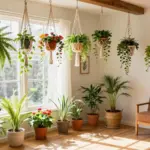
3. Macrame Plant Hangers
If your bedroom feels plain, a touch of green can lift the mood fast. Macrame plant hangers bring texture and life without crowding your shelves. This is a simple DIY project you can finish in a weekend, and it fits a boho decor vibe. It’s a DIY plant hangers project that fits your space. You can switch plants with the seasons for fresh color.
Materials and basics
Choose cotton cord, jute, or hemp. Natural tones look good with most rooms. Measure long enough for your plant pot and the knot pattern you want. Start with basic knots like the lark’s head and the square knot; plenty of quick tutorials show the moves.
– Pick easy plants such as pothos, spider plant, or a small snake plant.
– Vary hanging lengths to create layers of green.
– Try cord in a soft color to match your decor.
Hanging plants do more than look nice. They help freshen the air and bring a calm feel to your space.
Placement and care
– Hang from ceiling hooks or wall hooks to save shelf space.
– Put them away from strong drafts and heat vents to keep leaves happy.
– Dust leaves every couple of weeks and water the plants as needed.
Next steps: choose a corner, grab two plants, and start your first hanger.

Update your space with the Madison Park Essentials Joella 24 Piece COMPLETE Room in a Bag.

PRODUCT FEATURES- Allison comforter set can brighten up your room with its vibrant yellow flowers and corresponding sham. Dark grey and black accent colors help to outline the oversized floral pattern and are used in the matching decorative pillow to tone down the bright yellow of the rest of the set. Perfect for a girl's room or a dorm room

Update your space with the Madison Park Essentials Joella 24 Piece COMPLETE Room in a Bag.
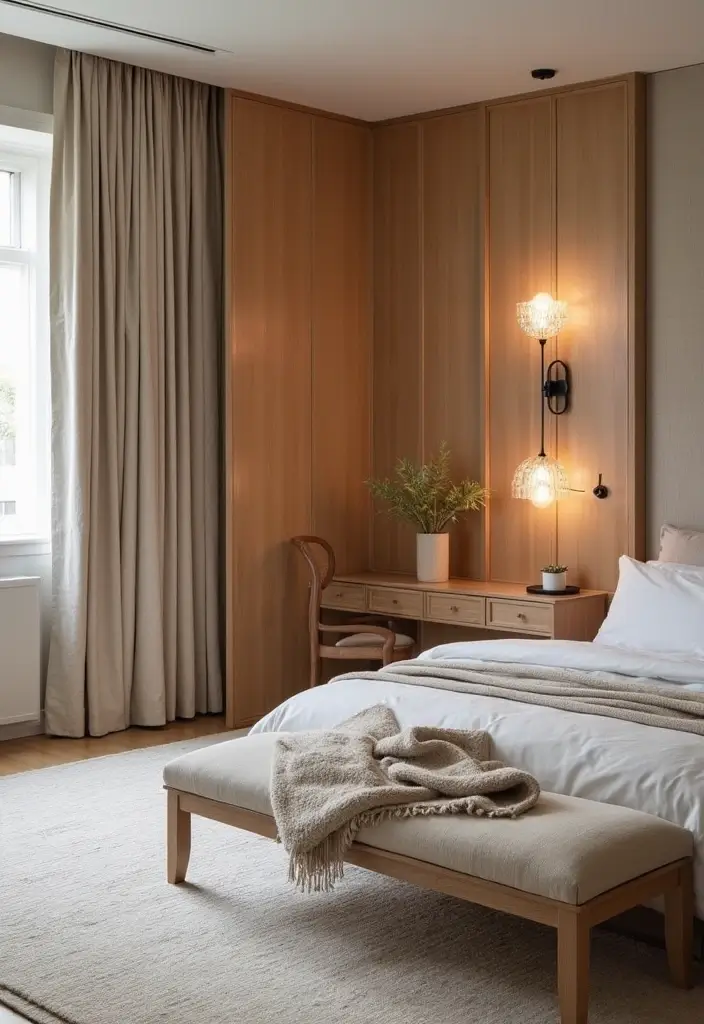
4. Create a Cozy Reading Nook
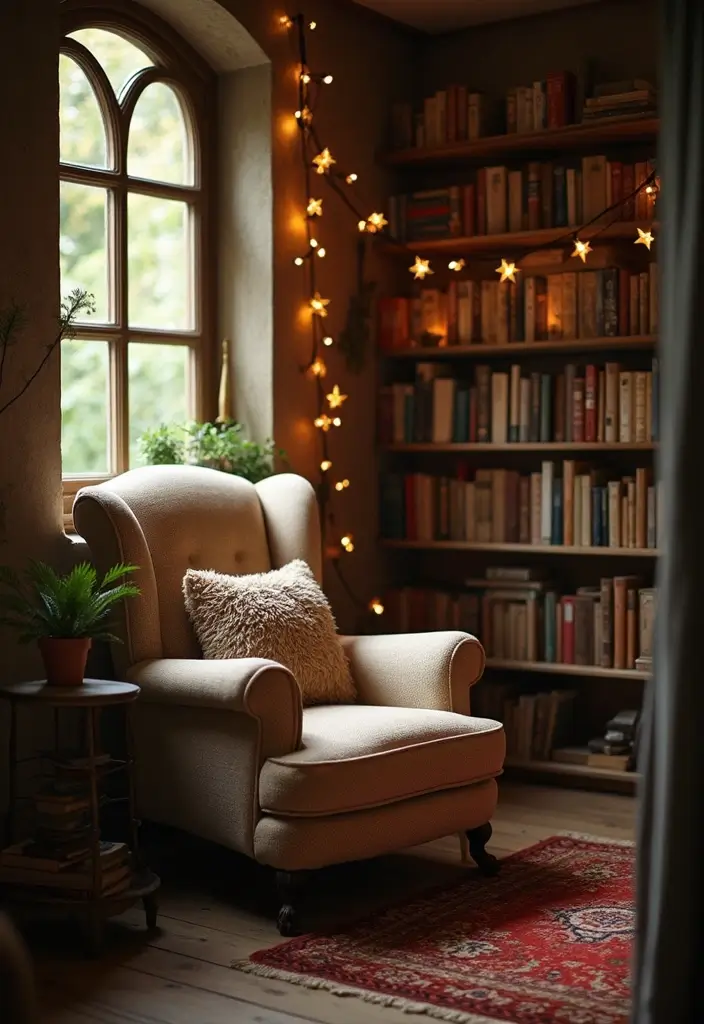
You want a calm corner in your bedroom. A cozy reading nook can turn late nights into a small ritual. Here is why it helps and how to build it fast.
– Choose a comfy seat Pick a chair you can stay in for long reads. Add a couple of cushions for back support. A light throw completes the inviting look.
– Add storage for books A small bookshelf at arm’s reach or a couple of floating shelves keeps 3–5 favorite titles handy. It saves trips to the hallway.
– Light it right Use a lamp with warm color and place fairy lights along the shelf edge. The glow should be soft and even so you can read without glare.
– Layer with textiles Drape a fuzzy blanket, add a few pillows in different textures, and lay a small rug nearby. You’ll feel cocooned the moment you sit.
– Calm color palette Choose neutrals with soft blues or greens. This gentle mix slows the mind and makes pages easier to focus on.
– Personal touches Add a small plant, a framed photo, and a favorite quote. These little details make the space feel truly yours.
This nook becomes your daily retreat where you unwind and read.
Next steps: in a weekend, pick the corner, gather the chair, shelf, and light, then arrange cushions and test the setup.


Stylish and Customizable Wall-Mounted Headboard Design Transform your bedroom with this modern upholstered headboard king or headboard queen size, made of 6 dark brown panels measuring 24 x 12 inches each. Designed to be pasted directly onto your wall, these panels offer a sleek and elegant look while allowing you to customize the size and arrangement to fit your needs. Choose from 6, 9, or 12 panels (or more) to create the perfect fit for your space, whether you're upgrading a full size headboard, queen headboard, or king size headboard only. Ideal for enhancing your room’s décor while giving it a high-end, designer feel.

Package Contents: Includes one queen headboard, two support legs, one set of screws, bed frame adapters, wall mount hardware, and an instruction manual. All parts are securely stored in a compartment on the back of the headboard queen size
5. Hand-Painted Pottery for Plants
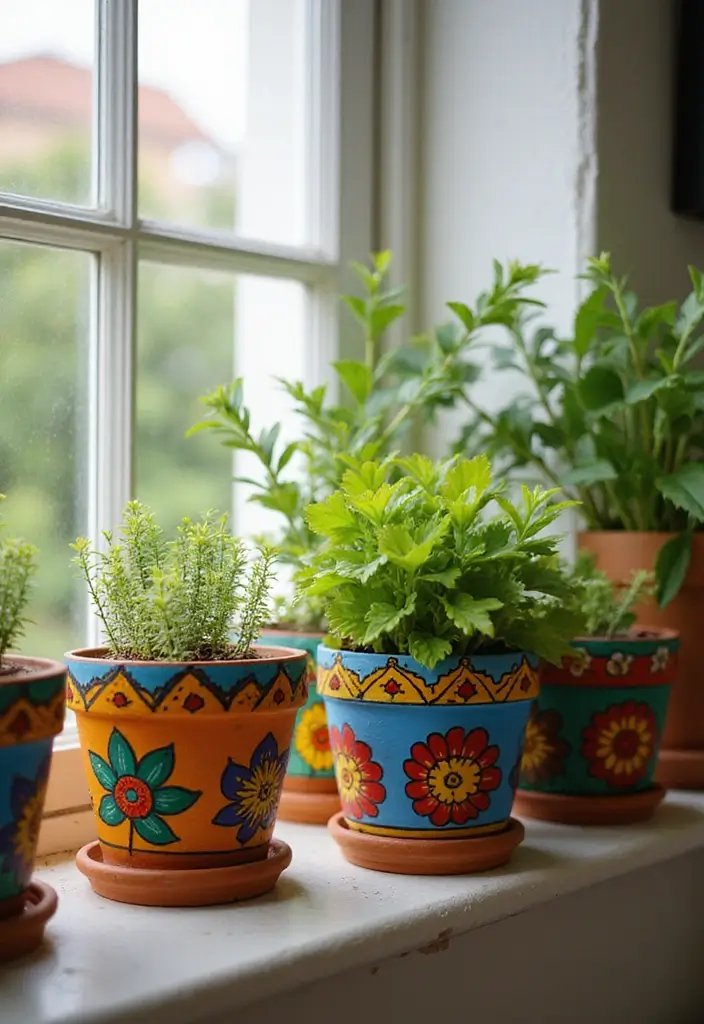
Want a quick upgrade for your bedroom? Hand-painted plant pots add color and charm. They turn plain planters into art you can admire every day. Here is why this works: you pick the colors, shapes, and vibe that suit your space.
Steps to paint your plant pots
– Start with plain terracotta pots in a few sizes.
– Choose earth-friendly, non-toxic paints so your air stays fresh.
– Decide on a design. Stripes, dots, florals, or freehand doodles all work.
– Clean the pots first. A quick wipe helps the paint stick better.
– Add a light base coat. Let it dry before you add patterns.
– Paint in layers. Dry between colors to keep lines clean.
– Group the pots on a shelf or window ledge. Vary height for depth.
– Personalize each pot. Use initials, favorite colors, or a motif you love.
– Seal with a clear, non-toxic top coat if you plan to water indoors. This protects the design.
– Wipe gently as needed. Avoid soaking the pots to keep the paint intact.
Here is a practical tip: try two pots with bold lines next to two softer, dotted pots. The mix feels balanced and modern. Next steps, grab your paints and start today. You’ll gain color, personality, and a fresh feel for your space.

VERSATILE SIZE - This unique chalk acrylic paint comes in a convenient 8 oz size and has a rich, highly pigmented formula - perfect for all your home décor projects!

VERSATILE SIZE - This unique chalk acrylic paint comes in a convenient 8 oz size and has a rich, highly pigmented formula - perfect for all your home décor projects!
VERSATILE SIZE - This unique chalk white acrylic paint comes in a convenient 16 oz size and has a rich, highly pigmented formula - perfect for all your home décor projects
6. DIY Floor Cushions
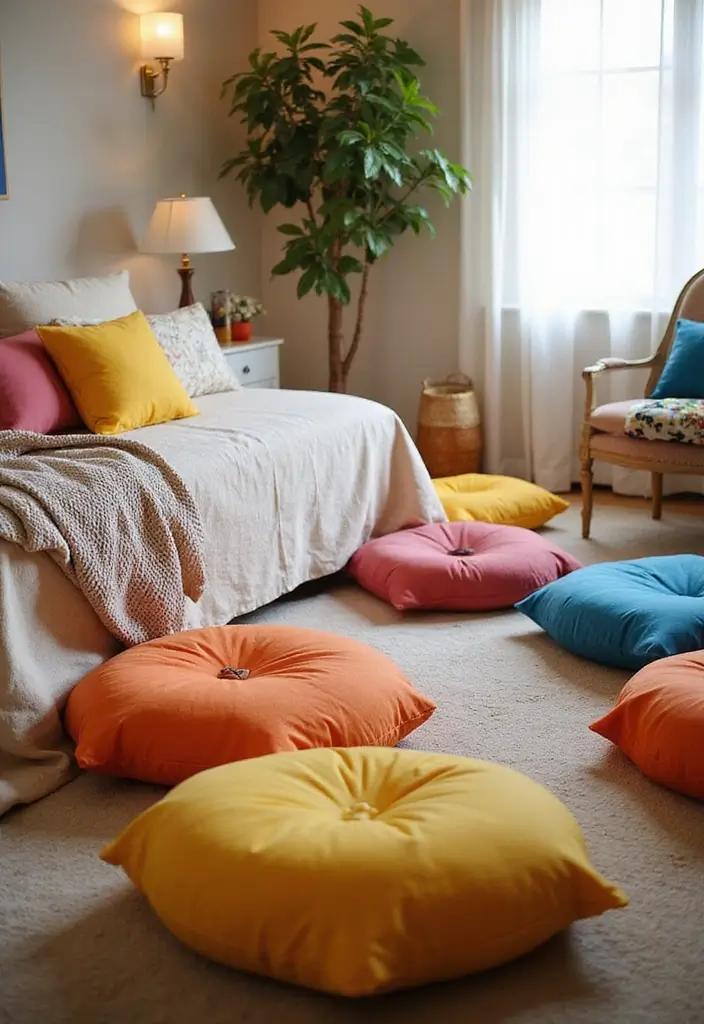
Looking to add cozy seating in your bedroom without bulky chairs? DIY floor cushions give you soft spots to lounge, play, or chat. They breathe new life into a space and let you reuse old fabric you already own.
What you’ll need
– Sturdy fabric or fabric scraps you love, such as cotton canvas, denim, or linen
– Thread and a needle, or a simple sewing machine
– Filling like recycled foam, natural fibers, or even old fluffy pillows
– A zipper or a simple hand stitch to close a removable cover
Here is why each piece matters. Durable fabric lasts through everyday use. A loose cover makes cleaning easier. The right stuffing keeps the cushions firm but comfy.
Shape ideas
– Try large rounds, square blocks, or long rectangle cushions
– Mix sizes for a playful, layered look
– Use bold colors or soft neutrals to match your room
Next steps are all about how you put them together. Start simple, then swap in new fabrics as your style shifts.
How to make them
– Cut two equal shapes for each cushion, with a small seam allowance
– Sew around the edges, leave a gap to add stuffing
– Fill lightly at first, then add more to reach your desired firmness
– Close the gap with a hidden stitch or a zipper
If you prefer a tie version, sew fabric strips around a base cover and tie to secure.
Placement and care
Place cushions near the bed, by a reading nook, or in a cozy corner. Arrange them in a row or stack them for a casual look. Wash removable covers when needed and fluff the inside to keep shape.
Next steps: choose a couple of fabrics, carve out an afternoon, and start sewing. Your room gets a soft, inviting upgrade you can customize over time.

【Pattern Design】The design is inspired by nature, with a dark base, highlighting the colorful flowers and birds. Flowers and birds are distributed freely, without fixed rules, adding a sense of natural randomness, and the overall design is full of retro charm, adding an artistic atmosphere and beauty to the living space.

Material: Made of high quality vinyl, blue grey concrete contact paper is thick; durable, waterproof; removable; sticky; self adhesive, sticky well on smooth surface

Black Wallpaper --Embossing Process- It can effectively reduce the generation of bubbles. The solid color gives the room a more advanced texture. Our backing paper is designed with a measure-and-cut grid which makes our black wallpaper easy to cut and apply to any size bedroom wall
7. Reclaimed Wood Bed Frame
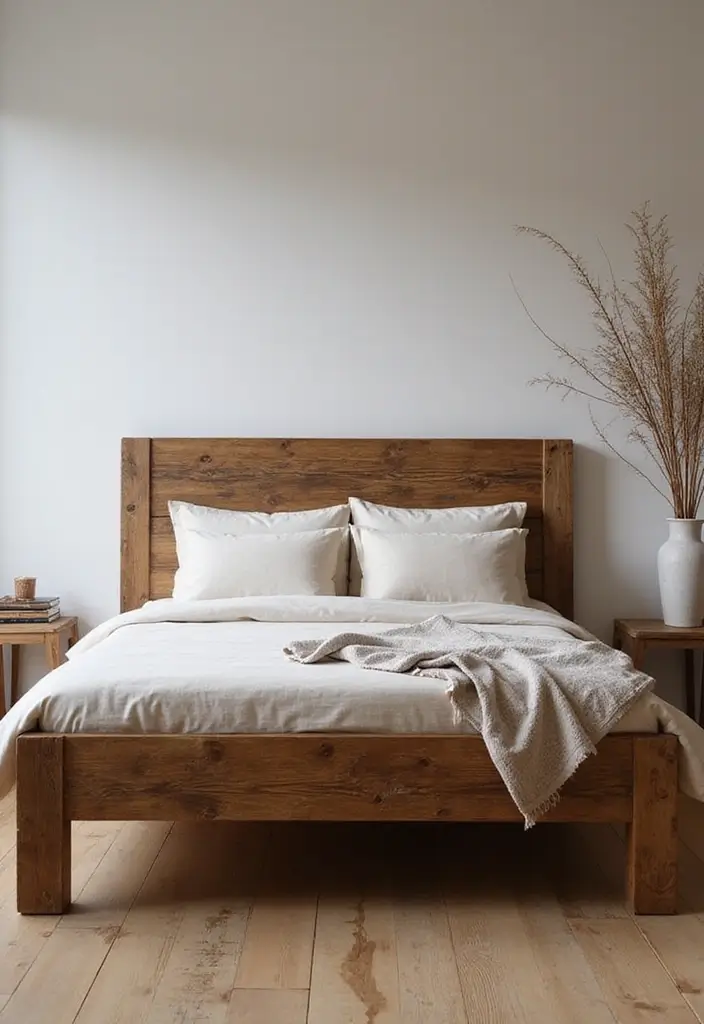
Want a bed frame that adds charm and lasts? A reclaimed wood bed frame fits. It brings warmth, texture, and a story to your room. You can salvage boards from old barns or repurpose pallets for a rustic vibe. This frame is sturdy, supports your mattress, and becomes the room’s centerpiece.
– Choose wood with a story – Look for boards from old barns or pallets. Pick pieces with color, nail holes, or weather marks.
– Inspect for condition – Check for rot, splits, or loose joints. Set aside boards with major cracks. Sand rough spots to smooth surfaces.
– Finish simply – Sand to smooth the wood. Apply a natural oil like tung or linseed. Wipe off excess and let it cure.
Next, build the frame with care. Keep the design simple for strength. A straight headboard and sturdy legs work with reclaimed wood and stay square.
– Pair with organic bedding – Use cotton or linen sheets. Choose neutral colors to let the wood shine.
– Add natural accents – A wool rug, jute basket, and linen curtains finish the look.
Care tips: Wipe dust with a soft cloth. Check screws twice a year and tighten. Refinish only when the finish wears; apply another light coat of natural oil to refresh color.
With this frame, you gain style that lasts and a look that feels honest.

CUSTOM CANVAS ARTWORK DETAILS: Celestial World Map (Pink) by Isabelle Z. DESCRIPTION: A map of the world, illustrated in muted earth tones, appears on a soft beige background. The continents are colored in hues of soft peach, cream and pale white, covered in thin concentric circles that radiate from the image's center.

Floral Canvas Art Detail: Hand-applied gold foils accents and textures create a stunning 3D artistic effect on the floral bouquet painting

【Pink Wildflower Wall Art Set of 3】Brighten any room with this framed wildflower canvas wall art set, featuring soft pink tones, butterflies, and delicate botanical details. Perfect for those who love flower wall art, floral wall art, and vintage floral wall art, this set brings a sweet, whimsical charm to nurseries, bedrooms, bathrooms, and living rooms.
8. DIY Fabric Wall Hangings
If your bedroom walls look bare, fabric wall hangings are a quick fix. They add texture and warmth without crowding the room. You can use scrap fabric or thrifted finds to make art that feels soft and inviting.
– Choose textures like burlap, linen, and cotton to mix interest.
– Pick colors that blend with your scheme or stand out for a bold accent.
– Decide how you want to hang them: an inexpensive rod, a slim branch, or a simple dowel.
Here is how to make one in minutes:
– Cut fabric into rectangles or long strips. Leave raw edges for a relaxed look or sew hems for a neat finish.
– Layer pieces or tie knots to form a simple pattern. You can loop fabric at the top for a graceful drape.
– Attach pieces to a rod with clips, ribbons, or a touch of glue for a fast DIY.
Where to place them: above the bed, beside a dresser, or on a blank hallway wall. Layer two or three hangings for depth.
Care and upkeep: keep fabrics away from direct sun. Lightly dust with a soft brush.
Next steps: pick a palette, cut a few strips, and start crafting. Your first hanger boosts the room fast.

WATERPROOF PROTECTION - With Layered Blankets waterproof blanket say goodbye to worrying about stains or wet spots on your bedding. Our innovative waterproof blanket creates a reliable barrier against all liquids including oils, intimate fluids, and accidents. Protect your mattress, sheets, and furniture while enjoying complete peace of mind.

Made from ultra-soft plush and reversing to a cozy Berber, provides an exceptionally soft and cozy feel

Contains: Brand New 2Pcs Square Cover/Shell 18" X 18"(45cm X 45cm), with Hidden Zipper Closure Only Cover No Insert/Filler.the Both Sides Same Colored Printing,100% Handmade.
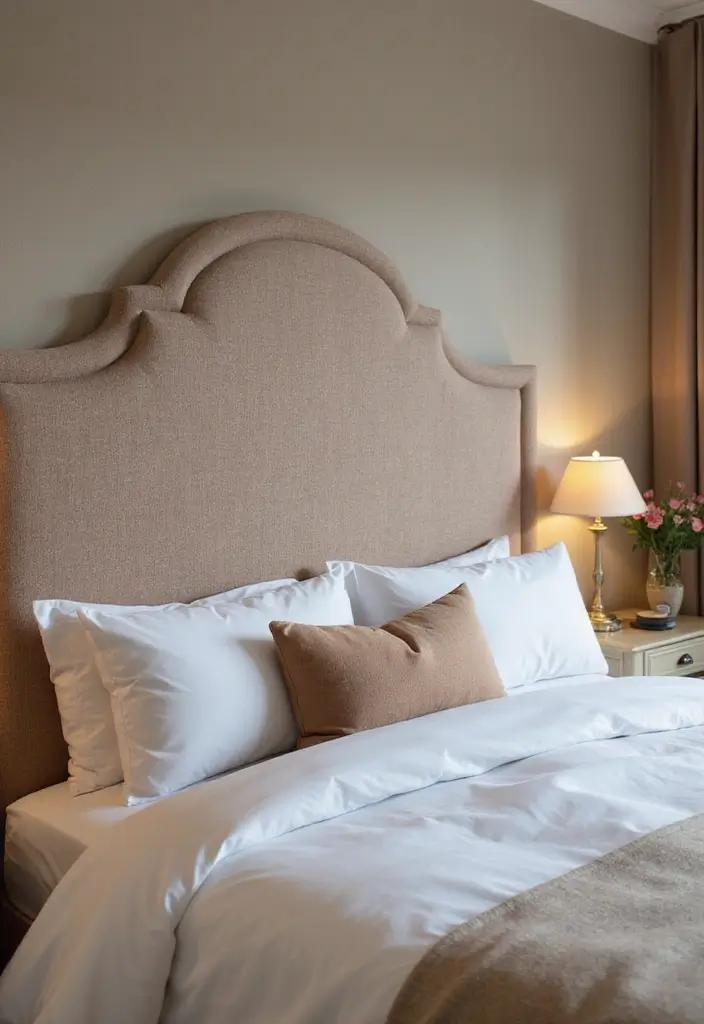
9. Stylish DIY Headboard

You want your bed to look stylish without a huge price tag. A DIY headboard can do that in one weekend. It gives the room a clear focal point and a touch of personality. Here is how to pick a style and make it real.
– Reclaimed wood headboard: gather sturdy boards and plan a simple layout. Mount them to a slim plywood panel for a solid back. Sand rough edges, then apply a warm stain and a clear seal. The wood grain adds texture and warmth to the room.
– Fabric or upholstered headboard: start with a plywood base. Add foam or batting for a soft feel. Wrap fabric tight and staple to the back. A solid color keeps things calm, while a subtle pattern adds life.
– Patterned upholstery: choose a fabric that fits your space. Consider a light tuft or neat piping to add depth. A low-profile frame helps keep the look modern and clean.
– Built-in lighting touch: hide a slim LED strip behind the panel. It creates a soft glow for reading and mood without glare.
Next steps: measure your bed width, pick a style, gather tools, and build. A well-made headboard boosts comfort and makes your space feel put together.

Customizable Wall-Mounted Headboard Panels Upgrade your bedroom décor with this set of 12 light gray headboard panels, each measuring 24x12 inches. Designed for flexibility, they can be used to create a king-size upholstered headboard, a wall-mounted queen headboard, or even full-sized arrangements. With adjustable configurations, these panels also work beautifully as 3D wall panels or decorative features for other spaces. Perfect for modern and luxurious interiors, these panels adapt to any style.

Soft Material: Our wall cushion is made of NBR environmentally friendly material, with excellent cushioning performance and fast rebound, soft touch, and protects children from collisions
Customizable Wall-Mounted Upholstered Headboard Panels Create the perfect bedroom centerpiece with this elegant wall headboard, which features 12 dark brown panels measuring 24 x 12 inches each. With a modular DIY design, you can customize the size and layout to fit any bed type, whether you need a wall headboard queen, floating headboard queen, or upholstered king headboard. The panels can be arranged in sets of 6, 9, or 12 to suit your space, or combined for larger installations to enhance your room’s style and functionality. These wall board panels are perfect for upgrading your space with a modern, elegant touch.
10. Natural Wood Shelves
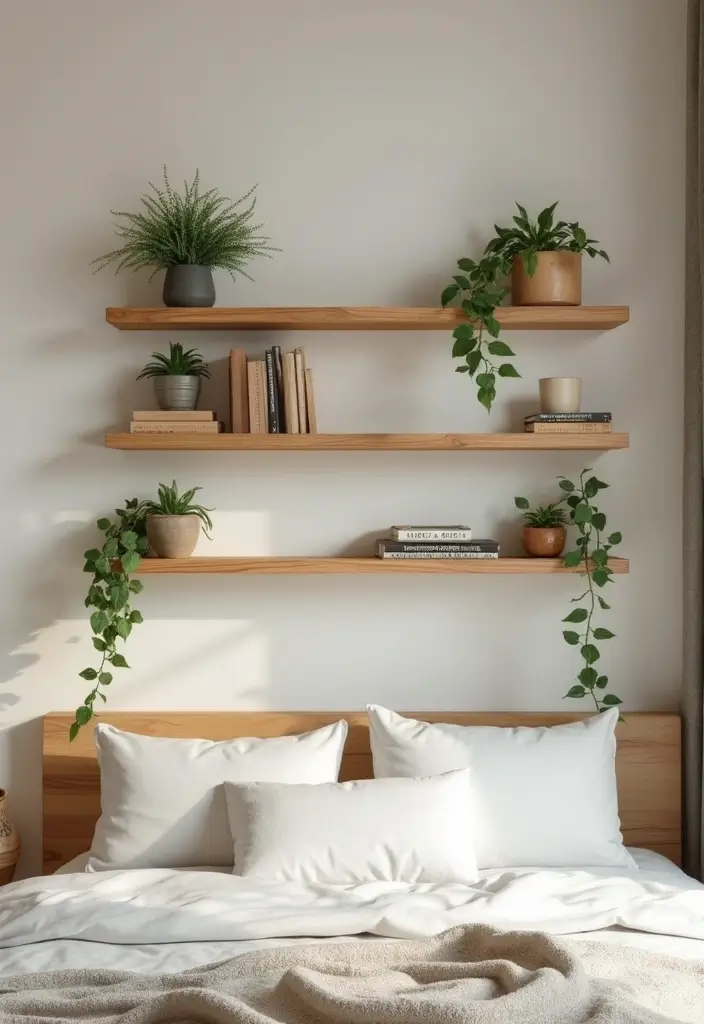
Here is why you want natural wood shelves. They store things and add a warm, natural feel to your room. They’re easy to build with a few simple tools. You can use them to show books, plants, and small decor pieces.
Here is how to do it
– Choose natural wood or reclaimed wood to get a cozy look.
– Pick the shelf height based on what you want to display. Eye level works well.
– Seal the wood with a clear finish to keep color and stop rough edges.
– Decide on a mounting plan. Hidden brackets give a floating feel; visible brackets add strength.
– Install shelves with care. Use wall studs and follow safe weight limits.
Next steps in styling
– Mix books, plants, and ceramics to keep the display balanced.
– Add a small plant at one end to soften the line.
– Leave a bit of space between pieces so the shelves don’t look crowded.
– Wipe dust periodically to keep the finish fresh.
Care and impact
– Reclaimed wood brings character and a story to the room.
– A light seal helps wood stand up to bedroom moisture.
– These shelves free up dresser space while adding a natural vibe.
This plan gives you storage that looks good and fits everyday life.

This product is manufactured in united states

EASY TO USE, EVEN FOR BEGINNERS: Whether you’re new to DIY or a pro, Rust-Oleum Chalked makes painting easy and enjoyable. Minimal prep required means you can jump right into your project confidently and focus on creativity—not complicated steps

EASY TO USE, EVEN FOR BEGINNERS: Whether you’re new to DIY or a pro, Rust-Oleum Chalked makes painting easy and enjoyable. Minimal prep required means you can jump right into your project confidently and focus on creativity—not complicated steps
11. Handmade Dreamcatcher
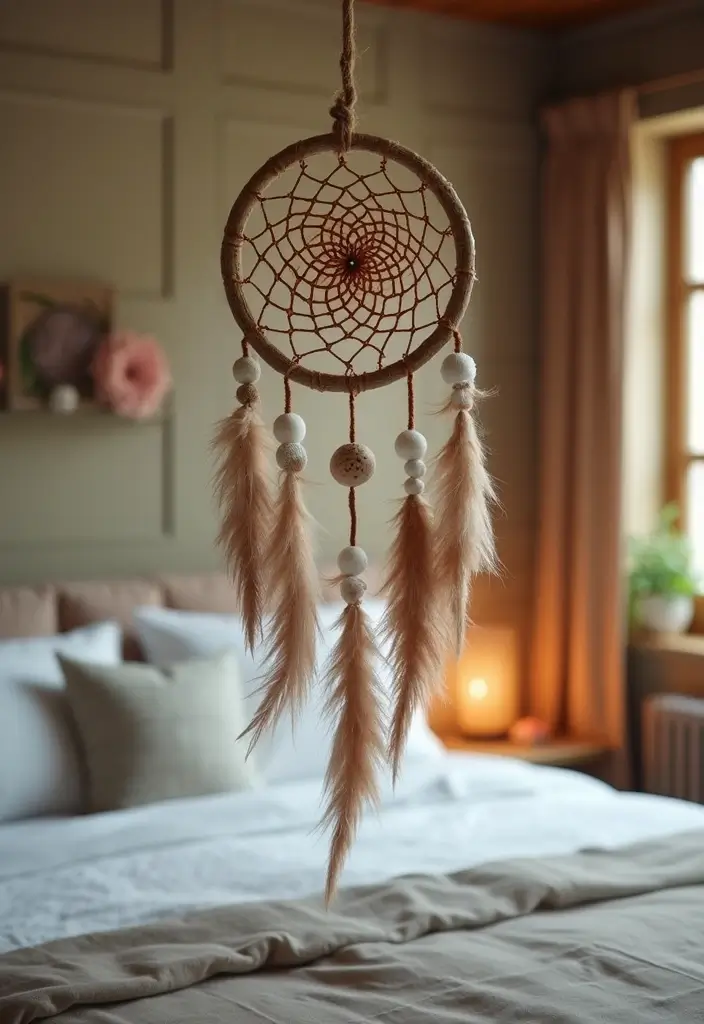
Want a calm, cozy bedroom? A handmade dreamcatcher adds whimsy and a soft energy. Hang it above your bed to invite peaceful sleep and guard dreams.
Here is why
– Choose colors that fit your bedroom palette.
– Add personal elements like charms or beads that matter to you.
– Try different sizes for a dramatic focal point.
What you need
– A hoop (wood or metal) about 6 to 12 inches wide
– Natural twine or yarn
– Strong thread or cord
– Scissors
– Feathers and beads
– Glue if needed
Let’s break it down.
1) Wrap the hoop with twine until it is fully covered.
2) Create a simple web by tying strings inside the hoop in a zigzag pattern.
3) Slip beads onto the string as you weave.
4) Attach feathers to the bottom with small cords.
Ways to display
– Hang above your bed for a bold focal point.
– Use a wall hook or a ceiling hanger to let it swing softly.
– Mix sizes with other boho decor for depth and texture.
Care and culture
– Dust lightly with a soft brush and keep the piece dry.
– These crafts nod to Native American traditions. Learn about the Ojibwe roots and honor the culture when you make one.
With a little care, your dreamcatcher can last for years and keep your space calm.
12. DIY Mood Lighting

Here is why mood lighting makes a big difference in a bedroom. A soft glow helps you wind down. It makes the room feel cozy and safe. You can build lights that fit your style and budget.
DIY mood lighting ideas
– Pendant lights from jars or bottles: turn a jar into a hanging light. Use a simple kit, thread a cord, and attach a pendant cap. Swapping in a warm LED bulb gives a mellow shine.
– Fairy light jars: fill a clear jar with tiny string lights. Hide the battery pack in the lid or inside a small pouch. The result is a gentle twinkle that softens the edges of the room.
– Layer and balance: mix one soft overhead glow with a bedside lamp and a string-light accent. Let each piece show a different level of brightness.
– Reclaimed touches: use a wood spool, a metal can, or a glass bottle as a shade. These upcycles add texture and charm.
– Warm color and safe setup: pick LEDs in warm white around 2700K. Keep cords neat and away from the bed. Use low-heat bulbs and never cover lamps with fabric.
Next steps: plan a quick project this weekend. Choose one idea, gather supplies, and test the vibe for your space.
13. Upcycled Jar Lanterns
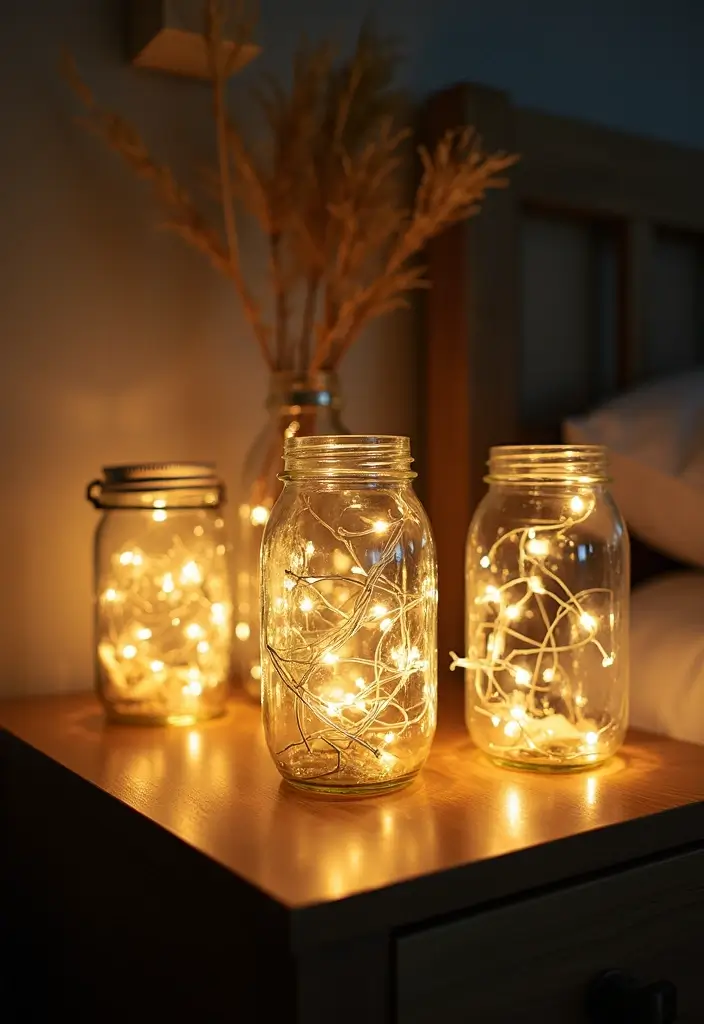
Want a warm, cozy glow in your bedroom without buying new lamps? Upcycled jar lanterns are simple to make and easy on the wallet. Turn old mason jars into tiny glow boxes that feel intimate and calm. Fill them with LED string lights for a safe twinkle, or set a small LED candle inside for a soft flicker. Place them on nightstands or hang them from the ceiling for a floating, storybook vibe.
– What you need Clean jars, a string of LED lights or a small battery candle, sturdy string or thin chain, and optional paints or twine.
– Light options LED lights stay cool and last long. Tealights can work, but the jar helps keep things safe near fabric and beds.
– Decoration ideas Wrap twine around the neck, dab on soft paint, or use a simple stencil. Add burlap or lace for a rustic touch. Mix jar sizes to add depth.
– Hanging and placement Install a ceiling hook or a wall hook. Hang jars at different heights to create a layered look. Tidy cords with clips or invisible ties.
– Care and safety Use battery power for safety. Check batteries every few weeks. Wipe jars with a damp cloth to keep them clear.
Next steps: group three jars at different heights to fill a corner with gentle light and charm.
14. DIY Upholstered Bench
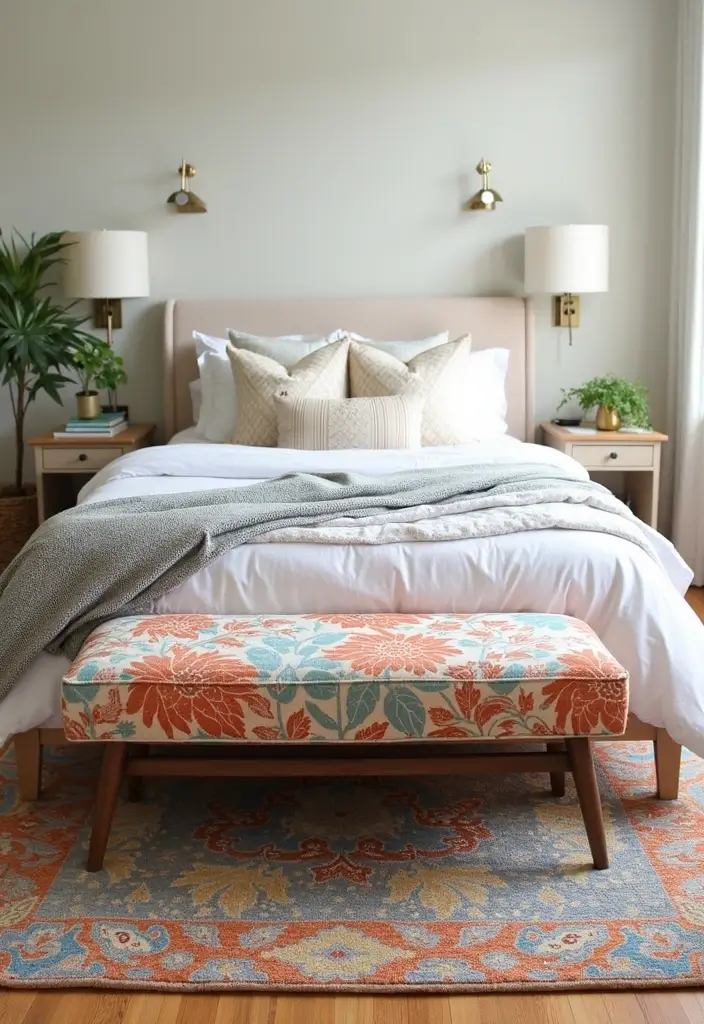
Here is why a DIY upholstered bench fits your bedroom. It adds seating, a small surface, and a cozy feel you can sense. You can reuse an old frame or build a simple one from wood. It costs less than most store pieces and fits your room’s vibe.
What you’ll need
– Wooden frame or an old bench
– Durable upholstery fabric that matches your decor
– Eco-friendly foam for cushioning
– Batting or soft liner for a smooth top
– A staple gun, screws, and glue
– Scissors, measuring tape, and a pencil
Next steps.
How to do it
1. Prep the base. Clean and sand rough spots.
2. Cut foam to fit the seat. Aim for a cushion that feels firm yet comfy.
3. Layer with batting for a smooth edge.
4. Cover with fabric. Stretch tight and staple under the frame.
5. Finish corners. Tuck and staple for a neat look.
6. Secure to the base. Attach the seat so it won’t wobble.
Tips
– Pick fabric that wears well and is easy to clean.
– Use foam that holds its shape and feels soft.
– If you need more storage, make the bench hollow under the seat.
Placement ideas
– Foot of the bed for a tidy landing spot.
– Near a sunny window for a quick sitting spot.
– In a corner to hold blankets or shoes.
Here’s to the finish. A simple bench adds style, function, and a spot you built yourself.
15. Colorful Throw Pillows
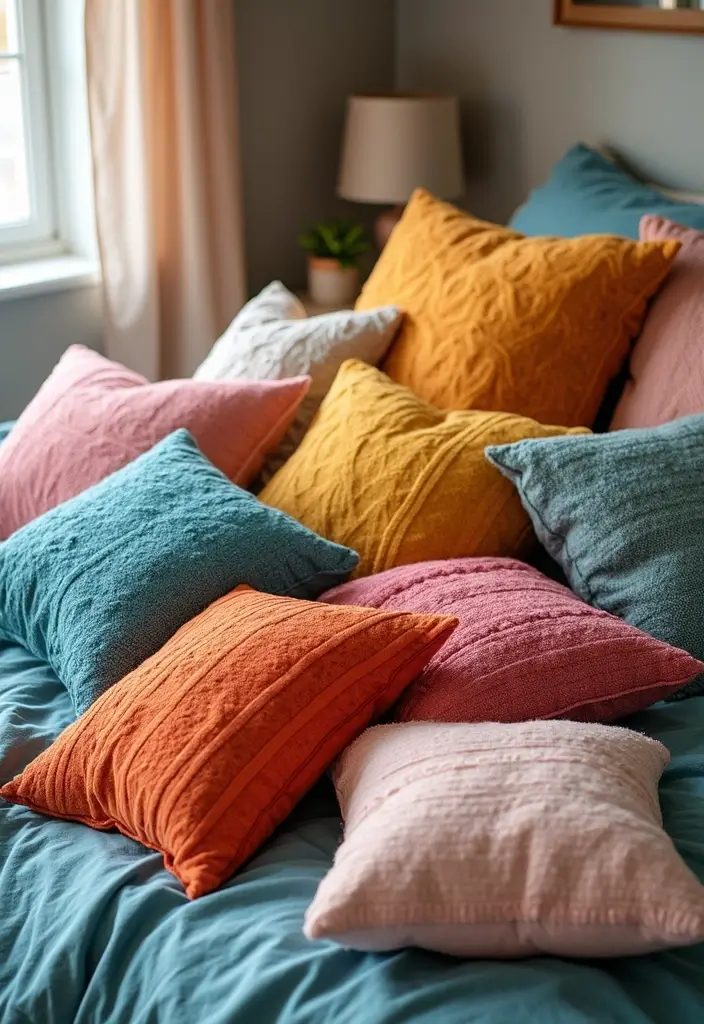
Feeling stuck with a bland bed? Colorful throw pillows can change the look in minutes. They add life, texture, and a personal touch without a big price tag. You can swap them with the seasons to keep the room fresh.
Here is why they work: pillows draw the eye to the bed and give the space a layered, cozy feel.
Materials
– Fabric remnants or thrifted fabrics in at least two colors
– Pillow forms or inserts in your chosen size
– Thread, needle, scissors, or a sewing machine
– Zippers or an easy envelope closure for quick cover changes
– Small trims like tassels, buttons, or piping
Tips to mix it up
– Try different shapes: square, round, and a bolster add visual interest
– Pair warm hues with cool tones for balance
– Add texture with velvet, linen, or cotton blends
DIY steps
– Choose two or three fabrics you love and prewash them
– Cut covers to fit your pillow inserts with a little seam allowance
– Sew the edges, using a simple envelope or zipper opening
– Slip in the insert and zip or close the flap
– Add a touch of whimsy with a tassel, button, or a tiny embroidery accent
Placement and care
– Layer two large covers at the back and one smaller front for depth
– Rotate colors by season to refresh the vibe
– Wash pillow covers when needed; let covers air dry to avoid shrinkage
Next steps: pick a couple of fabrics today and start a small, doable pillow swap. With a little sewing, your bed becomes the room’s focus—soft, inviting, and totally you.
Transform your bedroom in an instant! Colorful throw pillows are the secret to adding personality and warmth without breaking the bank. Swap them with the seasons for a fresh look all year round!
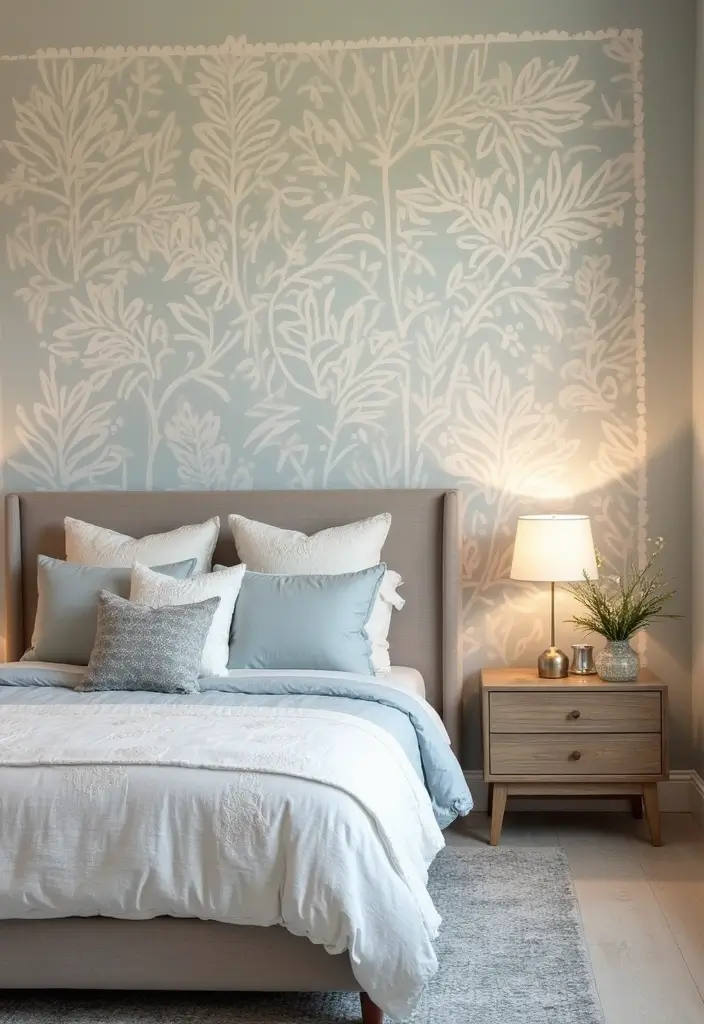
16. Eco-Friendly Bedding
You want a bed that feels great and helps the planet. Eco-friendly bedding can do that without wasting your time or money. Natural fibers breathe. They feel cool in warm weather and warm when it is cold. You wake up refreshed, not tired.
– Materials matter: look for organic cotton, bamboo, or linen sheets. They stay soft after many washes and don’t shed chemicals into your skin.
– Choose natural dyes: pick sets that use plant-based colors. They reduce harsh chemicals around your skin.
– Favor sustainable brands: seek labels that save water, use safer dyes, and treat workers fairly.
– Use a calm color palette: soft beiges, grays, or sea-foam greens help your mind relax and your room look timeless.
– Care tips you can use: wash cold, on a gentle cycle. Dry on low heat or line dry. This preserves fibers and reduces energy use.
Start small: a single bed set with two pillowcases can transform your sleep space. When it wears out, replace with a like-minded option. Over time you’ll build a bedding look that comforts you and helps the planet.
These sheets can last longer than cheap options, saving you money over time. They make your bed feel like a true retreat.
17. DIY String Art
Want a quick way to upgrade your bedroom wall? DIY string art gives you a bold centerpiece that isn’t pricey or hard to make. You control the shape, color, and size, so it fits your space exactly. A well-placed string art piece at eye level can make the whole room feel calmer and more personal. Let’s break it down so you can start today.
Materials
– Wood board or plywood as the base
– Small nails or pins
– String, embroidery floss, or lightweight twine
– Hammer
– Ruler or tape measure
– Pencil for outlining
Design ideas
– Choose a simple shape like a heart, star, circle, or a clean geometric form
– Try a mandala or abstract lines for a modern look
– Use one bold color or a soft two-tone gradient to match your bedding
– Leave some background space to keep the art light and airy
How to build it
1. Lightly sand the board so nails sit flat and the surface is smooth
2. Sketch your design with a pencil and place nails along the outline, about 1–2 cm apart
3. Tie the string to the first nail and stretch it, keeping tension even
4. Wind the string from nail to nail, crossing over to create texture and depth
5. When the shape is full, tie off the end and trim excess string
6. Add a simple hanger and mount the piece at eye level
Hang and style
– Pair the art with a plain wall and slim frames to let it pop
– Switch string colors seasonally for an easy refresh
– Keep surrounding decor simple to let the artwork shine
Common questions you might have
– What if I mess up a line? Simply rewrap from the nearby nail and adjust as you go.
– How long does this take? A small piece can take a couple of hours; larger designs may need a weekend.
– Can I remove nails later? Yes, you can pull nails and sand small holes if you revise the look.
Next steps
– Gather your supplies, pick a design, and start small. A tiny string art project can build your confidence for bigger wall pieces later.
18. DIY Painted Furniture
Here is why DIY painted furniture is a smart move. You save money and shape your room’s vibe. You can refresh a nightstand, a dresser, or a chair with just a coat of paint.
– Pick the piece: Choose something sturdy with clean lines.
– Prep right: Clean it well, fix scratches, and sand rough edges.
– Choose paint: Chalk paint gives a vintage look. Latex or acrylic paint is durable and easy to clean.
– Apply in layers: Start thin. Let it dry. Add a second coat for full color.
– Add details: Try stencils, stripes, or new hardware to make it pop.
– Seal the finish: Use wax for a soft sheen or poly for hard wear protection.
– Tips: Remove hardware, protect nearby surfaces, and work in good light.
– For laminate: Sand lightly and apply bonding primer.
– Common questions: Is primer always needed? On bare wood or glossy surfaces, a light primer helps.
– Sealer needed: Yes, it protects against chips and water marks.
Next steps: The surface should feel smooth to the touch when dry. If you want two colors, paint the top in one shade and the body in another.
This small change can brighten your room without a big budget.
19. DIY Photo Collage Wall
If your bedroom looks plain, a DIY photo collage wall can change that in minutes. It turns a blank surface into a small, personal gallery. You’ll see memories every day, and the space will feel warmer and more alive.
What you need
– photos and prints that you love
– frames in one color or a casual mix of clips, strings, and small boards
– painter’s tape, a ruler, and a level
– hanging strips or nails and a hammer
How to plan
– Pick a simple color theme for the frames or go with a casual mix of metal and wood.
– Mix sizes for visual interest—small, medium, and large.
– Decide on a grid look or a free-form, airier layout.
– Test the layout on the floor first. Cut paper shapes the same size as your photos and lay them out to see how it feels on the wall.
Step-by-step setup
1) Gather photos, print them in a few sizes, and group them by tone or subject.
2) Create your wall layout on the floor using paper templates or tape marks.
3) Tape the outer edges of the layout to the wall so you can preview the arrangement.
4) Hang the center piece first, then add the others evenly around it.
5) Leave consistent spacing, then step back to check alignment and adjust if needed.
Tips to keep it fresh
– Swap in new photos every month or two to spark change.
– Rotate one frame at a time instead of redoing the whole wall.
– Add a small shelf for a clock or clay ornament to break up rows.
– Dust frames and wipe glass periodically so colors stay crisp.
Why it works: a collage wall makes a plain space feel lived in and truly yours. With simple planning and easy tweaks, you get a standout feature that grows with your memories.
20. DIY Fabric Headboard
You want a soft, welcoming headboard without a big price tag. A fabric headboard adds warmth. It makes your bed feel complete. Here is a simple plan you can do this weekend.
What you need
– Plywood cut to your bed size
– High-density foam for a plush feel
– Batting for volume
– Durable fabric in your color or pattern
– A staple gun, scissors, and glue
– Optional tufting buttons or a tufting kit
– Mounting hardware for wall or bed frame
How to build it
1) Measure your bed and decide height and width.
2) Cut the plywood to size.
3) Attach foam to the board and trim edges.
4) Cover with batting, smoothing tight.
5) Drape fabric over, fold edges, and staple to the wood.
6) Add tufting if you want. Space buttons evenly and secure.
7) Mount the board. If on a wall, locate studs and use screws; if on a frame, use brackets. Test by leaning back.
Style and care
– Pick fabrics that feel good and wipe clean. Velvet, linen, or sturdy cotton work well.
– Match color to the room for a calm vibe or make it a focal point with a bold shade.
– Start simple; you can add details later.
Next steps
Take a photo of your finished headboard, adjust height if needed, and enjoy the cozy upgrade.
21. DIY Wooden Crate Storage
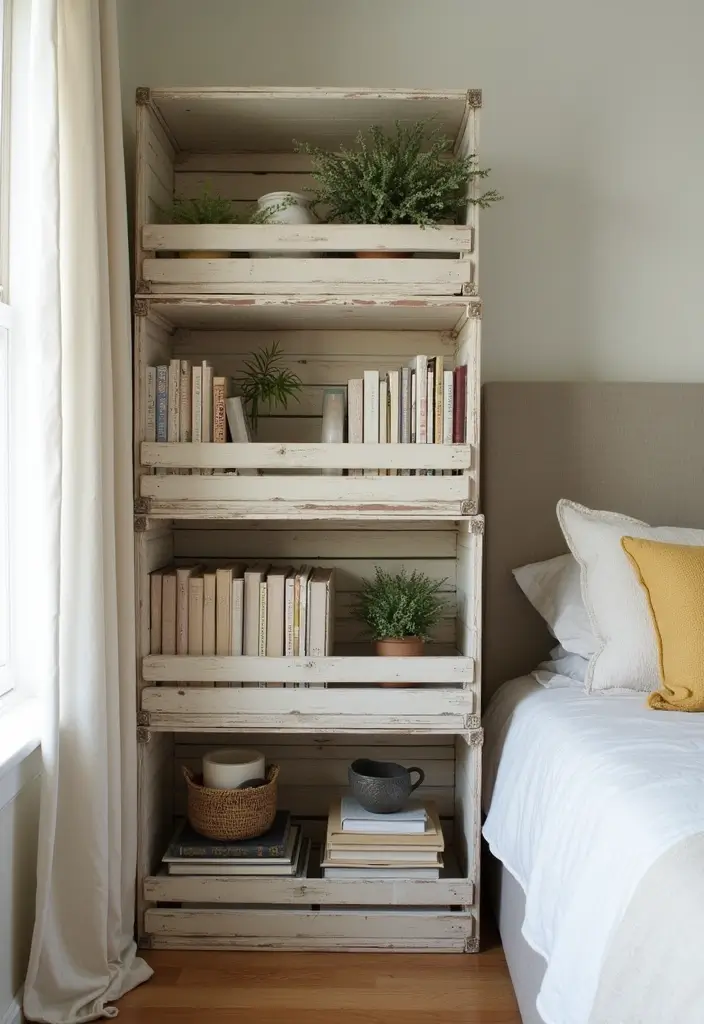
Why wooden crates work in a bedroom
Here is why DIY wooden crate storage fits a bedroom. They are affordable and easy to move. They add texture and a warm, casual look. You can keep them natural or give them a fresh color. No heavy tools needed. They work as open shelves that avoid drilling. This keeps your space tidy without losing style.
What you can do with them
– Paint, stain, or whitewash crates to match your decor.
– Stack crates in a step pattern on the floor or mount a few on the wall as tiny shelves.
– Label crates so each holds a clear type of item.
Next steps.
– This setup helps you stay organized and adds a lively touch to your room.
How to set them up
– Pick the right sizes. Small crates for a nightstand upgrade; large ones for a dresser display.
– Add grip pads on the bottom to stop slipping.
– Use fabric baskets or liners inside for loose items.
Tips to keep tidy
– Keep only daily items in the most accessible crates.
– Rotate plants or books seasonally to refresh the look.
– Check weight limits and avoid overloading.
Bottom line: wooden crates give flexible, low-cost storage that fits many bedroom styles. They can move as your space changes.
22. DIY Windowsill Herb Garden
You want a fresh touch in your bedroom. A windowsill herb garden can give that and make your space smell great.
Here is how to pull it off.
– Pick herbs you actually cook with. Basil, thyme, chives, or mint are easy to grow and spring back after a quick trim.
– Choose containers with good drainage. Small pots or repurposed glass jars work. Add a tray or dish to catch draining water.
– Use the right soil. A light potting mix with perlite helps roots breathe.
– Set up the space. Place your herbs on a sunny windowsill that gets 4 to 6 hours of light a day. Turn the pots every week so they grow straight.
– Make it look nice. Decorate pots with paint, twine, or labels. A simple chalk tag tells you what to harvest.
– Water smartly. Check the top inch of soil. If it feels dry, water gently until it trickles out the bottom.
– Care tips. Prune stems to encourage new growth. Remove yellow leaves to keep plants healthy.
– Practical perks. You’ll have fresh leaves for meals, tea, or a quick herb oil. The scent wakes the room in a soothing way.
– Quick fixes. If a plant looks sad, give it more light or a smaller pot. If pests show up, wipe leaves or swap soil.
Next steps. Gather supplies, set the jars or pots, and start with three herbs.
23. DIY Table Runner
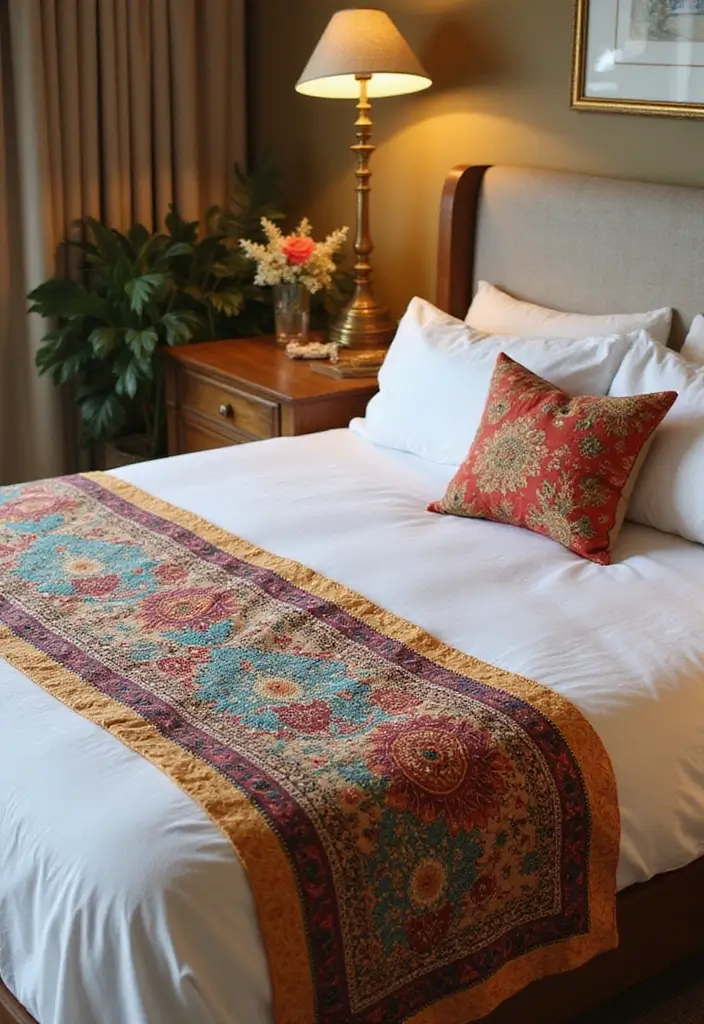
Stuck with a plain bedside table or dresser? A DIY table runner can fix that fast. It adds color, texture, and a cozy feel. Use fabric remnants or thrifted textiles you already own to keep costs low. You can go bold with bright hues or keep it soft with quiet patterns. Here is why this works: a runner pulls together different decor on the surface and hides scratches. It also lets you swap looks in minutes.
What to choose
– Choose fabric that adds texture and warmth.
– Pick a material that wears well on a surface you touch often.
– Add embellishments like lace or pom-poms for a unique design.
A table runner instantly lifts the look of your furniture and helps your decor feel tied together.
How to make it
– Measure the table or dresser top and add 2 inches for seam care.
– Cut your fabric from remnants or thrift finds to fit the area.
– Hem the edges with a simple fold and a straight stitch so it lays flat.
– For a reversible runner, cut two matching pieces and sew wrong sides together, leaving a small gap to turn, then close the gap.
– Add a light finish if you like, such as a single top stitch around the edge.
Size ideas
– For a bedside table: about 12 inches wide and 24–30 inches long.
– For a dresser: around 14 inches wide and 36 inches long.
– For a wide chest, go longer and adjust to your space.
Care tips
– Wash gently and air dry to keep colors bright.
– Avoid harsh cleaners that can fade fabrics.
Next steps: test two sizes on different furniture pieces, and switch colors with the season. This quick project gives you a personal touch that any room can feel.
A DIY table runner is your secret weapon for instant bedroom decor upgrades! It adds personality and warmth while covering up those pesky scratches. Get creative with fabric remnants and transform your space in minutes!
24. DIY Canvas Art
Feeling bored by bland walls? A DIY canvas art project can change your bedroom fast. You get something that fits your style and space.
Materials
– Blank canvas
– Acrylic or watercolor paints
– Brushes and sponges
– Stencils, tape, or stamps
– Texture options like fabric scraps, paper, or other mixed media elements
– Glue and a clear sealer or Mod Podge
– Optional: gold leaf or metallic accents
Steps
1) Pick a mood color. Think calm blues, warm peach, or bold emerald.
2) Paint a simple base and let it dry.
3) Add shapes with stencils or freehand lines. Keep edges clean.
4) Layer texture. Glue on fabric bits or add paper elements.
5) Seal the piece with a light coat of varnish. Let it dry completely.
Display ideas
Hang your canvas at eye level. Center it where you look most each day. Use a single large piece or a small gallery of 2–3 canvases for balance. Good lighting boosts color and detail.
Tips
Work in a well-lit spot. Clean brushes after use. If a design doesn’t feel right, pause, step back, and rework later.
If you’re not confident drawing
Use stencils or collage to shape your art. You still create a unique wall decor item that tells your story.
Transform your bland walls into a vibrant masterpiece! With just a canvas and your creative touch, you can elevate your bedroom decor ideas DIY and express your unique style.
25. DIY Room Divider
You want to carve a big bedroom into cozy zones without adding walls. A DIY room divider can do that. It gives privacy, adds texture, and guides how you move through the space.
Materials and styles
– Wood panels for clean lines. Stain light or dark to match your furniture.
– Fabric screens. Soft, light, and easy to change.
– Plants in a row. A living divider adds scent and life.
Pick a look that fits your vibe: boho, modern, or rustic. Let color and texture echo your bedspread and curtains. Keep the divider light enough to move if you like.
Safety and stability
Choose a design with a stable base. Freestanding frames work well in open rooms. If you anchor, use proper brackets and secure fasteners.
Step-by-step setup
1. Measure the space and decide the divider’s height.
2. Choose materials and assemble or buy a kit.
3. Position it where it creates flow and leaves space to walk.
4. Add finishing touches like trim, fabric edge, or planters that drain.
Smart ideas to try
– A slim wood screen for subtle division.
– A bold fabric panel to make a statement.
– A line of small potted plants on a shelf.
A room divider does more than separate. It shapes walkway paths and sets the room’s mood. It’s an easy weekend project that pays off in style and function.
26. Upcycled Vintage Suitcases
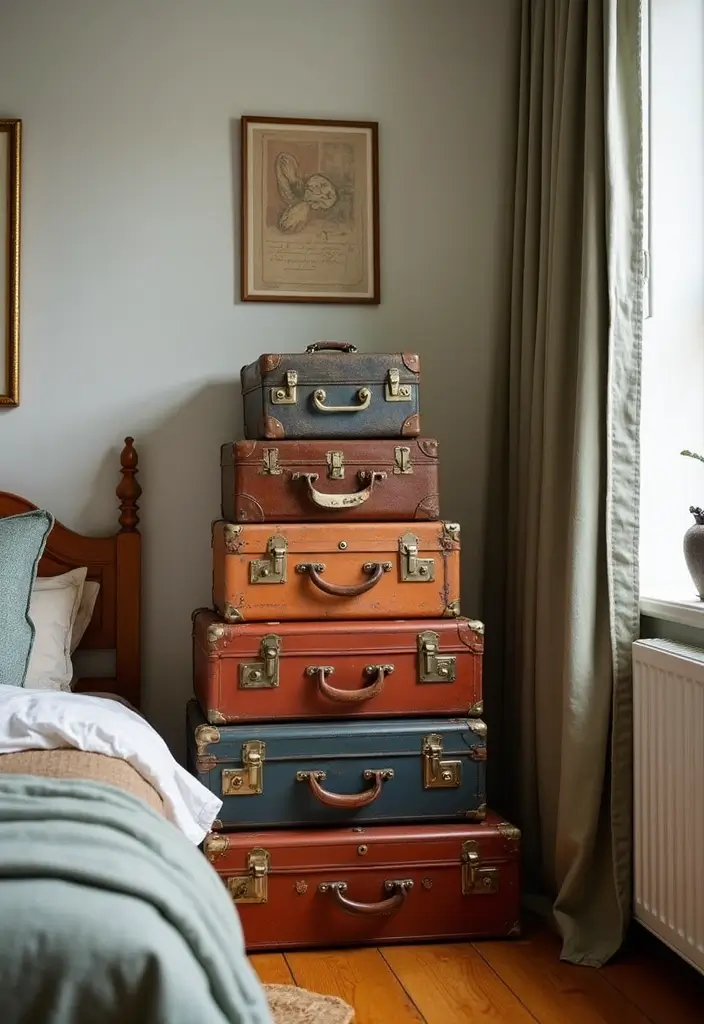
You want a room that feels cozy and neat without spending a lot. Upcycled vintage suitcases can do that. They hide clutter and add a warm, storylike touch to your space.
– Choose suitcases with character: look for color, stitching, and marks that show their age.
– Clean and fix: wipe with mild soap, dry well, and tighten any loose handles or clasps.
– Plan the layout: stack them for a nightstand, or spread them as small shelves for books and a lamp.
– Protect the surface: line the inside and add felt pads under the base.
– Keep it steady: use a non-slip mat and anchor the stack to the wall.
– Add the final touch: place a glass of water, a plant, or a book on the top case.
Turn the look into a story. Three cases in a row make a low shelf by your bed. A green lid with brass latches adds color. Leave the inside for a rustic look, or remove the lining for hidden storage.
These tips help you cut clutter and spark chats. Your space gains storage and a unique style that shows your love of thrift finds. Try this today and see the room change fast for you.
27. DIY Stenciled Wall
Want a room upgrade that feels stylish but simple? A stenciled wall can do the trick. It adds texture and pattern without a big redo. You control the design, color, and how bold it becomes. It’s a project you can finish in a weekend with minimal tools.
What you need
– Stencil or a sturdy cardboard cutout you can reuse
– Painter’s tape and a clean cloth
– Eco-friendly, low-VOC paint that matches your bed linens
– Stencil brush or a small foam roller
– A ruler, pencil, and level for a neat layout
– A damp cloth for quick fixes
Steps
1) Prep the wall. Wipe away dust, and prime if the surface is glossy.
2) Plan the design. Mark the wall’s center and lay out a simple grid for repeat.
3) Secure the stencil. Tape the edges so it won’t slip while you paint.
4) Apply paint. Dab lightly with the brush or roll with a gentle touch. Lift the stencil often to keep edges clean.
5) Repeat with care. Move in even steps, re-taping as needed. Clean the stencil between uses.
Tips and care
– Start with a focus wall where the pattern makes the biggest impact.
– Use a dry brush for sharp edges.
– Add a matte topcoat if you want more durability.
This weekend project adds texture and personality to your bedroom without a full redo.
28. DIY Terrarium
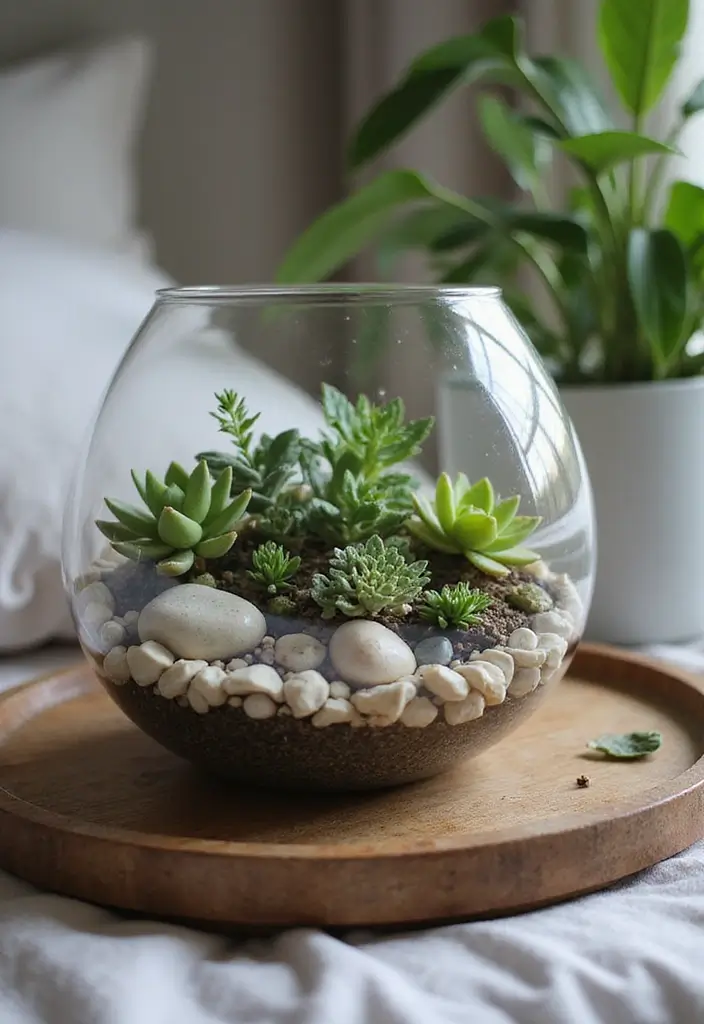
Here is why a terrarium helps your bedroom. It brings a small garden with little care. You get color, texture, and a natural touch that feels calm.
Here is how to do it, step by step.
What you need
– Glass container
– Gravel and charcoal
– Soil
– Small plants
– Moss or decor
Steps
– Choose a clear glass container.
– Create a drainage base with gravel and a pinch of charcoal.
– Add soil that fits your plants.
– Pick plants that share light and water needs.
– Plan a simple plant layout with taller in back.
– Add a tiny layer of moss for greenery.
– Place small stones or figurines for charm.
– Decide on open or closed setup and what it means for watering.
– Put the terrarium where it gets bright indirect light.
– Water sparingly when the soil feels dry.
– Watch for mold and trim crowded growth.
– Enjoy a calm, natural focal point in your room.
Next steps Keep an eye on moisture and light. Condensation means humidity. See dull leaves? Brighten indirect light. Closed terrariums need less water; open ones can need a bit more.
This small garden adds life to your space and gives you a quick, low upkeep decor upgrade.
29. DIY Woven Wall Hanging

You want texture on your bedroom walls without a big project. A woven wall hanging adds warmth and a soft feel. It’s easy to make with a few supplies and your own style.
Here is why it helps your room: fiber catches light, the wooden dowel keeps the piece neat, and a handmade touch makes the space feel inviting.
Materials
– Wooden dowel to anchor the weaving.
– Yarn or thick twine in colors you love.
– Scissors to cut the yarn.
– A tapestry needle or simple crochet hook.
– Optional: tassels, beads, or extra fiber for extra texture.
Steps
– Cut yarn into pieces about 60 to 80 cm long.
– Fold each piece in half and loop around the dowel to make a hanging thread.
– Fill the bar with rows of color, using simple knots or a basic weave. Keep the work tight but not stiff.
– Change colors every few rows if you want stripes, or keep one color for a calm canvas.
– When you’re done, tie off the ends and trim any long tails for clean edges.
Next steps: hang and style. Hang the piece at eye level for best view. Use a nail or a small hook. If your wall is sunny, place it where colors won’t fade quickly.
Care tips: dust lightly with a soft brush. Gently shake or vacuum on low suction to refresh the fibers.
30. DIY Candle Holders

Want a cozy bedroom glow without spending much? DIY candle holders are quick to make and transform your space fast. Choose glass jars for a rustic look or wood for a warm, earthy feel. Decorate with paint, lace, twine, or burlap to match your style.
Materials
– Glass jars or mason jars
– Wood slices or small blocks
– Tea lights or LED candles
– Paints, brushes, and optional stencils
– Twine, ribbon, lace, or burlap
– Glue or hot glue gun
– Sandpaper and a sealant (for wood)
How to make
1) Clean jars and dry them well.
2) Smooth wood edges with sandpaper.
3) Paint a base coat and let it dry.
4) Add decorations. Wrap twine, glue lace, or paint a simple pattern.
5) Insert a candle and test heat. If you use LED candles, you get safe, steady light.
Keep flame, heat, and decorations far apart. Use LED candles when you want extra peace of mind.
Style ideas
– Rustic charm: burlap around a jar with a small pinecone.
– Minimalist: a frosted jar with a single simple mark.
– Romantic: lace wrapped softly around a jar for a gentle glow.
Placement and care
Set them on nightstands, shelves, or your dresser for a warm focal point. Wipe clean as needed. Remember to never leave burning candles unattended and keep them away from flammable decorations.
Transform your bedroom with DIY candle holders! A simple jar or wooden slice can create a warm, inviting glow that makes your space feel like home.
Conclusion

These 30 sustainable DIY bedroom decor ideas offer a perfect blend of creativity and eco-friendliness, allowing you to personalize your sanctuary without breaking the bank. Whether you’re looking to revamp your space or simply add a few stylish touches, these projects will inspire you to get crafty and make your bedroom a true reflection of your style. Remember, each small change contributes to a beautiful and sustainable environment.
Get started on your bedroom makeover and enjoy the process of making your space uniquely yours!
Frequently Asked Questions
What Are Some Easy DIY Bedroom Decor Ideas for a Quick Makeover?
Looking for a quick bedroom makeover? Try simple DIY projects like colorful throw pillows or DIY wall art using natural materials. These ideas can instantly brighten up your space without breaking the bank! You can also consider upcycled furniture to add a personal touch to your room.
How Can I Make My Bedroom More Sustainable with DIY Decor?
Sustainability can be stylish! Focus on utilizing upcycled materials like vintage suitcases for storage or creating DIY planters from recycled jars. Incorporating eco-friendly bedding made from natural fibers is another great way to enhance sustainability while upgrading your bedroom decor.
What Are Some Affordable Bedroom Decor Ideas That Look Stylish?
You don’t have to spend a fortune to achieve a stylish bedroom! Consider DIY fabric wall hangings or a hand-painted pottery project for charming accents. Additionally, creating a cozy reading nook with a thrifted chair and some cushions can elevate the style and comfort of your space without a hefty price tag!
How Do I Choose the Right DIY Projects for My Bedroom Space?
Start by assessing your space and identifying areas that need a boost. Look for creative bedroom ideas that resonate with your personal style. Projects like DIY string art or a photo collage wall can personalize your bedroom while being manageable in size and complexity.
Are DIY Projects Difficult to Complete for Beginners?
Not at all! Many of the bedroom decor ideas DIY mentioned in the article are beginner-friendly and require minimal tools. Projects like DIY floor cushions and upcycled jar lanterns can be completed in a weekend and are perfect for those just starting their DIY journey!
Related Topics
bedroom decor
DIY home decor
sustainable design
upcycled furniture
creative upgrades
budget friendly
cozy spaces
beginner projects
natural materials
eco-friendly decor
stylish decor
quick fixes