The builds below range from a single afternoon with a saw and drill to serious joinery you’d budget a cabinetmaker for, and the one that belongs in your house depends on whether you’re hiding clutter or curating a rotation you actually want to see.
A simple two-tier rack in light wood handles the everyday side; the curved wooden organizer with its forward-rotating tiers handles the display side.
1. Shoe Cabinet!

A tilt-out shoe cabinet gives you storage without eating floor space, which matters in a narrow entryway or apartment where every inch counts.
The slanted shelves inside let you read labels fast, and the shallow depth keeps the whole unit from jutting into traffic.
Before you buy or build, measure your longest pair, boots included, and check that the cabinet depth and shelf height both clear it with the door closed.
Wall mounting is standard for these, so locate studs or plan for toggle bolts rated to the loaded weight.
A top surface this size is genuinely useful for keys or a small tray, and I would skip any aerosol freshener and just let leather breathe.
2. DIY Built-In Shoe Shelves
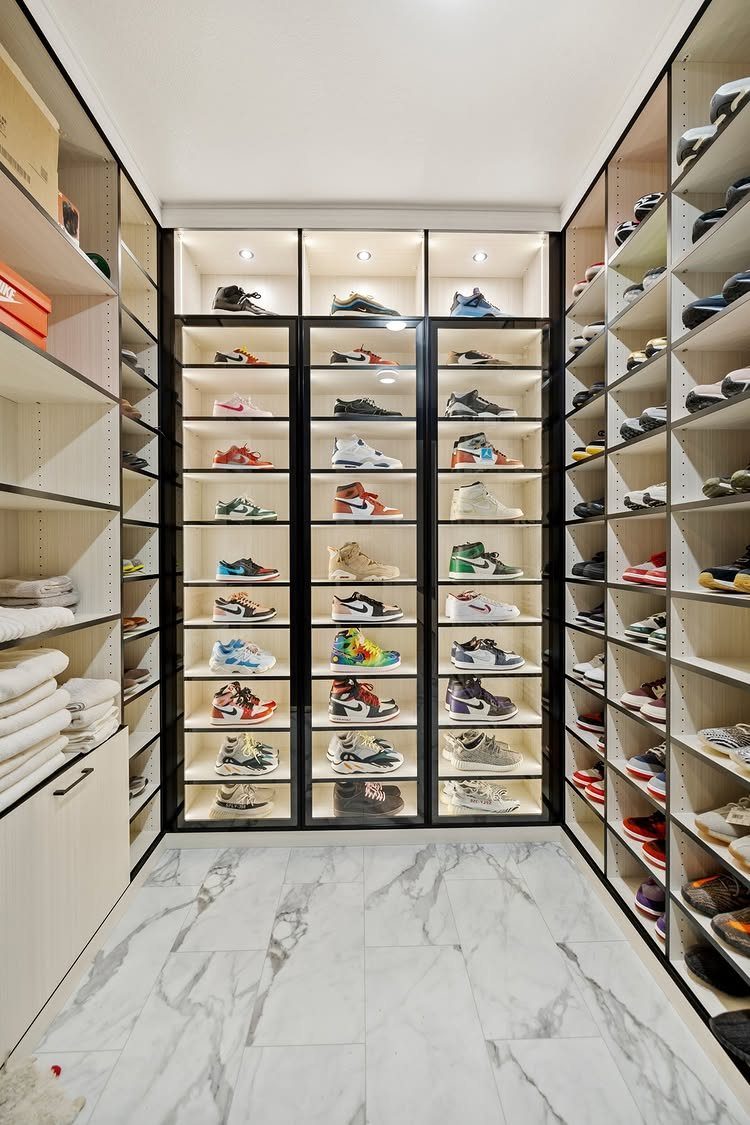
Floor-to-ceiling built-ins turn a walk-in closet into something that feels designed rather than accumulated. Glass-front cabinets at center keep pairs you want to see on display, while open shelving flanking them handles the daily rotation.
Marble floors and lighting make this read luxury, but the same logic works with painted MDF and LED strips from any hardware store.
What stops most DIYers is not the carpentry; it is accepting that their closet dimensions will not match the photo exactly and planning cuts around the obstacles they have, a soffit or an outlet, rather than pretending them away.
3. DIY Shoe Shelf Bench
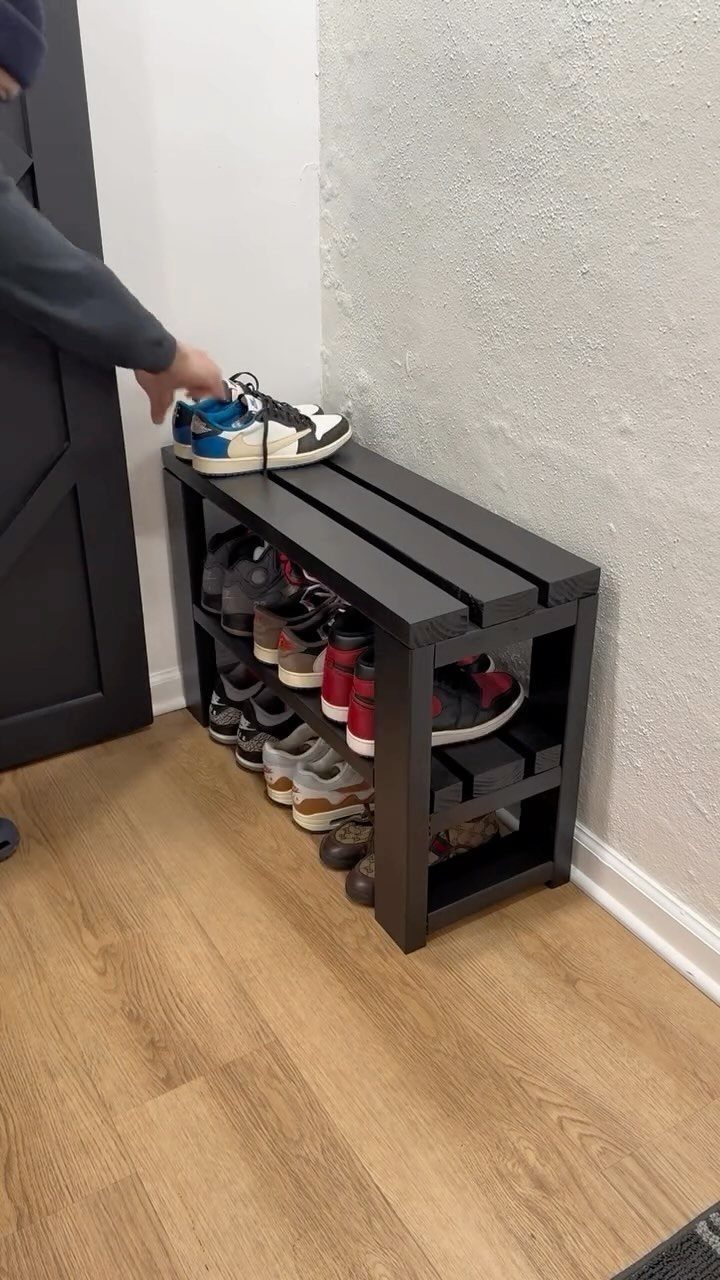
A shoe bench earns its spot when you actually sit to put shoes on, which in my experience means the entryway, a mudroom, or any door you use daily.
A slatted top lets wet soles drain and air circulate, a detail I would copy in any damp climate. Building from 2x4s keeps cost low and lets you cut to whatever length your wall allows.
I would build the lower shelves with a slight gap between boards too, for the same reason, and finish with exterior-grade paint if boots come in snowy or muddy.
Open shelves show everything, so this bench suits people who rotate a small collection, not anyone hiding clutter.
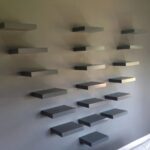
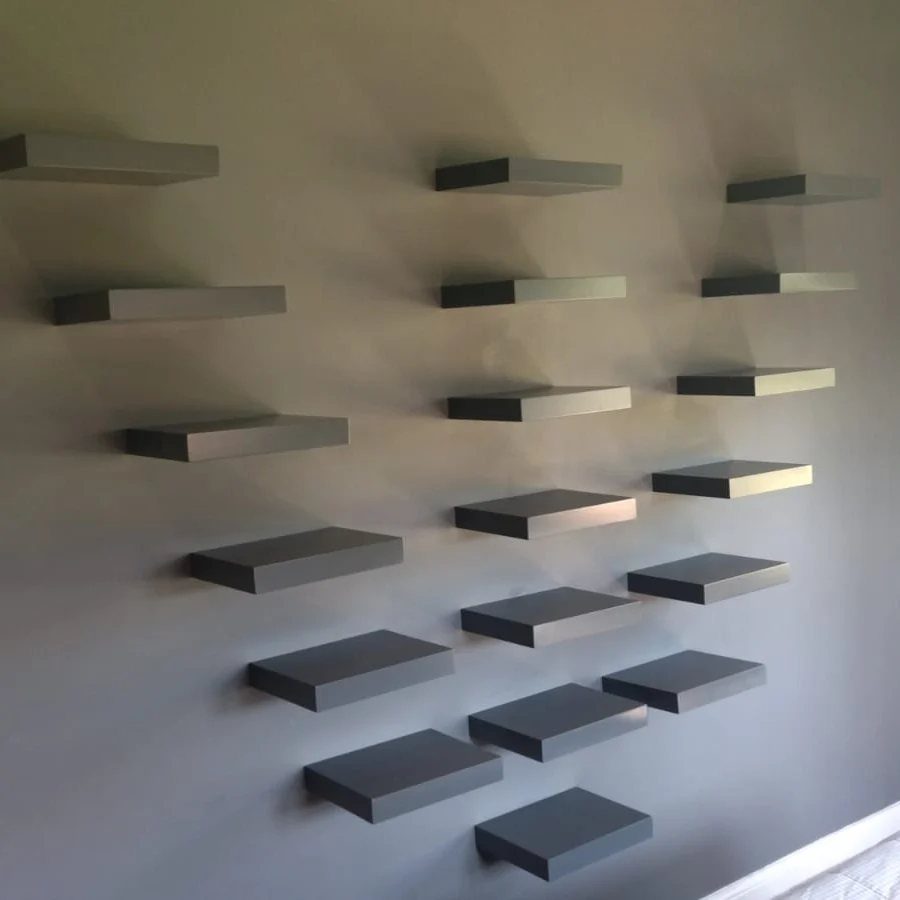
4. Staggered Floating Wall Shelves
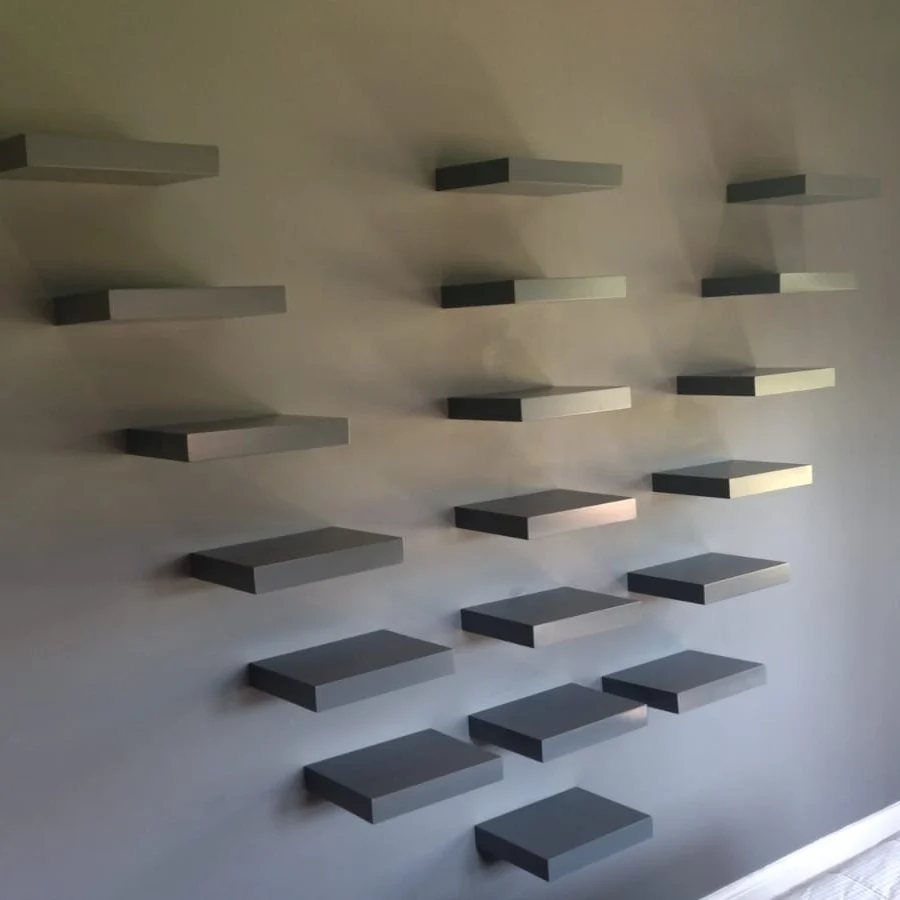
Staggered shelves break up a wall’s flatness in a way that reads intentional, not like you ran out of matching brackets.
The V pattern works because the shelves stay identical in color and depth; variation belongs in placement only. Vertical spacing needs to clear a men’s high-top without crushing the silhouette, so measure your tallest pair before you mark any holes.
The grey-on-grey here is calm, but the same layout in warm wood against white would suit a different room.
Check your wall type before you drill: drywall anchors for light loads, but lag bolts into studs for anything holding a full rotation.
5. Under-Stairs Shoe Shelving
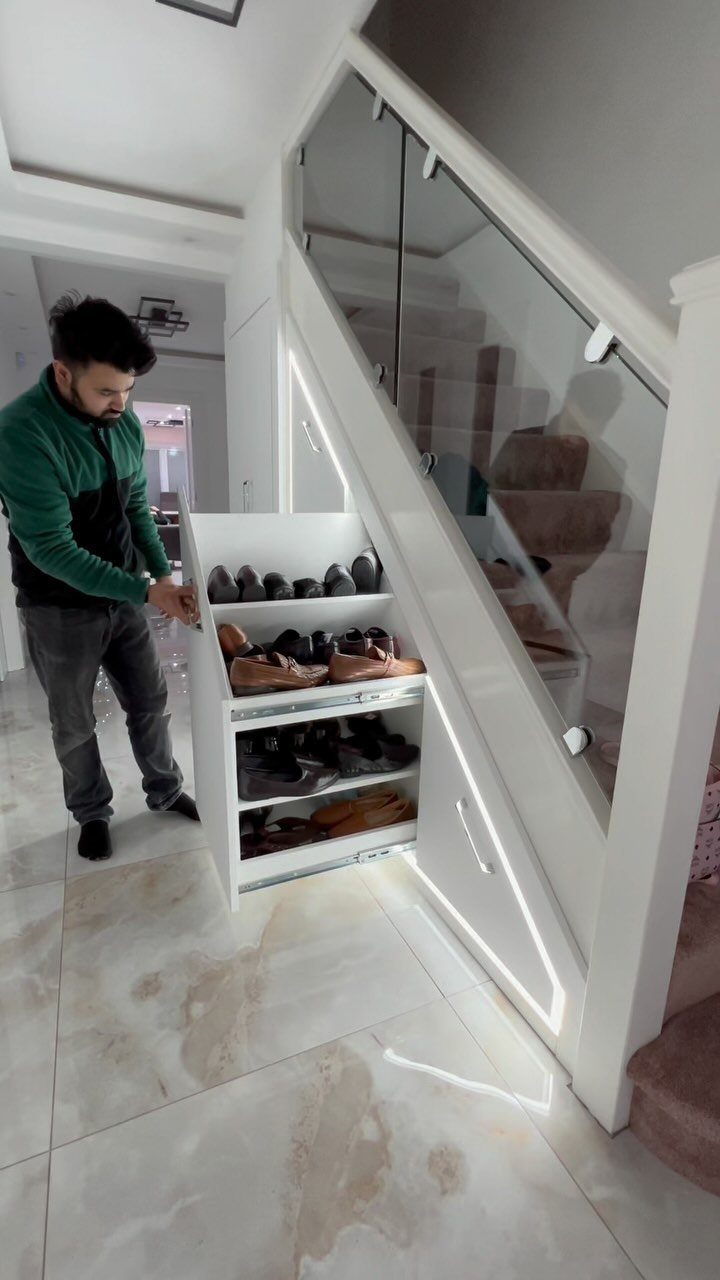
The space under a staircase is usually wasted or filled badly, because the angle fights standard cabinets.
A pull-out rack on full-extension slides solves it by bringing the back corner to you, rather than you crawling into it. A white finish keeps the unit reading as architecture, not furniture shoved into a gap.
Before you build, measure the narrowest height under your stairs and the deepest point; your rack depth is set by the shallowest, not the deepest, or the drawers will bind.
I would add soft-close slides, since these get yanked when people are rushing out.
6. Neon Lighted Sneaker Display
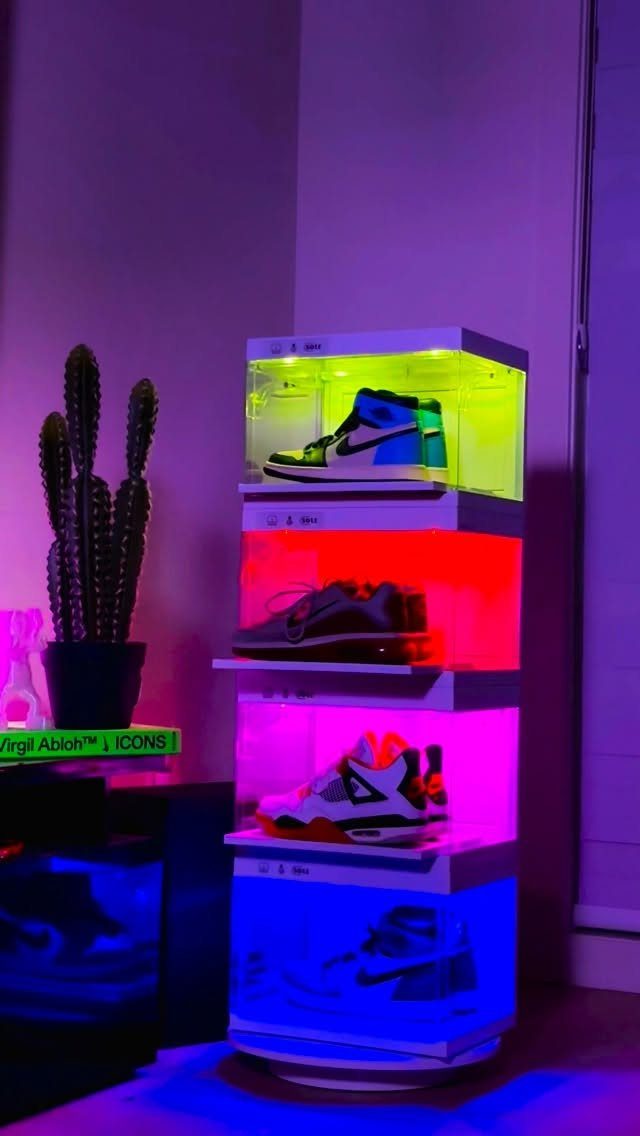
Neon-lit display is not storage for a full collection; it is a choice to treat a handful of pairs as objects worth looking at.
A vertical tower saves footprint by going up, and colored LEDs let you shift mood without repainting.
Wiring is the part most DIYers underestimate: plan for a cord path you can hide, or budget for battery strips you will replace often.
I would build this only for a collection I had already narrowed to favorites, because the light draws attention to empty slots immediately. Maintenance runs to bulbs and dust both, weighed against the effect when the room goes dark.
7. Wall-Mounted Shoe Cubby Grid
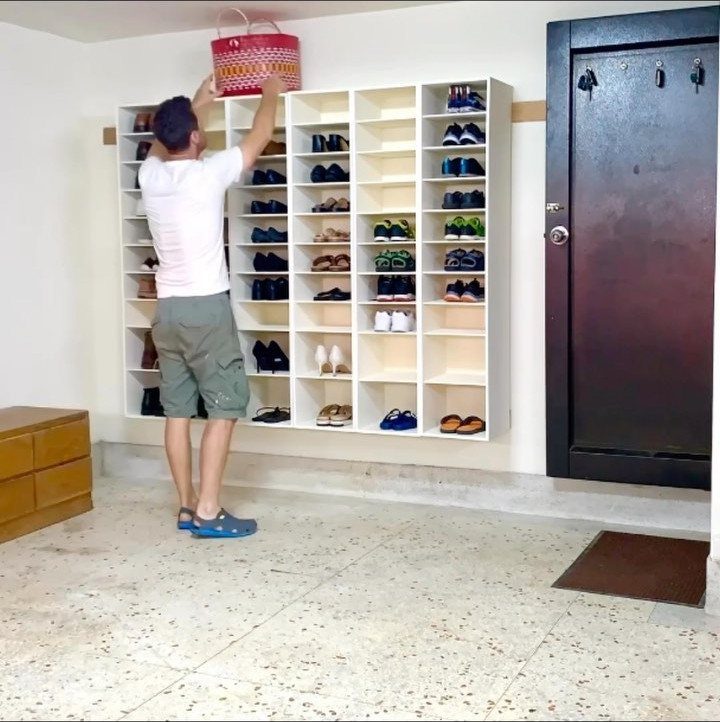
A wall-mounted cubby grid turns any vertical surface into sorted shoe storage without eating floor space. The open squares keep pairs visible and reachable, which I like for a garage or mudroom where speed matters more than hiding clutter.
Before you mount one, check that your wall can take the loaded weight across multiple studs, or use a plywood backer to spread the load if studs do not line up with the grid holes.
The white finish here is practical for brightness, but I would expect scuffs in a high-traffic spot; a darker tone or a wipeable semi-gloss paint saves touch-ups later.
8. Curved Wooden Shoe Organizer
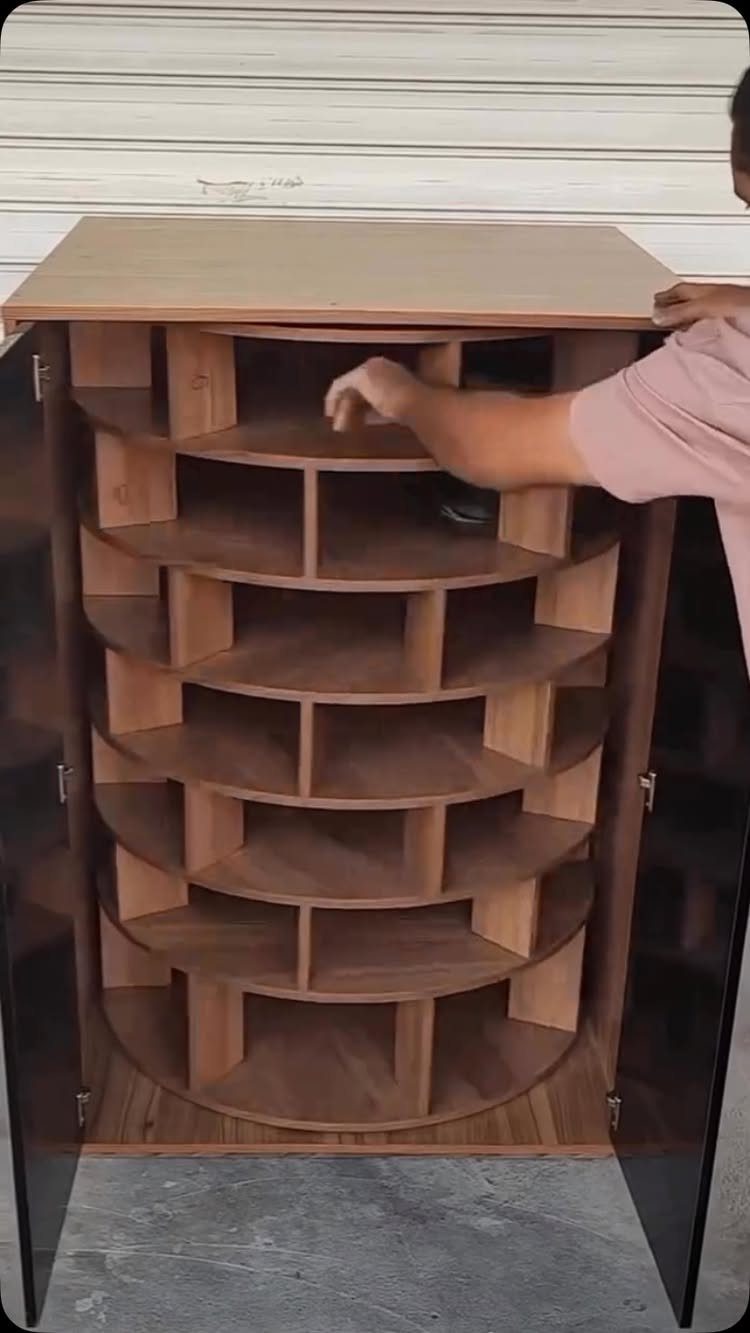
Curved wooden compartments give this organizer a custom furniture look that standard flat shelves never match. The semicircular tiers rotate or pull forward to bring pairs to you, which matters when the unit sits deep in a closet.
Building this from scratch takes serious joinery; I would budget for a cabinetmaker unless your saw skills are already solid.
The same curved shape in painted MDF would cost less and suit a more modern room. Check your closet depth before committing: the curve adds inches you do not see in flat photos.
9. Simple Two-Tier Wooden Rack
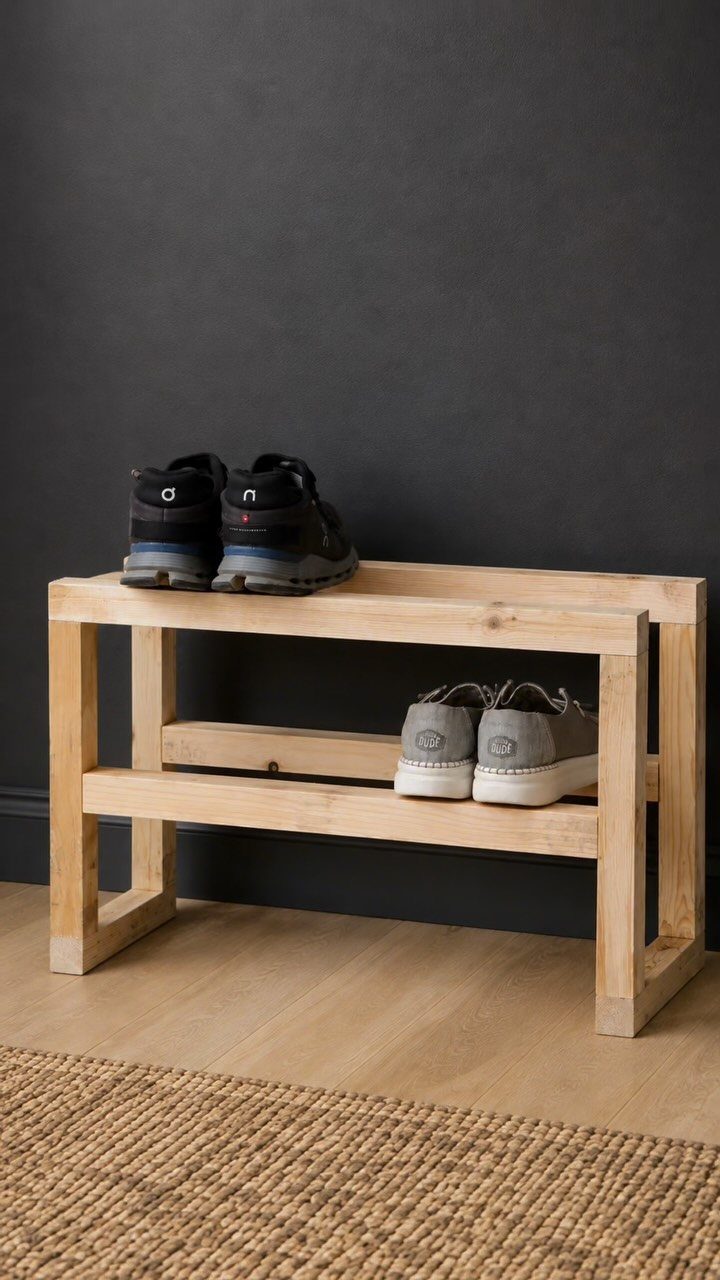
A two-tier wooden rack is the project I point to when someone wants useful storage in one afternoon with a saw and a drill.
2 shelves and simple joinery keep the build straightforward and the cost low enough to justify even for a rental.
Light wood is friendly against dark walls, though I would stain or paint mine to match whatever room it lands in.
Height between tiers needs to clear your tallest pair, boots included, or the lower shelf becomes dead space. No back panel means it slides flat against a wall, but shoes will mark the paint behind it over time.
Materials and Tools Needed
Most shoe storage builds start with ¾-inch plywood and 1×2 furring strips, which are cheap, flat, and easy to rip to width.
I use wood glue at every joint and back it with screws long enough to bite, 3-inch for framing connections. A countersink bit keeps the heads flush so they do not catch on shoe soles or scratch finishes.
A drill and some kind of saw, circular or jigsaw, handle the bulk of the cuts. A brad nailer with 1¼-inch nails speeds up trim and backing, though screws alone will do it.
A level and stud finder matter more than people think; a rack that looks straight until you step back is a mistake you live with daily.
A Kreg jig is useful if you own one, not worth buying for a single shelf. Sand before assembly, not after, unless you enjoy working around corners.
Design Considerations
Before you pick a design, pull every pair out and sort honestly. I donate anything I have not worn in a year, then split what remains by frequency, not sentiment.
Seasonal pairs can live farther from the door, under stairs or high in a closet, as long as retrieval does not become a project.
Measure the space after sorting, not before. A 12-pair collection and a 40-pair collection need different solutions, and guessing leads to half-empty racks or overflow on the floor.
I also sort by style, heels and sneakers want different shelf heights, and mixing them wastes vertical space. The best build is the one that matches your actual habits, not the closet you imagine having.