Perfect kitchen organization starts with throwing things out, not buying bins.
The real mistake most people make is sorting by container size instead of grouping by what they actually do: breakfast supplies together, dinner prep near the stove, baking tools in one zone.
A $24 set of adjustable bamboo dividers will outlast three kitchens, but only after you have pulled the expired cans and unused gadgets into donate and trash bags first.
1. Declutter Before You Sort
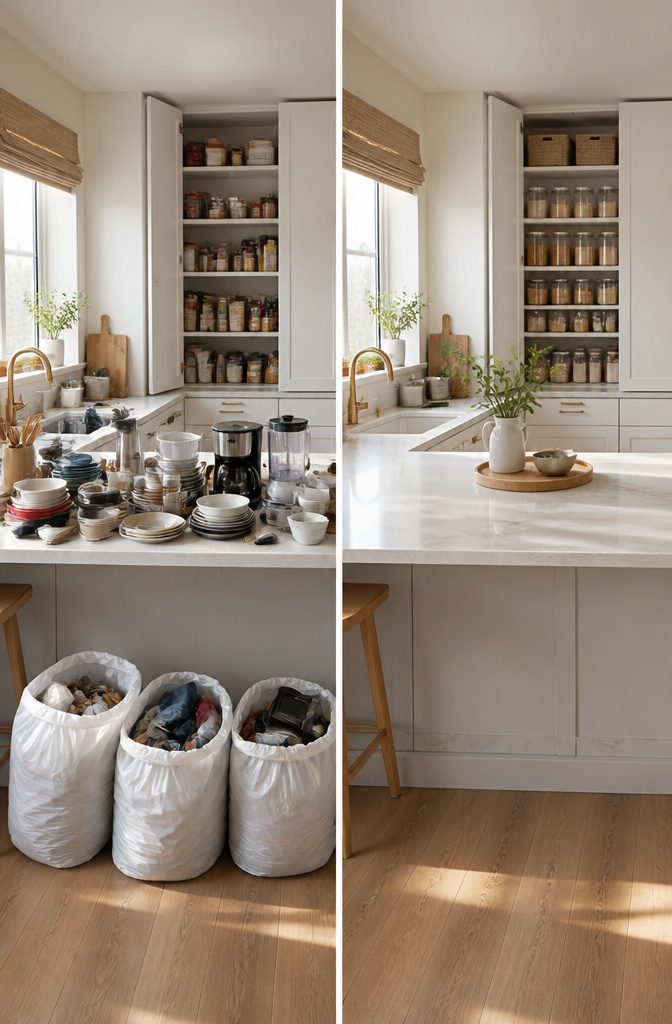
Decluttering is the step that makes every later decision easier, because there is no point in buying bins to store what you will never use.
I start with three bags or boxes marked trash, donate, and sell, then move through the entire kitchen and pull anything I do not use often or no longer want.
While I am at it, I relocate anything that wandered into the wrong room, like toys stashed in a cabinet, so the kitchen holds only kitchen items.
For food, the first in, first out method keeps waste down.
Newer items go in the back of the fridge or pantry, older ones move forward. That way the berries from last weekend sit where I will see them before the new batch goes in.
Canned goods nearing their date get pulled to the front the same way. I also strip unnecessary packaging right away, because a half-empty cereal box or a plastic overwrap takes up space that the food itself does not need.
2. Group What Stays
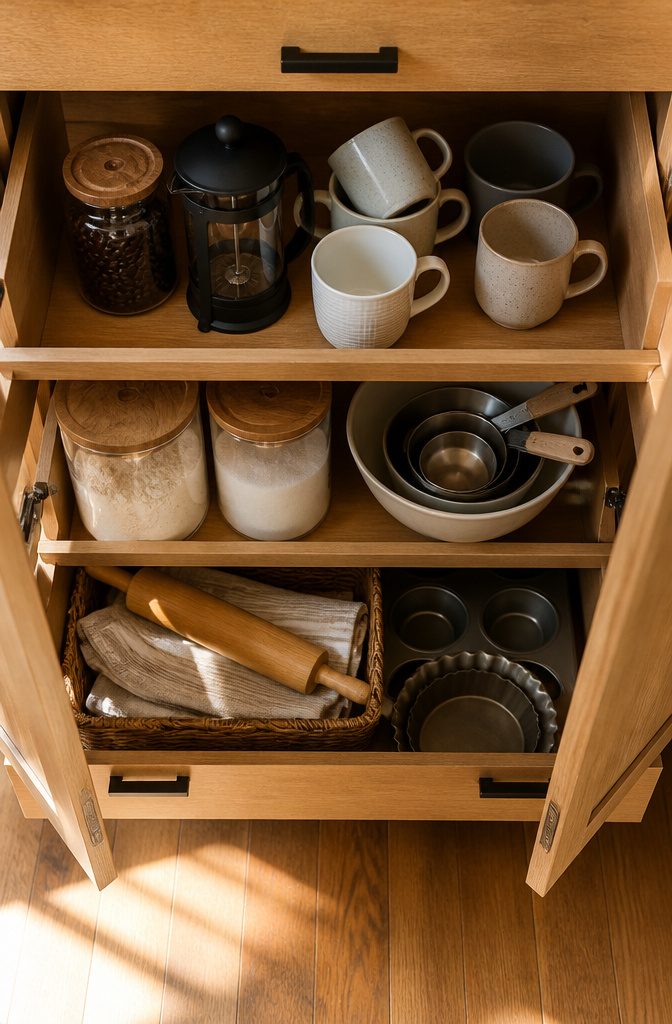
The real mistake I see in kitchen organization is sorting by container size instead of by what you actually do.
Baking supplies scattered across three cabinets because the flour canister fits one shelf and the measuring cups fit another means you still rummage every time you bake a cake. Group by the task, not the package.
Think in categories that match your routine: breakfast, dinner prep, baking. A breakfast station keeps coffee, mugs, and morning utensils in one cabinet so you are not crossing the kitchen before caffeine.
Dinner prep lives near the stove. Baking collects measuring bowls, spoons, and pans in a single zone.
This is the foundation everything else builds on. Bins, risers, and turntables only help once like stays with like.
Apartment Therapy notes the practical benefit: storing similar things together lets you take inventory of what is clean or missing at a glance. No more buying a third box of parchment paper because the other two hid behind mismatched containers.
One category may not fill a cabinet perfectly.
A breakfast zone might leave six inches of awkward space. That gap is better than the daily friction of hunting across the kitchen for what should stay together.
3. Drawer Organizers for Utensils
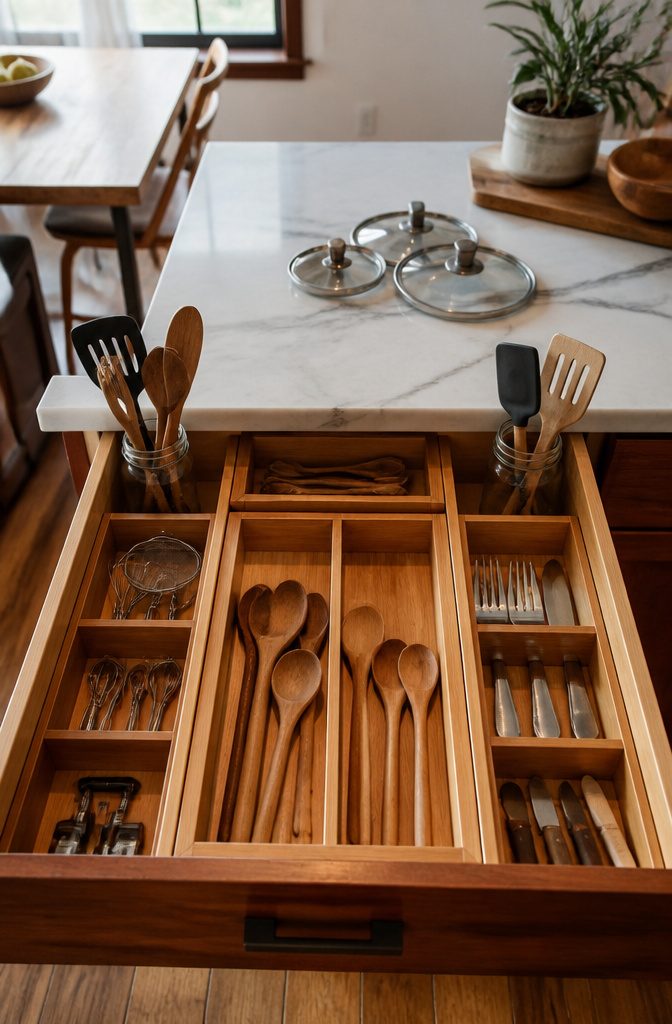
Adjustable bamboo dividers run about $24 on sale and spare you from measuring twice for plastic trays that might not fit your next drawer.
I like that flexibility for renters, though I will say the tension system can shift if you load one side heavy with dinner forks while the other holds only a few teaspoons.
Mason jars on their sides are the other move worth trying, especially for taller utensils that flop around in wide compartments.
A half-pint jar fits most standard drawer heights and keeps wooden spoons or spatulas standing at an angle where you can grab one without disturbing the rest.
The real choice is between modular dividers you reset as needed and fixed inserts that lock everything into permanent zones.
Fixed inserts look cleaner and stop the migration of small items, but they assume your silverware count stays the same and your next kitchen has identical dimensions.
For a first home or a rental, modularity wins. The only trade-off is a slight wobble in the fit and the few seconds it takes to readjust when you buy a new gadget.
4. Pull-Out Drawers and Cabinet Conversions
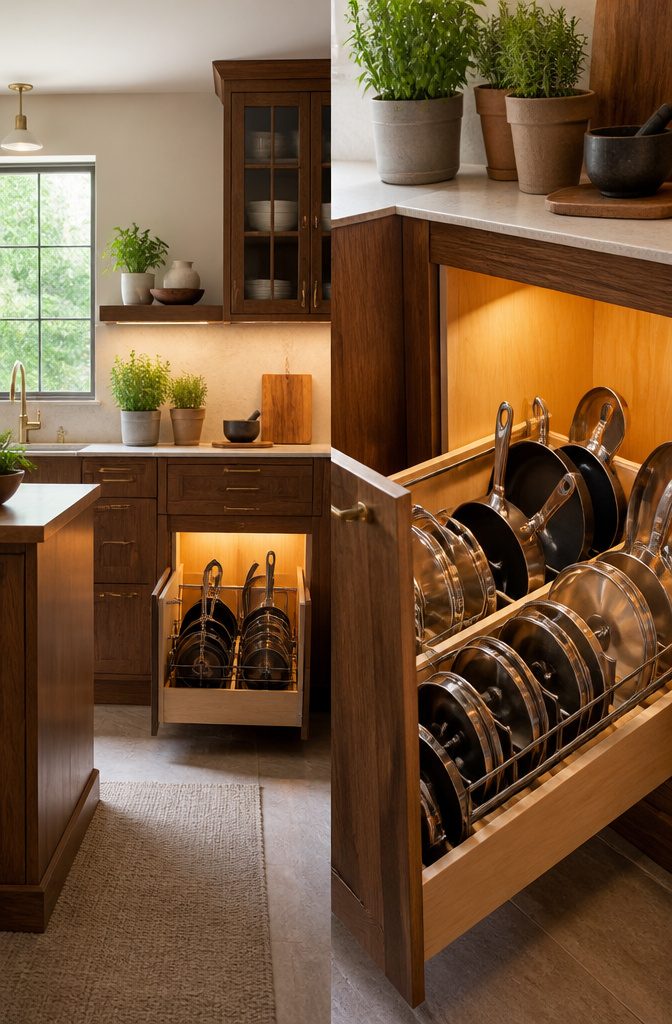
Pull-out shelves solve the problem deep cabinets create: the item in back stays there until it expires.
I see this in every kitchen with standard shelving. The fix is a drawer that rolls forward so nothing hides behind anything else.
A Kitstorack organizer runs about $40 on Amazon and mounts with adhesive strips, which means no drilling into rented cabinetry. House Beautiful’s Marina Liao has kept hers in place three years that way.
"These were the first items I bought when organizing my kitchen. They help keep my pots, pans, and lids within reach, and I love how every item has a spot."
That spot-for-every-item part matters more than the brand. When you convert a cabinet to pull-out function, you are really converting it to visibility.
For lids specifically, a cooling rack and a few zip ties build a vertical divider inside a deep drawer. The rack stands on edge, lids slide in by size, and the whole thing costs less than a takeout dinner.
Drawers beat cabinets for anything you stack, and if you cannot replace the boxes themselves, rolling racks or even baskets inside them get you most of the way there.
5. Stacking Shelves and Shelf Risers
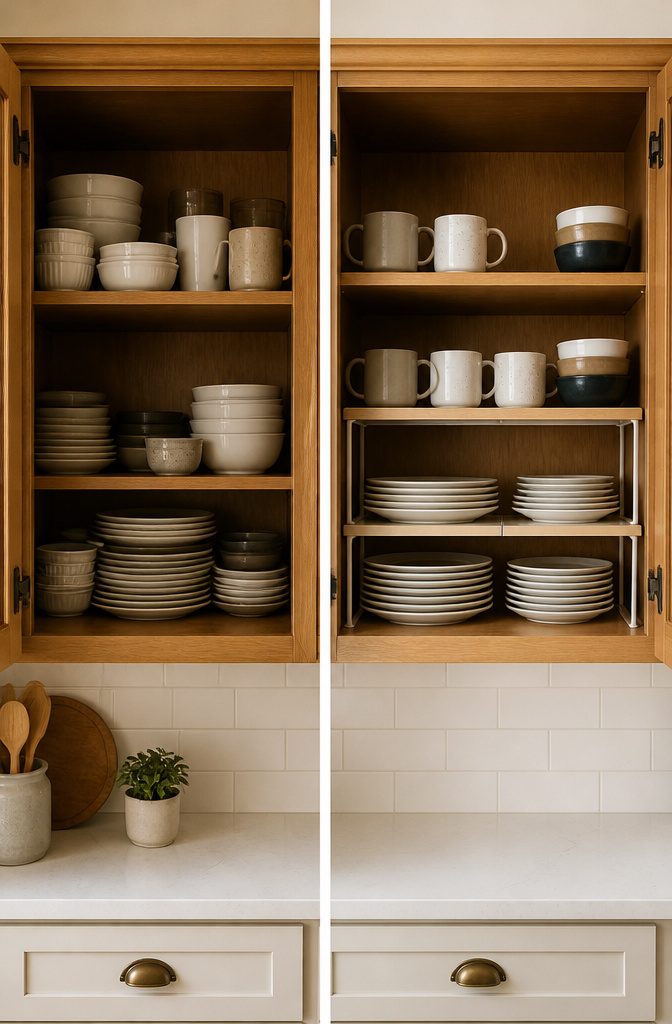
Stacking shelves turn a single cabinet shelf into two levels, which is the fastest way to double storage without a drill.
I reach for them when a client has tall cabinets filled with short items: plates above plates, mugs above mugs, all that dead air in between. The metal wire versions run about $8–$15 and hold most everyday dishware without sagging.
Shelf risers do something slightly different. They lift the back row so you can see what you own without crouching or pulling everything forward.
For spices, canned goods, or any deep pantry shelf where items migrate to the black hole in back, risers win over full stackers because visibility matters more than total capacity.
A riser set costs roughly the same as stacking shelves but solves the forgetting problem instead of the fitting problem.
Use stackers when height is the bottleneck; use risers when depth is. In a small rental kitchen, I usually do both: stackers in the upper cabinets for dishes, risers in the pantry for cans and jars.
Stackers can feel tight if your cabinet depth is under 12 inches, and risers waste a few inches of vertical space that a second full shelf would use.
6. Turntables for Countertop and Pantry
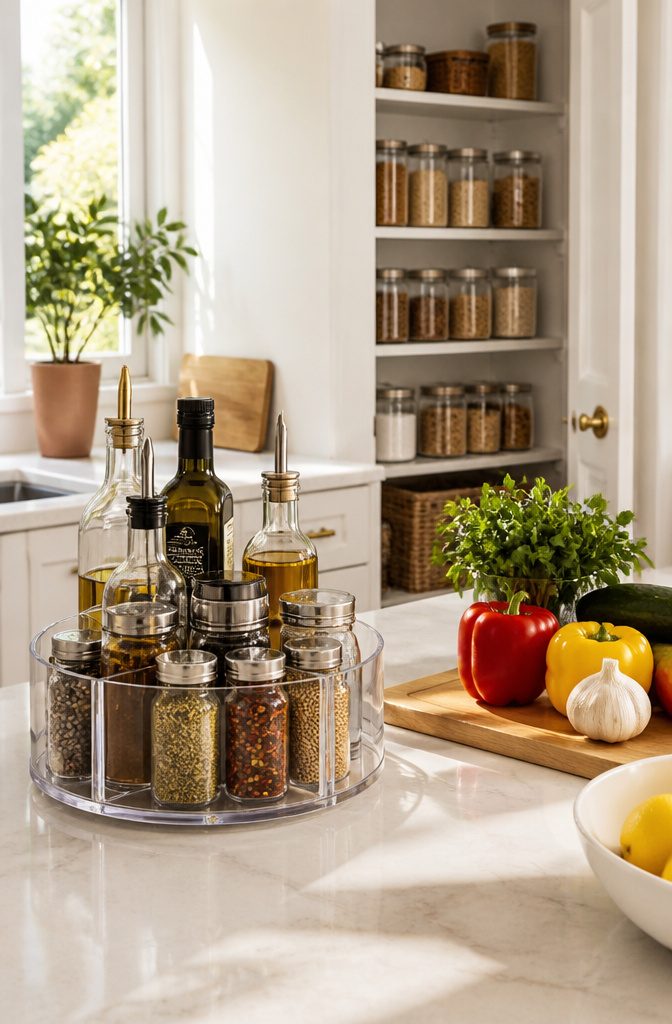
A lazy Susan on the counter corrals the items that never quite make it into a cabinet: olive oil, salt and pepper, the honey jar for morning tea.
The divided ones earn their space when you are corralling smaller items like coffee pods or building a self-serve snack station kids can actually reach into without rearranging half the pantry.
Turntables inside cabinets and pantries turn dead space into usable depth, especially when a shelf is shallow enough that a single row of cans leaves six inches of nothing behind them.
A tiered version stacks spices or canned goods vertically, which matters more than it sounds in a pantry under nine inches deep.
The fridge is where material choice becomes the deciding factor. Cold temperatures stiffen standard plastic bearings fast, so the turntable that spins smoothly on a countertop can seize up between the milk and the condiment shelf.
I look for models that specify cold storage or list refrigerator use in the product details; the ones that do not mention it usually fail there.
Cold-rated turntables tend to run slightly taller, so measure your shelf height before you buy.
7. Tension Rods and Extra Spice Shelves
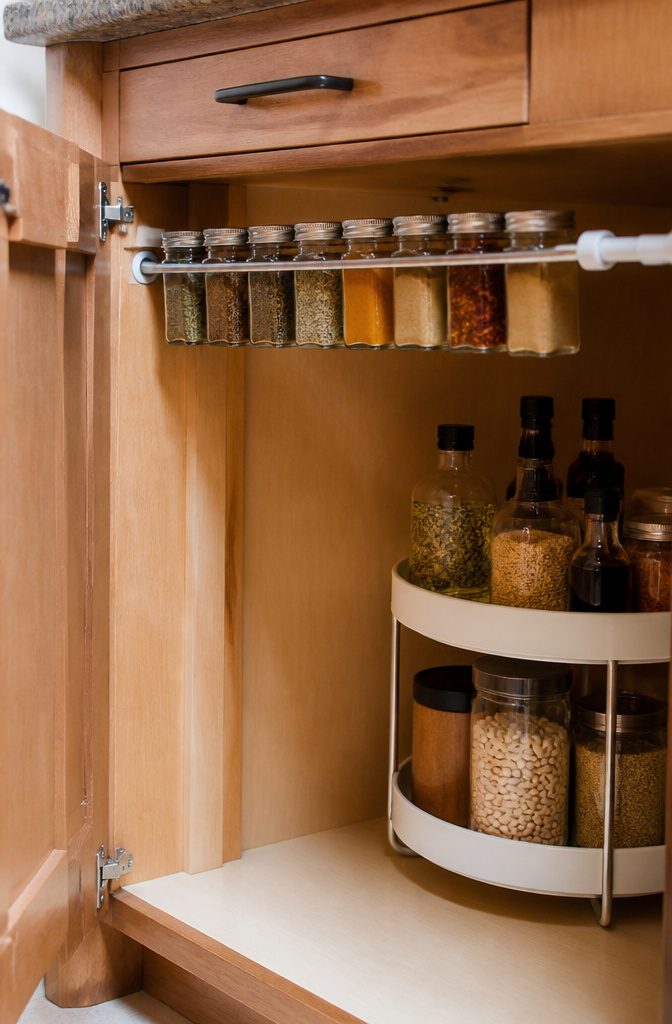
A tension rod across the upper third of a cabinet creates an instant shelf for spice jars without touching the storage below. I like this move for renters because it leaves no holes and costs less than a dedicated rack.
The rod sits tight against the cabinet sides and holds small jars in a single row, though I would not trust it for anything heavier than a few ounces of dried herbs.
For cabinets with more depth, a two-tier turntable like the Simple Houseware model at $16 on Amazon uses vertical space better than one flat layer.
The spin means no jar gets buried in back, which matters when your cabinet is only about nine inches deep. I have seen people waste that narrow space with a single row of bottles and a dark void behind them.
The tension rod wins on speed and cost. The turntable wins when you have more jars than one row can hold or when you need to reach the back without unloading everything in front.
My call: start with the rod if you own fewer than a dozen spices and do not want another kitchen gadget. Upgrade to the tiered spinner once the collection outgrows the single line.
8. Hooks Inside Cabinets and on Walls
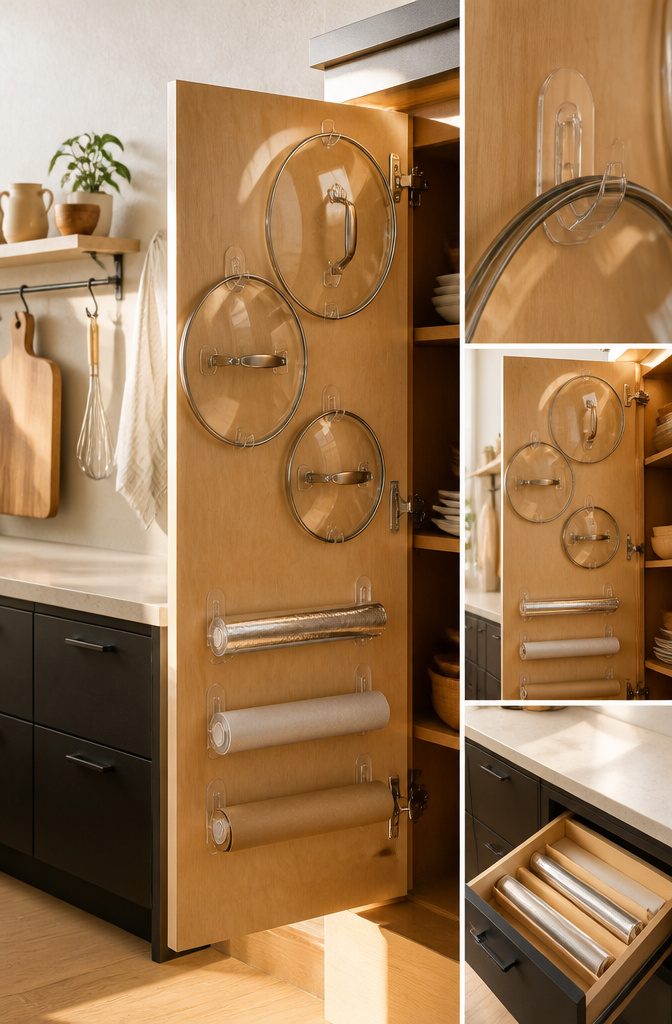
The inside of a cabinet door is dead space until you stick a hook on it. Command hooks on the back of a cabinet door will hold pot lids flat, which stops the avalanche that happens when you stack them.
Two hooks per lid, spaced to catch the handle or rim, and the lid sits quietly without rattling.
Foil and parchment paper boxes fit the same real estate. A single hook through the box’s dispensing slot keeps the roll from sliding around the cabinet, and you tear off a sheet one-handed.
For the stand mixer cord, one Command hook on the back of the appliance itself gives the plug a home. Wrap the cord, hang the plug, and it stops trailing across the counter every time you move the bowl.
Adhesive hooks mean no drilling, which matters in a rental or when you are not sure the arrangement will stick.
Weight is the catch; these are for light, awkward items, not for heavy pans. For those, a screw-in hook on a wall or the underside of a shelf is the stronger call, and it still costs under a few dollars.
9. Bins and Baskets with Labels
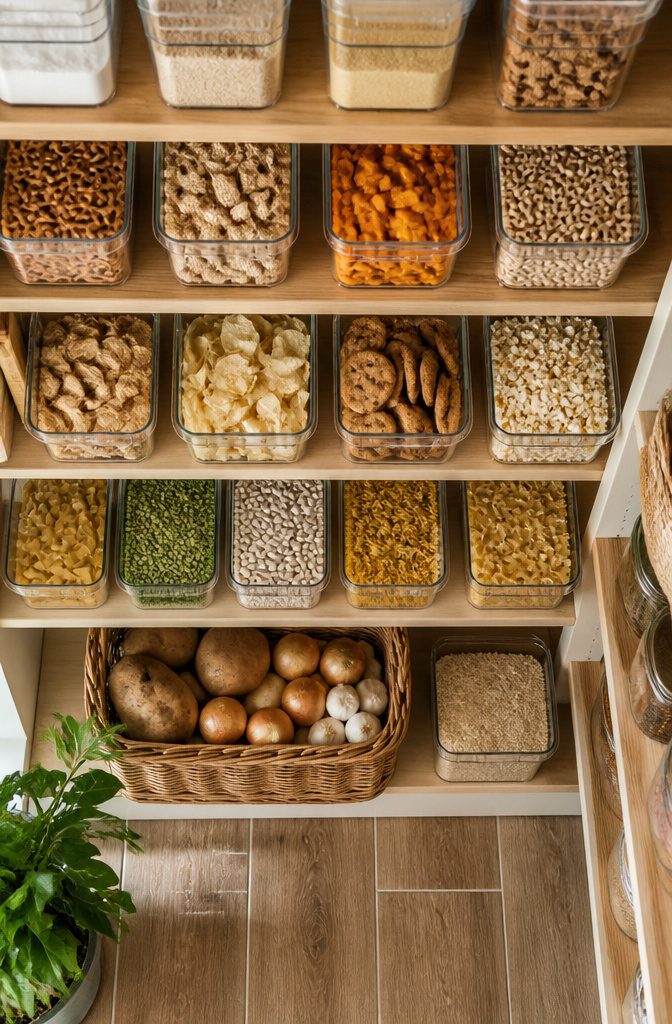
Clear bins earn their keep in pantries because you can see the last granola bar without pulling three containers forward.
The House Beautiful picks run about $21 on Amazon for a freezer-ready set and $22 at Container Store for a divided bin, both of which keep categories separated so you stop buying a third bag of rice.
I reach for clear when I need to locate food fast, especially in a deep cabinet where opaque boxes turn into black holes.
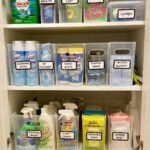
Baskets pull ahead on open shelving, where the visual noise of packaging needs softening. Apartment Therapy’s lined-up label example shows the real win: uniform tags on jars create order even when the contents vary wildly.
The clip-on style from Just a Girl and Her Blog works on fabric or wire without commitment, which matters if you rent.
The one place I skip labels entirely is inside a refrigerator.
They read as clutter in that context, and the contents change too fast to keep current. Everywhere else, a labeled bin cuts the time to put groceries away by half, because the decision is already made.
10. Vertical Space Above and Beside Cabinets
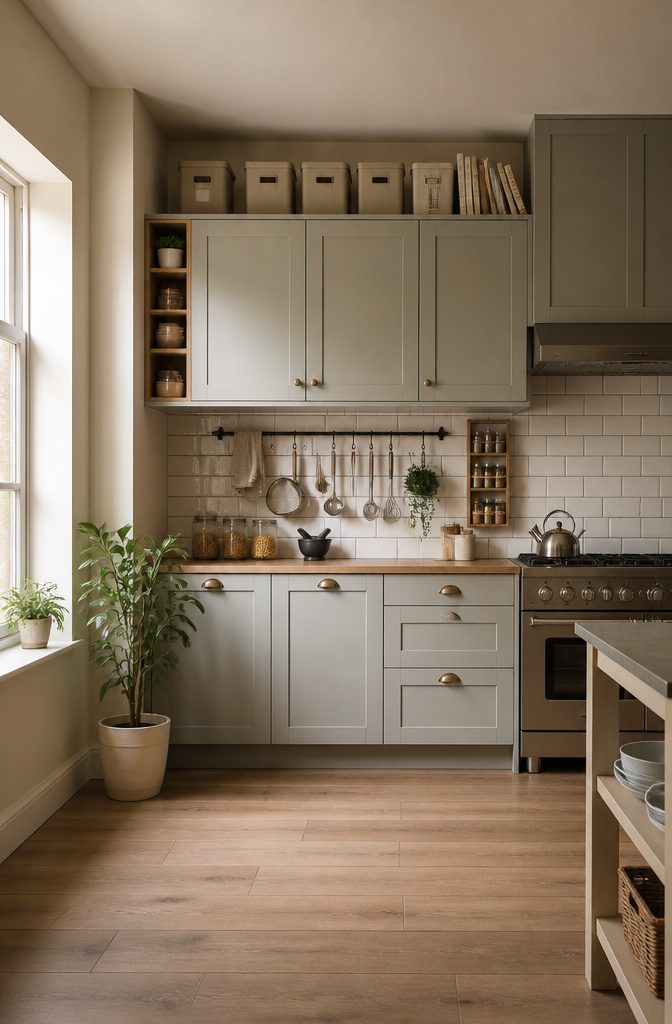
Most kitchens leave two vertical zones completely untouched: the gap between upper cabinets and the ceiling, and the exposed sides of cabinet runs. Both are usable if you match the storage to the reach.
Above the cabinets, I store bulky pots I pull out twice a year, backup dry goods in sealed bins, and the cookbooks that do not fit in the prime shelf line.
A step stool thin enough to slide between the fridge and the wall makes the height practical, not theoretical. Dust is the problem; anything up there needs a quick wipe before it earns its spot.
Cabinet sides are narrower but more accessible. A simple rail with S-hooks holds towels or small tools; a shallow shelf screwed to the side keeps spices or oils within arm’s reach while I work at the counter.
I skip this in galley kitchens where the side faces a walkway and the projection becomes a hip-check hazard.
For renters without a pantry, a pegboard or basic wall shelves turn blank wall into vertical storage for staples.
Standard brackets and 8-inch pine boards cut to fit the gap beside a refrigerator or at the end of a cabinet run cost less than a freestanding unit and keep floor space clear.
The boards show wear faster than cabinet-grade material, but for a weekend project under $100, the function wins.
11. Island and Cart Storage
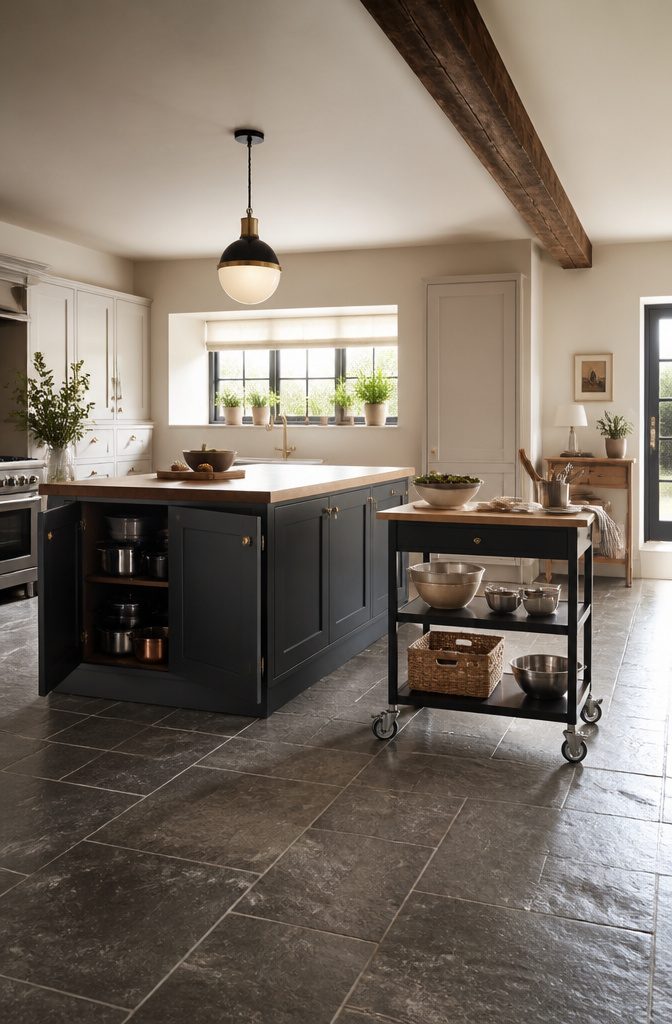
A fixed kitchen island adds prep space and closed storage that hides clutter the moment you shut the door, but the cost only makes sense when you own the place and plan to stay.
For renters, a rolling cart is the smarter move. The Container Store sells a small Elfa-style cart around $87 on sale, and it rolls into the kitchen when you need it and out of the way when you don’t.
I would not count on it for daily utensils or anything you reach for every hour.
Built-in islands give you permanence and more square footage of counter, while a cart gives you flexibility and a price that does not follow you when the lease ends.
If you are renting and dreaming of an island, start with the cart. You will know within a month whether you actually use the extra storage or just need less stuff.
12. Magnet and Wall-Mounted Spice Storage
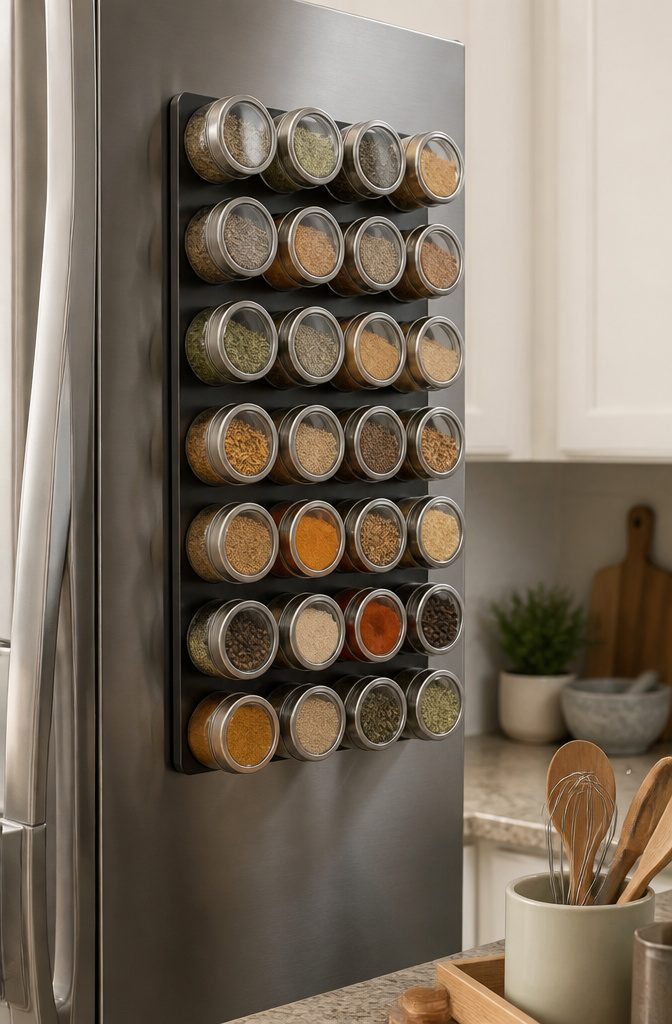
The side of a refrigerator is dead space until it isn’t.
A magnetic spice rack turns that steel surface into storage that costs no counter and no cabinet interior, which matters when both are already spoken for. Stainless steel or textured plastic, the fridge doesn’t care; the magnets grip either way.
For spices you want closer to the stove, a magnetic strip mounted to the underside of a cabinet does the same job with more stealth.
The jars sit overhead, labels up, and the cabinet below stays free for the larger items that actually need the depth.
Not everything magnetic has to cling to metal. A simple tray on the counter corrals the appliances you use daily, and when company comes or you need the workspace, the whole arrangement lifts away in one move.
The tray itself isn’t magnetic, but it serves the same purpose: keeping the counter functional without committing to permanent placement.
The meal prep zone works best when it borrows from both ideas. Spices live on the fridge or cabinet underside within arm’s reach.
The cutting board and daily appliances stay on a tray that can relocate when the counter has to become something else. Nothing is fixed that doesn’t need to be.
13. Refrigerator and Freezer Organization
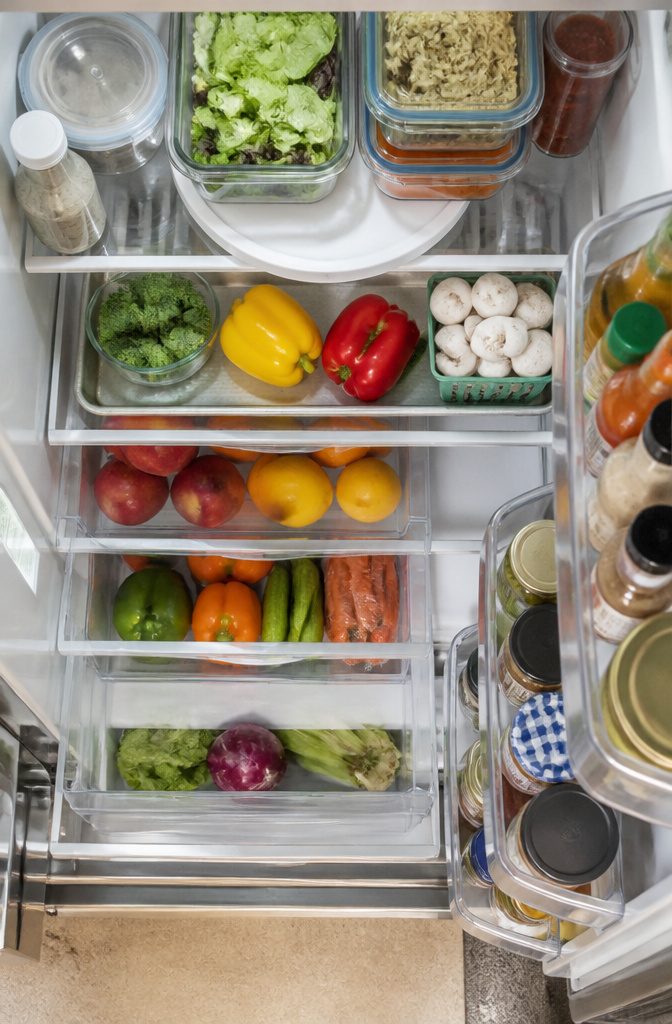
The bottom of most freezers has built-in ridges that act as natural dividers, and those ridges work best as tracks rather than something to ignore.
Slide a flat bin or tray between them and the ridges hold it in place, so pulling one container forward does not start an avalanche of frozen vegetables.
I have seen the same freezer go from chaotic to usable just by matching the bin width to the ridge spacing.
For the refrigerator door, an egg crate turned on its side corrals condiment bottles better than the shallow shelf alone. The individual cups keep bottles from tipping into each other every time you grab the ketchup.
A small sponge holder stuck to the inside of the door catches stray sauce packets, organized by type so you actually use them instead of finding expired soy sauce three years later.
A half-sheet pan laid flat on a fridge shelf creates a slide-out layer above whatever sits below it. You can pull the whole tray forward to reach items in back without unpacking the front row.
Turntables work the same way in a refrigerator as they do in a cabinet: one spin brings the jar of olives from the back corner to your hand.
The limit is height; a turntable only helps if your shelf spacing leaves enough clearance for the bottles you store on it.
14. Small Appliance and Tool Storage
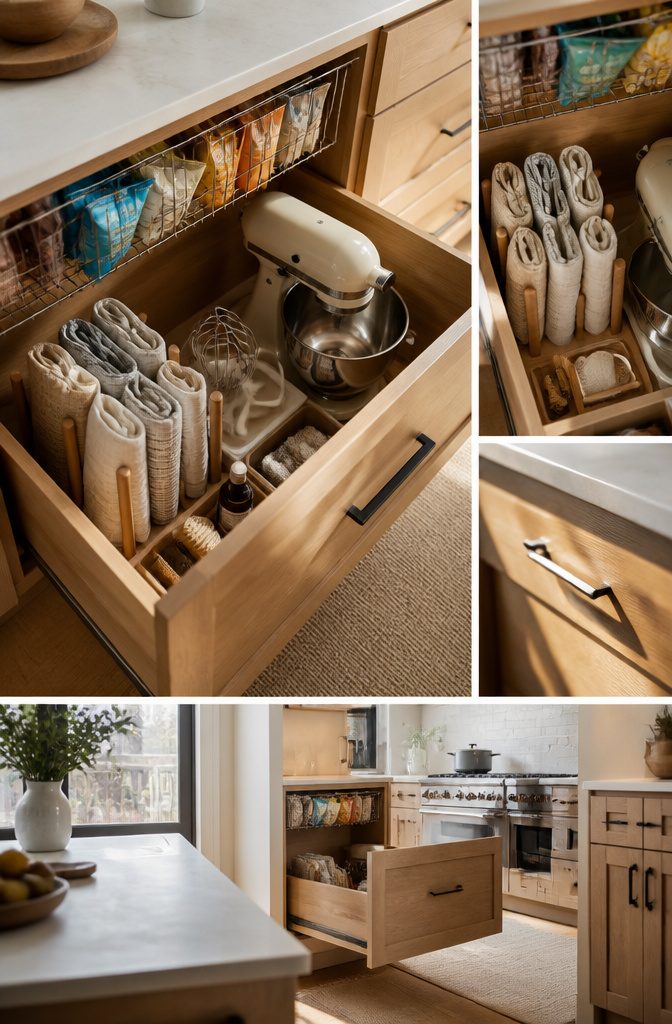
Stand mixer attachments disappear into drawers unless you store them inside the mixing bowl itself.
The bowl sits on a shelf, the whisk and paddle stay with it, and you stop hunting through three cabinets to bake a batch of cookies.
A Command hook on the back of the cabinet door keeps the power cord from slithering onto the floor every time you pull the mixer forward.
I have seen renters hesitate to drill into rental cabinets; adhesive hooks solve that without a second thought.
Chip bags clipped with pants hangers go on a rod inside a cabinet or on a wall hook. The hanger seals the bag, hangs flat, and costs nothing if you already own a few wire ones with the grippy pads.
The only catch is weight: a full bag of kettle chips will slide or sag, so this works for half-empty bags and lighter snacks.
If a drawer has extra height, the towel-folding method buys space.
Fold kitchen towels in thirds lengthwise, then roll them tight and stand them on end like files in a cabinet. A drawer that held six flat towels holds twelve rolled ones, and you pull one without disturbing the rest.
Time is the cost: rolling takes longer than folding in half, so I only do this in drawers I open daily, not the linen closet.
15. Under-Sink and Cleaning Zone
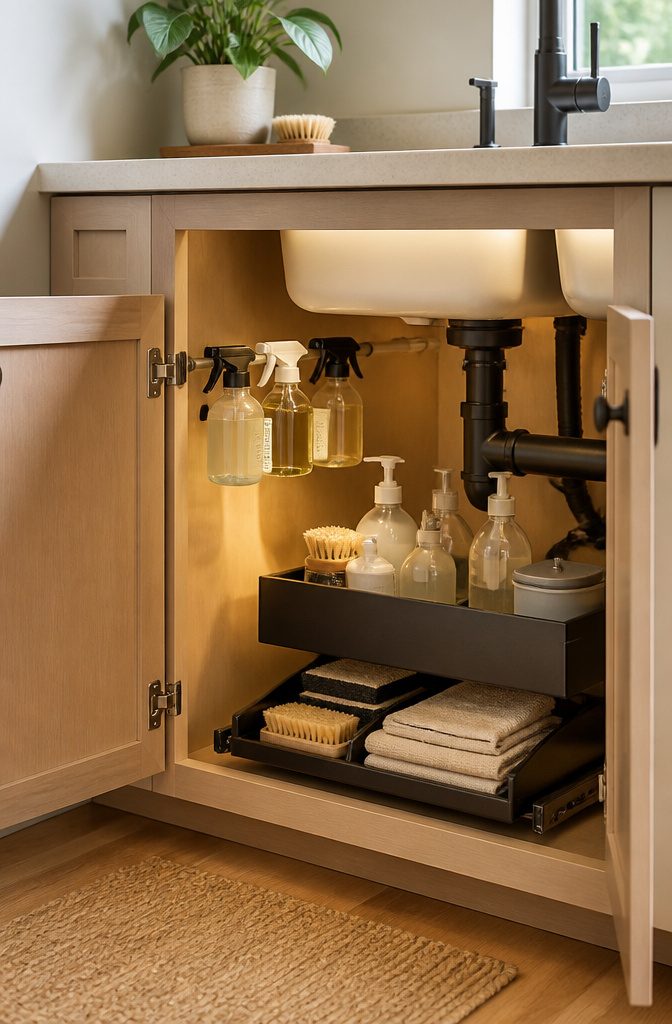
The space under the kitchen sink is where cleaning supplies go to disappear. A two-tier sliding organizer changes that: the lower basket holds bottles and spare towels, the upper one corrals sponges, trash bags, and smaller tools.
I think the sliding feature matters more than the extra height, because you can reach the back row without unpacking everything in front.
For spray bottles, a tension rod hung across the cabinet interior keeps them off the floor and within reach.
It costs almost nothing and installs in a minute, though it only works if your cabinet walls are close enough together to hold tension.
Trash bags belong at the bottom of the can, not in a drawer across the room. Drop three or four in after you line it, and the next change takes ten seconds instead of a hunt.
If kids’ dishes share the kitchen, a small dish rack inside a lower cabinet keeps their plates and cups contained and reachable.
It is not as tidy as a closed bin, but it trains them to put their own things away, which pays off faster than the visual neatness costs.
What Zone Thinking Changes
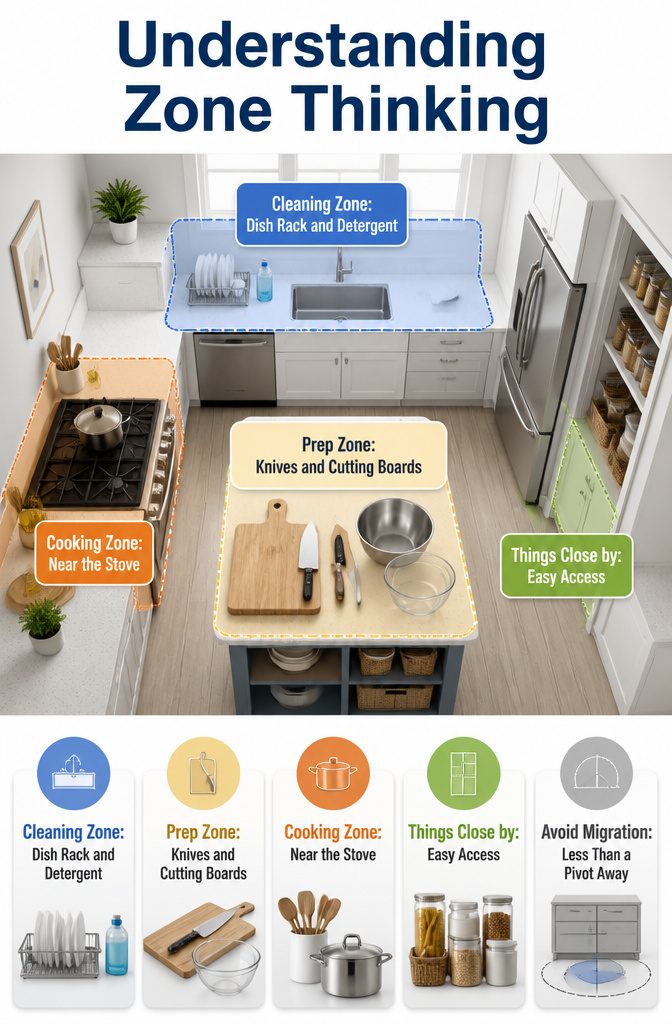
Most weekend kitchen reorganizations fall apart within a month because the system looks tidy but fights the actual work. Zone thinking fixes this by mapping storage to what you do, not just what you own.
A cleaning zone keeps the dish rack, detergent, and everyday dishes within a step of the sink. A prep zone clusters cutting boards, knives, and mixing bowls where the counter space actually is.
When I plan a kitchen layout, I write out the steps for the three tasks I repeat most, usually cooking dinner, loading the dishwasher, and packing lunch.
If a tool sits more than a pivot away from where I use it, it will migrate back to the counter or the wrong drawer.
That migration is what undoes organization. Cooking zones belong near the stove, storage near the fridge and pantry, and prep where the counter is widest.
The blender can anchor its own zone if you use it daily, or it can live in a cabinet and stop cluttering the one stretch of counter you need for chopping.
Planning zones, calendars and mail and menu notes, work best outside the main traffic line so they do not steal space from the work itself.
Speed is not the only benefit. A zone that matches your actual morning means you put things back without thinking, and the kitchen stays organized because the system finally makes sense.
Products Worth the Money
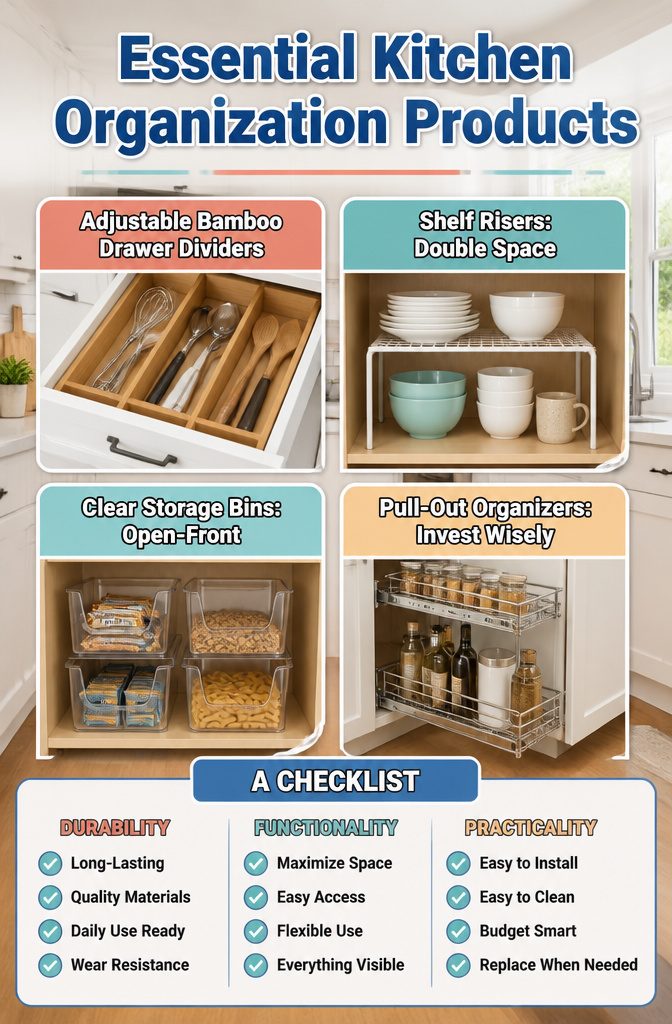
A few purchases pay for themselves in daily use, and a few wear out faster than their price suggests. This is my take on each.
- Adjustable bamboo drawer dividers are the one-time buy I keep recommending. They move with you, reconfigure for whatever drawer you land in next, and the spring-loaded tension holds better than cheap plastic trays that slide around after six months.
- Shelf risers double vertical cabinet space for almost nothing and last indefinitely unless you overload them. I prefer the simple wire or acrylic styles; the fancy tiered versions with built-in drawers tend to jam when cabinet humidity swells the tracks.
- Clear storage bins are where I split my vote. Open-front stacking bins work harder than lidded ones, because unstacking three levels to reach the bottom is not organization, it is a chore. The plastic itself will cloud and scratch over years, so treat these as replaceable, not permanent.
- Pull-out organizers cost more upfront and ask for precise cabinet width, but the hardware outlasts the bins above. Installation is the concern: renters should check lease terms before drilling side-mount brackets into base cabinets.
DIY Builds That Last
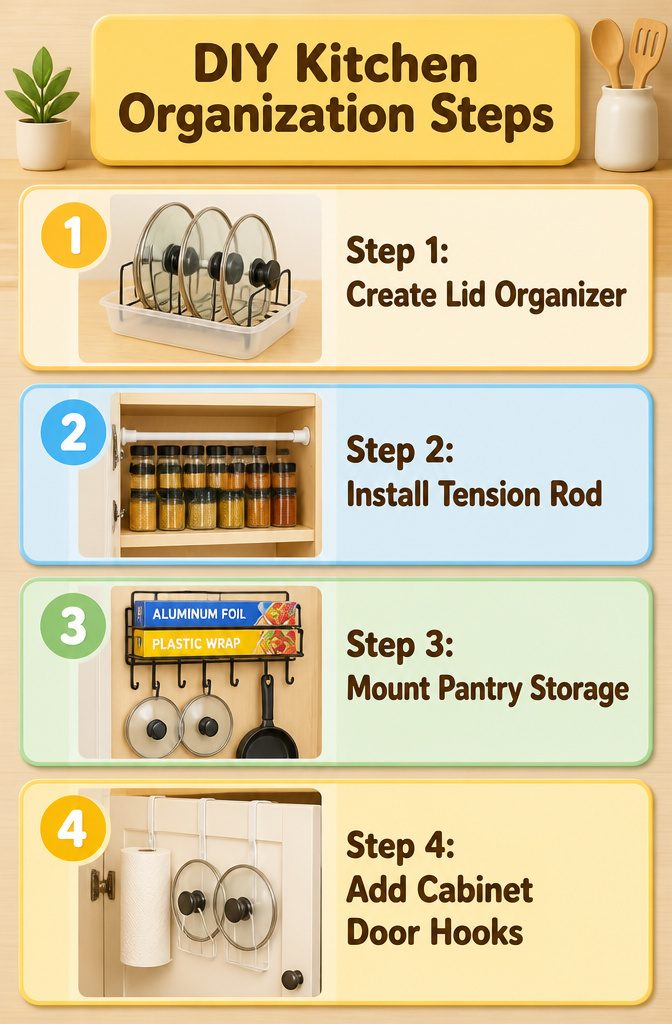
Some of the most useful kitchen organization fixes cost almost nothing and take an afternoon to build. Here are four that hold up over time:
- A cooling rack over a shallow plastic container makes a lid organizer that actually works. The rungs separate lids by size, and the whole unit slides into a drawer or onto a shelf. No tools needed, and it comes apart for cleaning.
- A tension rod installed toward the top of a cabinet creates an extra spice shelf without touching the storage below. It is renter-friendly, though I would not load it with glass jars. The rod holds best in cabinets with solid sides, not the flimsy panel backs some builders use.
- Wall-mounted pantry storage, whether hooks for pans and lids or a slim rack for foil and wrap boxes, reclaims the back of a door. You will give up an inch or two of shelf depth inside, but the trade is worth it for small kitchens. This one needs a drill and anchors unless you get lucky with stud placement.
- Cabinet door hooks for foil and lids are the fastest install of the group. Over-the-door styles need no hardware at all. The limit is weight: keep it to lightweight rolls and a few lids, not a full pot collection.
Frequently Asked Questions
How can I organize my kitchen efficiently?
Start by decluttering with three marked bags or boxes for trash, donate, and sell, then group what remains by task rather than container size.
Map storage to your actual routine, keeping breakfast items together, dinner prep near the stove, and baking supplies in one zone. This zone thinking cuts daily friction and keeps the system working past the first month.
What are the best kitchen organization products?
Adjustable bamboo drawer dividers move with you and reconfigure for any drawer, while shelf risers double vertical space for about $8–$15.
Clear open-front bins work harder than lidded ones, and pull-out organizers solve the problem of items hiding in deep cabinets. Each earns its place by matching how you actually cook, not how the kitchen looks in a photo.
How do I maximize pantry space?
Use turntables to turn dead shelf depth into reachable storage, especially in pantries under nine inches deep where a single row of cans leaves wasted space behind.
Stacking shelves double levels for short items, while risers lift the back row so nothing gets forgotten. Match bin width to freezer ridge spacing to stop avalanches when you pull one container forward.
What is the 3×4 kitchen rule?
The closest principle is zone thinking: map storage to the three tasks you repeat most, and if a tool sits more than a pivot away from where you use it, it will migrate back to the counter or wrong drawer.
What are the 7 pantry zones?
It recommends grouping by your actual routine, such as breakfast, dinner prep, and baking, rather than by container size or package type.
A cleaning zone near the sink, a prep zone where counter space is widest, and cooking zones near the stove complete the task-based approach.