These ideas run from a door rack you hang in minutes to a full pull-out pantry you wire yourself, so the one that fits depends on whether you own your cabinets or answer to a landlord.
I would start by matching your budget to your permission level: renters stick to shelf risers and labeled jars, while owners can drill for sliding shelves and built-in pantry cabinets.
The proof is in the hardware ratings; those pull-out shelves need slides that carry real dish weight, and the pantry light has to hit the door switch exactly or you will never use it.
1. Utilize Cupboard Doors
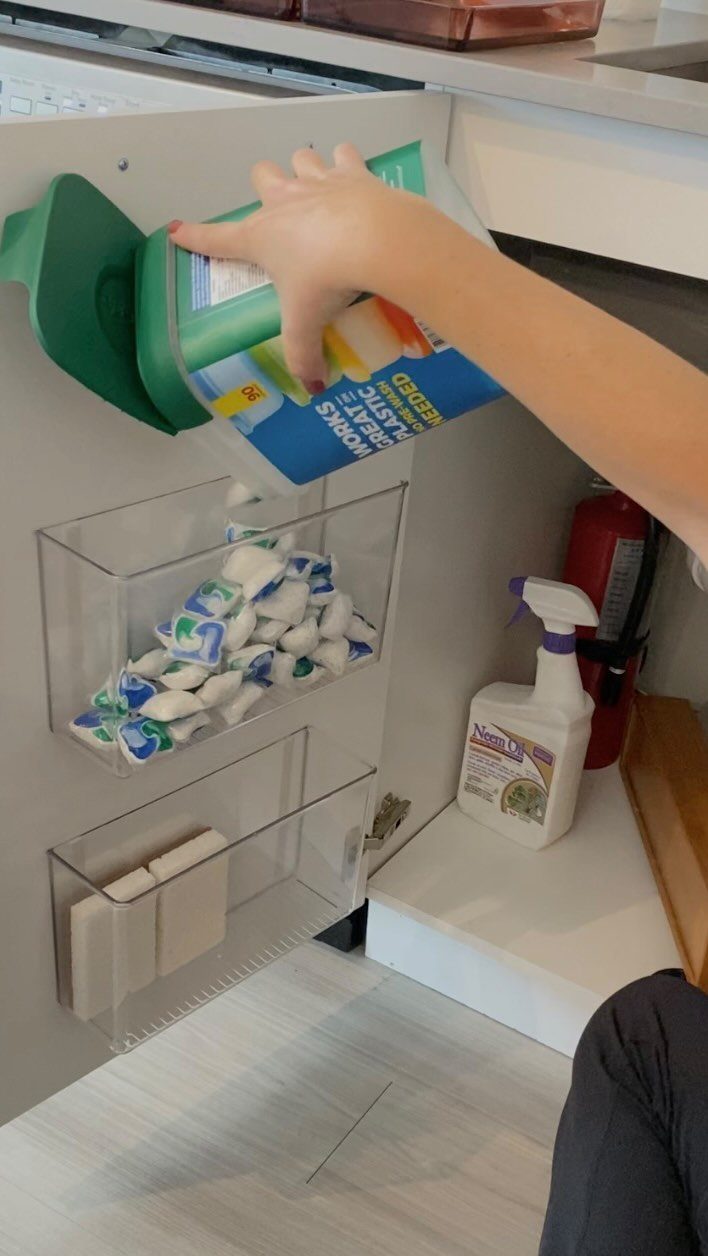
The inside of a cupboard door is dead space until you mount something to it. What works depends on what you store: shallow bins for pods and sponges, a flat bracket for wrap or foil, small hooks for tools.
Check your door first. A cabinet that sits flush when closed needs slim hardware; anything that bumps the shelves or frame will drive you crazy.
I like this setup for under-sink cabinets and lower cupboards where the door is wide enough to hold real weight. The tradeoff is access: you need to open the door to reach anything, so don’t put your most-used items there.
2. Shelf Risers in Taller Cabinets
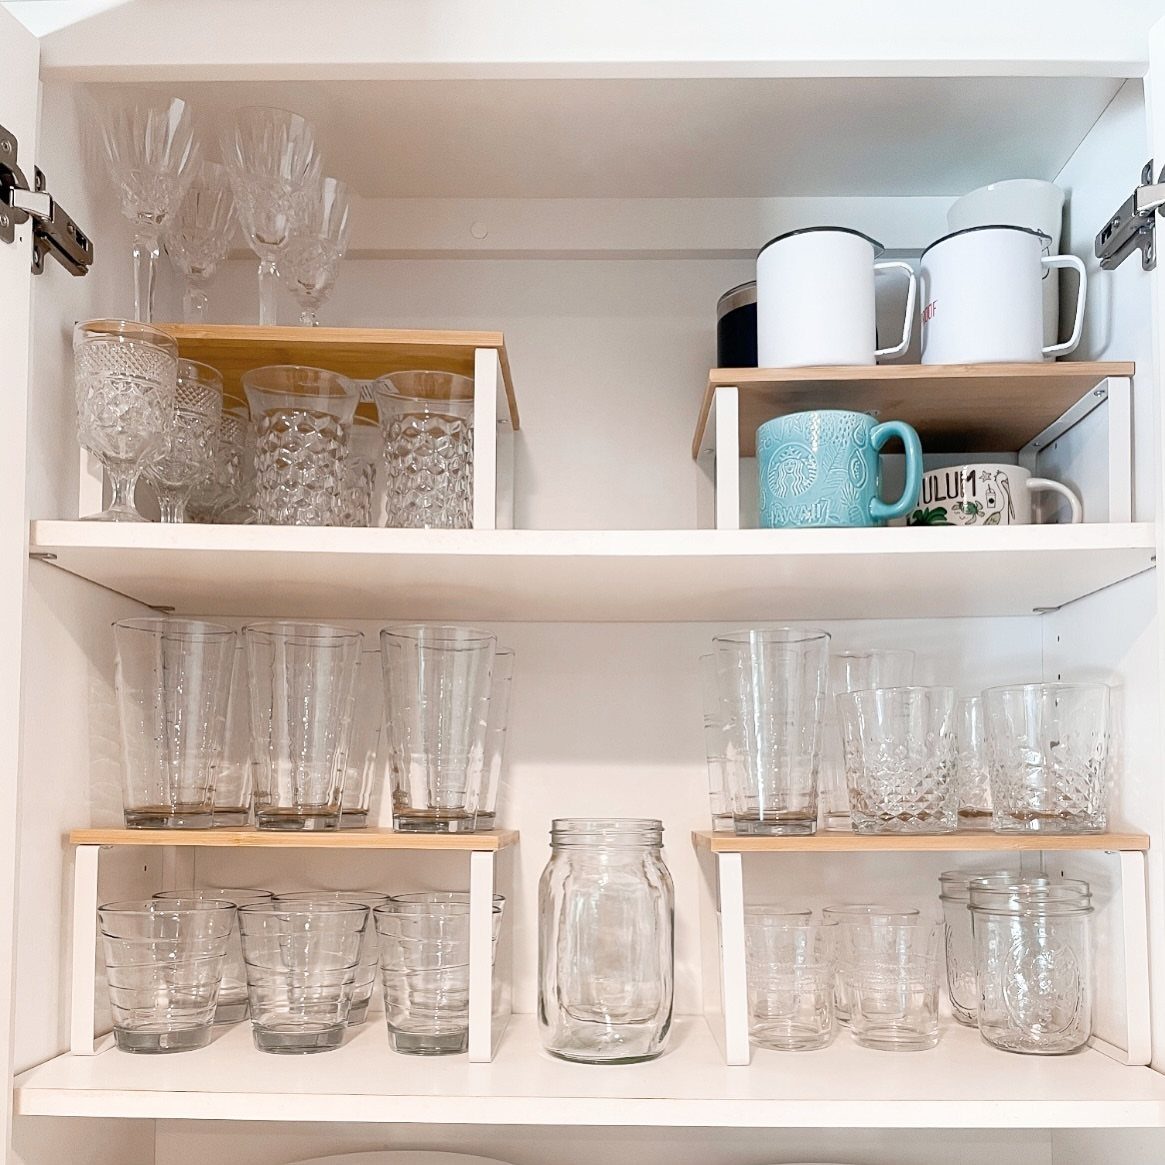
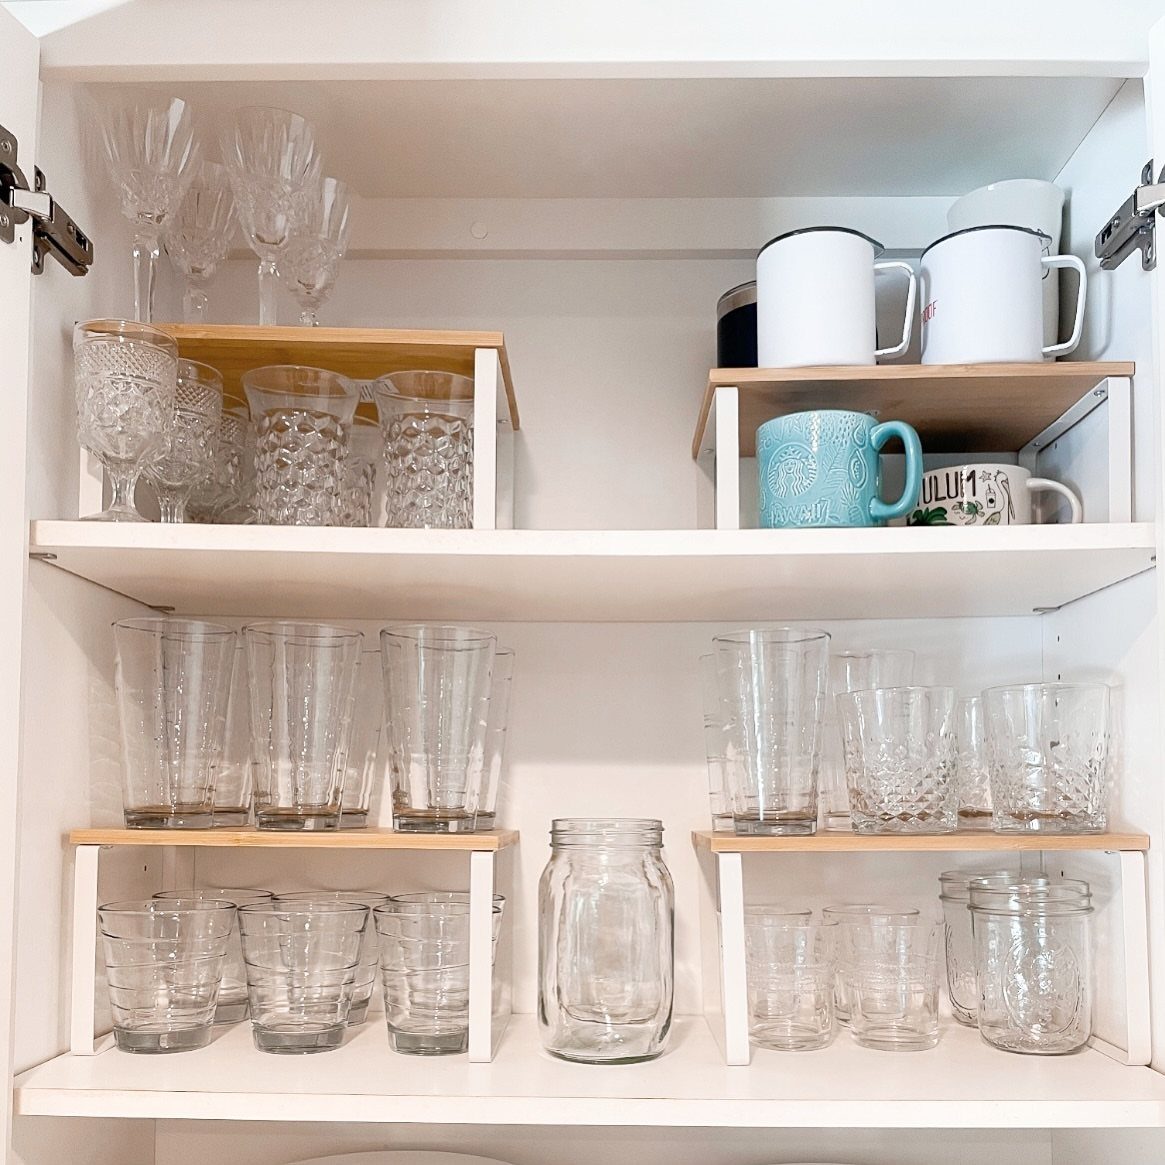
A riser turns one tall shelf into two shorter ones, which matters when your glasses or mugs leave half the height empty.
Wood with metal frames looks finished enough to leave visible, which matters in a cabinet you open often. Measure your shelf depth before buying; a riser that overhangs catches sleeves and looks careless.
I use these in cabinets that store mixed sizes, where tall carafes sit behind and short mugs step up in front. The only real limit is headroom: leave enough space to lift a glass out without tilting it sideways.
3. Categorize by Type
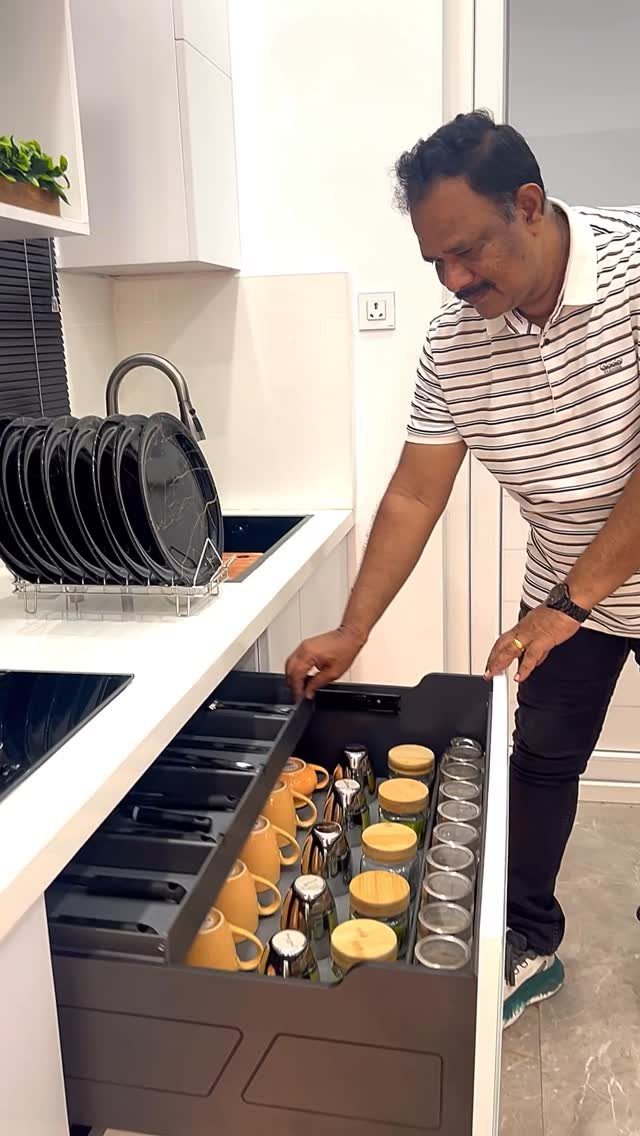
Grouping by shape and size, not by meal or day, is how you fit more into the same drawer.
I group everyday dishes, glasses, and mugs by shape and size, not by type or color, because that is how you fit more into the same drawer.
This works because similar items nest or line up predictably, so you stop playing Tetris every morning.
I set up drawers this way for clients who share a kitchen, since the system is obvious enough that everyone puts things back in roughly the right zone.
This only works when you own enough of one kind to fill a section; a single odd mug still needs a home somewhere.
4. Incorporate Drawer Inserts
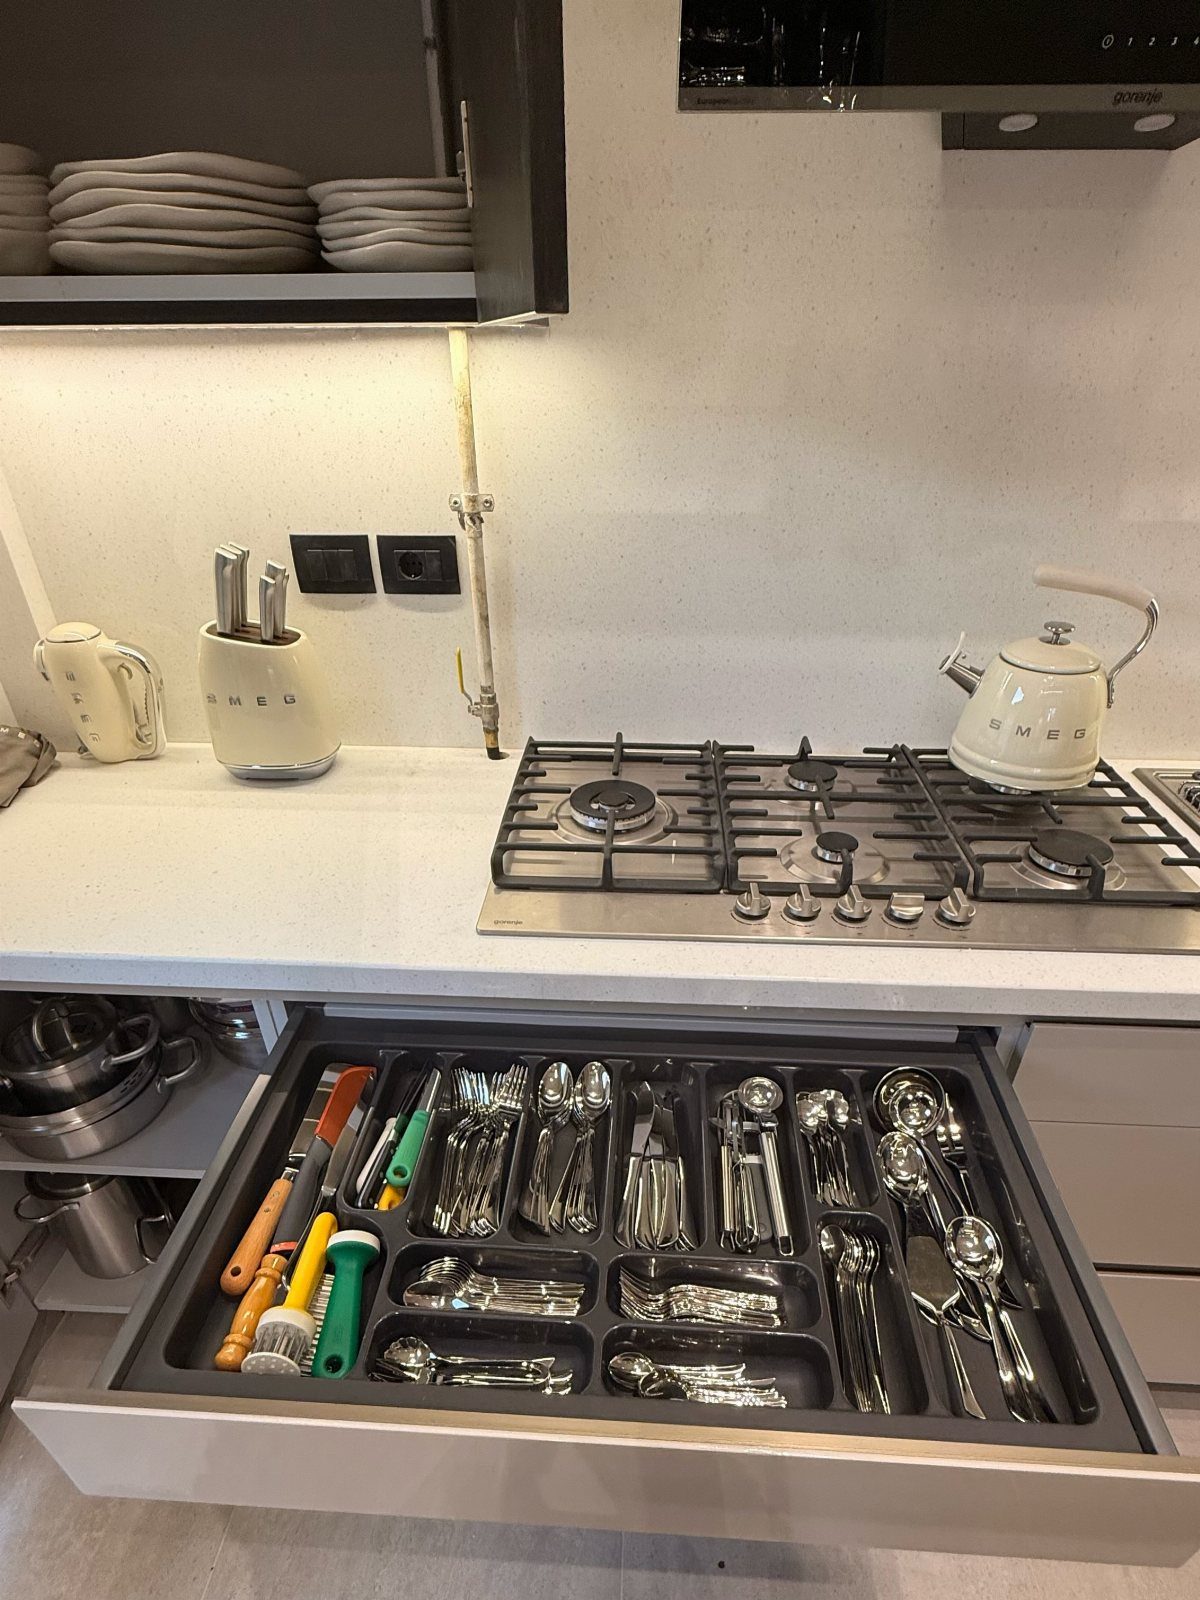
A flat utensil tray with fixed compartments sorts silverware fast, but the better inserts now come with adjustable dividers for the odd tools that collect in every kitchen.
The grey tray divides standard forks and spoons on one side from wider slots for spatulas and tongs on the other.
Check your drawer dimensions against the insert before ordering; a tray that floats an inch on each side wastes space and shifts when you slam the drawer.
I prefer trays with some grip on the bottom, since smooth plastic slides around on painted drawer boxes.
5. Built-In Pull-Out Shelves
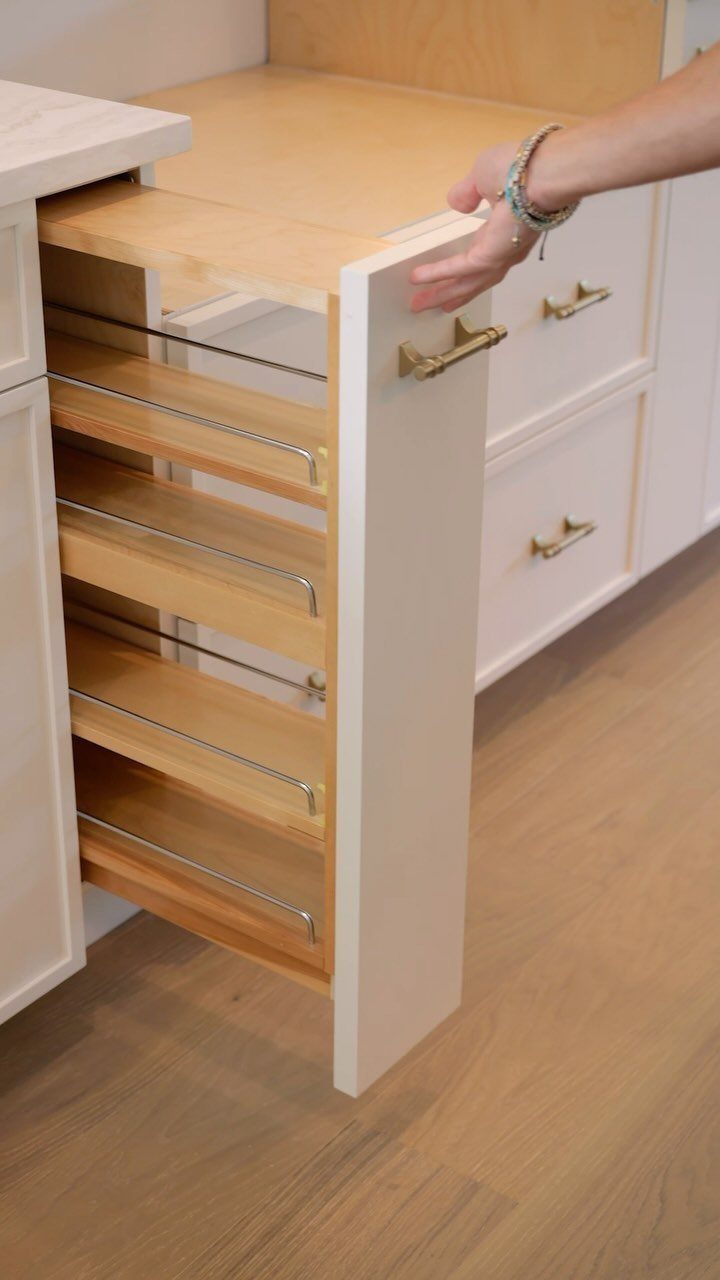
Sliding shelves bring the back of a deep cabinet to you, which matters most in narrow tall cabinets where reaching behind means kneeling and groping.
The tiered wood shelves let you see everything at once as the unit rolls forward. This is a project for someone comfortable with a drill; the hardware needs to mount square and level or the shelves bind.
I would put these in a pantry or cleaning cabinet before a dish cupboard, since dishes are heavy and the slides need to be rated for the load.
Soft-close hardware adds cost but stops the slam that loosens screws over time.
6. Integrated Tall Pantry Cabinet
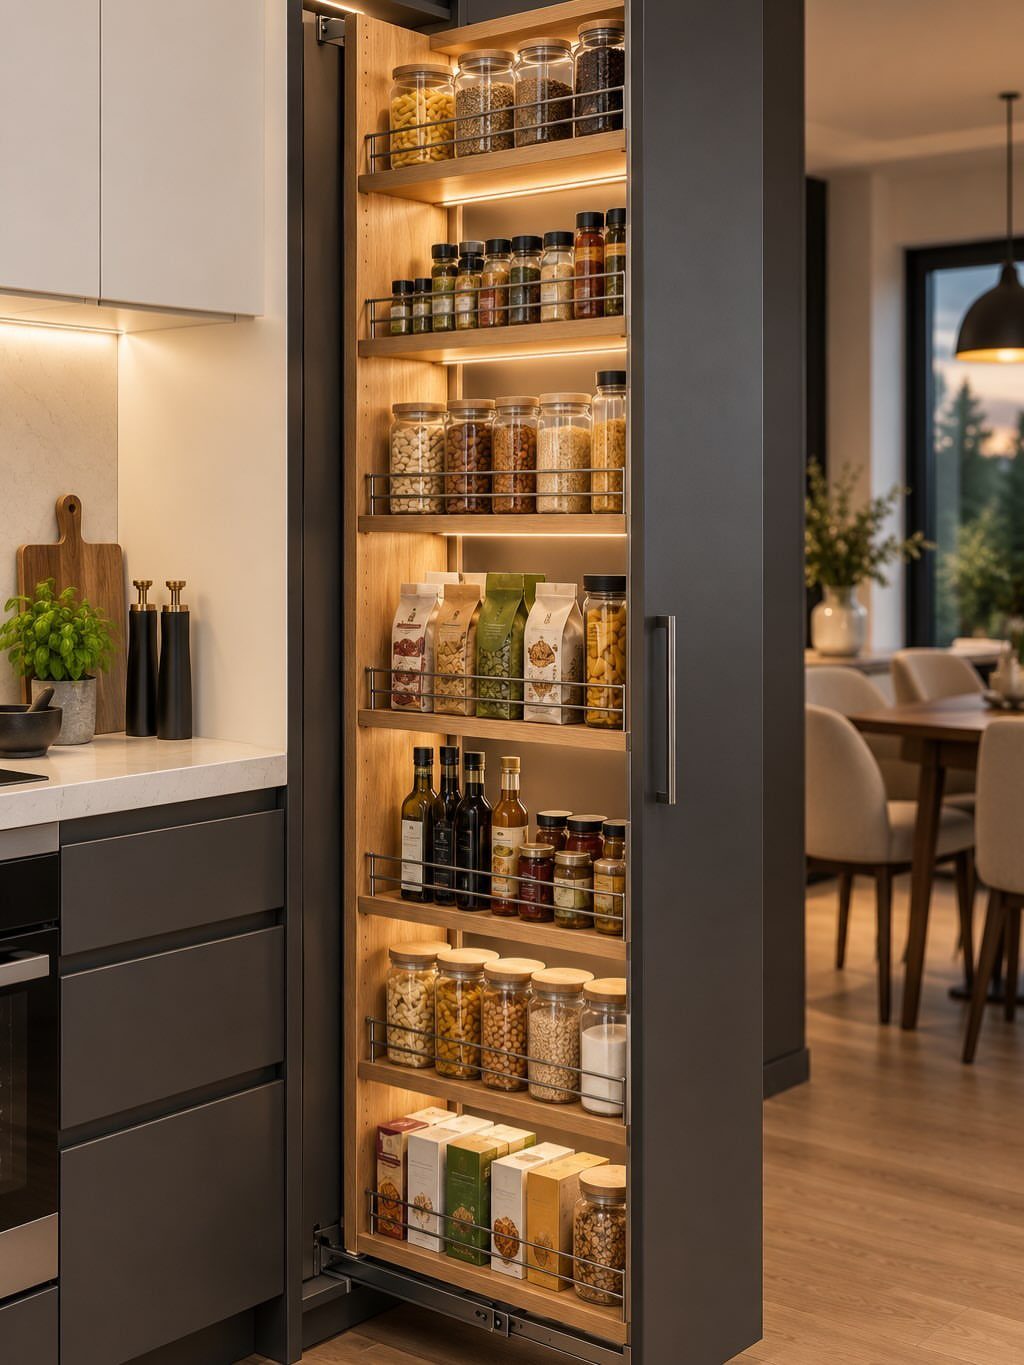
A full-height pull-out pantry with its own lighting turns a narrow gap beside the refrigerator into usable storage.
Warm light matters more than it looks: a deep tall cabinet goes dark at the back, and you end up buying duplicates of what you already own.
I would wire the light to the door switch so it comes on when you pull the pantry open, not on a separate switch you’ll forget.
This setup suits kitchens where wall space is tight and you can’t spare a walk-in closet.
Weight is the real issue; loaded shelves on full-extension slides need sturdy boxes and good wall anchoring, or the whole unit racks when you pull it hard.
7. Cereal Dispensers on Shelves
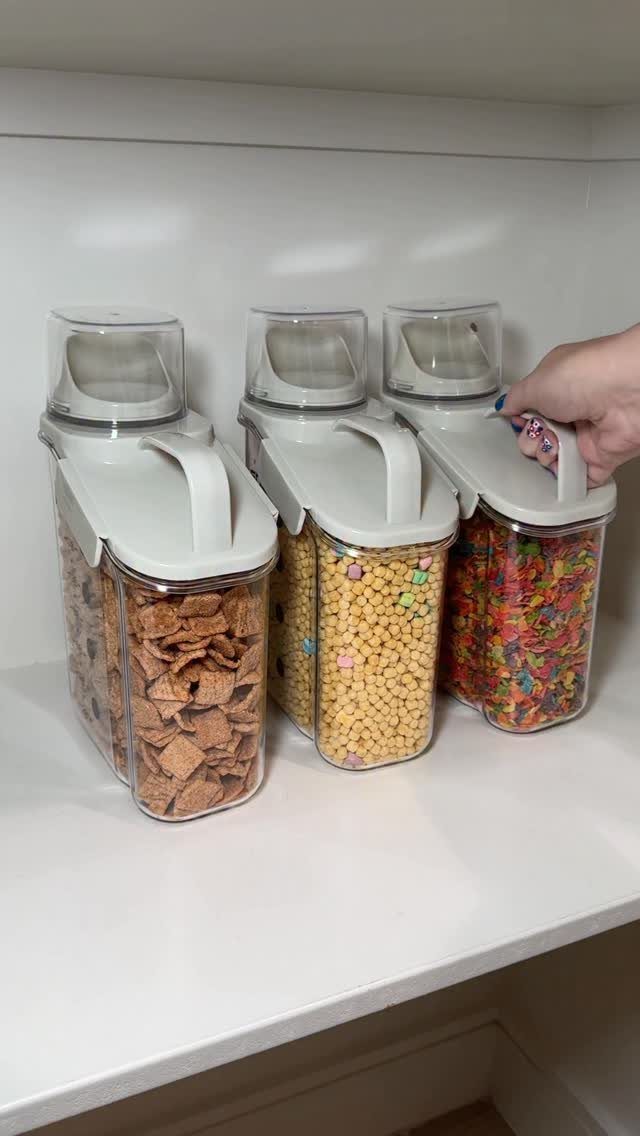
Clear dispensers with pour spouts turn cereal into something you can grab one-handed, which matters on busy mornings.
I like them for households where two or three cereals run at once; matching shapes read as intentional even when the contents clash in color.
Check your shelf height against the dispenser plus a bowl underneath; too tall and you end up storing them sideways.
Cleaning is the real downside: dried cereal dust collects in the spout mechanism, so pick a model that comes apart for washing.
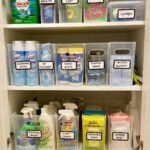
8. Matching Labeled Glass Jars
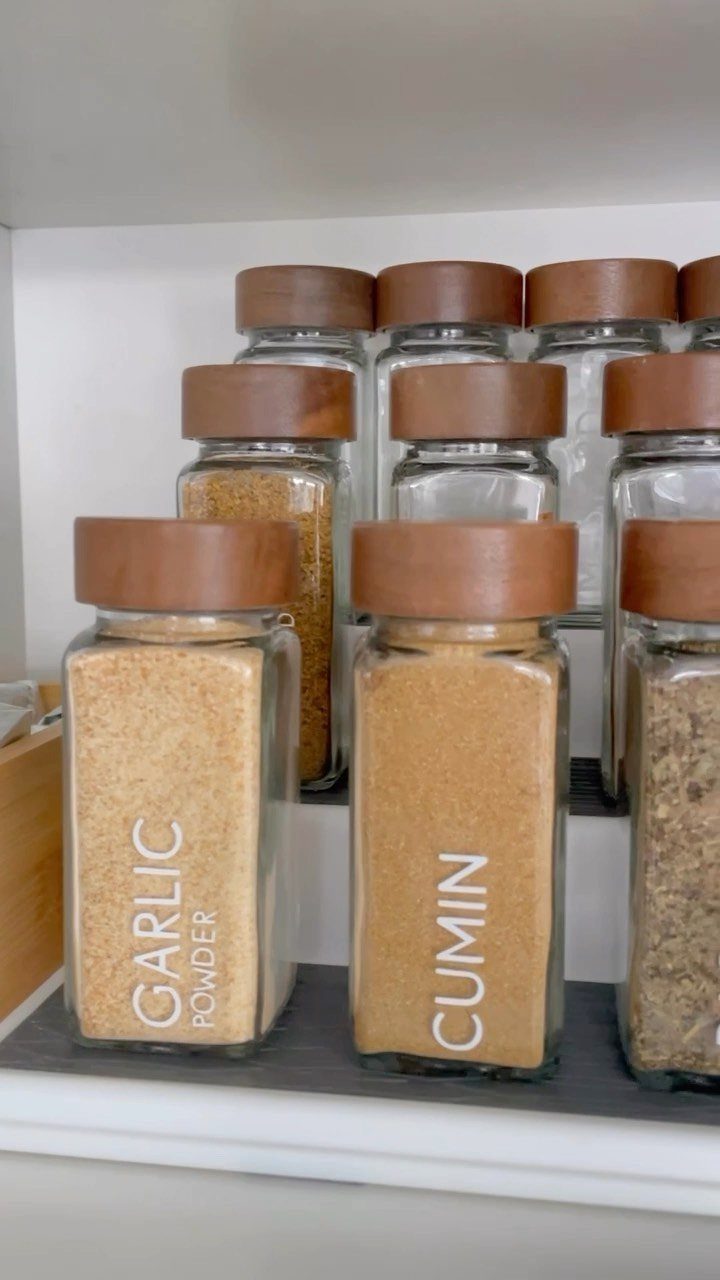
Uniform jars with wooden lids and vertical labels make a cabinet shelf feel like a system instead of a collection of leftovers.
I would use this setup for spices and small dry goods where the original packaging is ugly or bulky. Vertical labels save neck-craning; horizontal labels on a high shelf are readable only from a stepstool.
Check jar mouth width against your measuring spoons: a narrow neck looks tidy but fights a standard scoop. Glass breaks, so I skip this for homes with small kids who reach.
9. Baskets for Packaged Goods
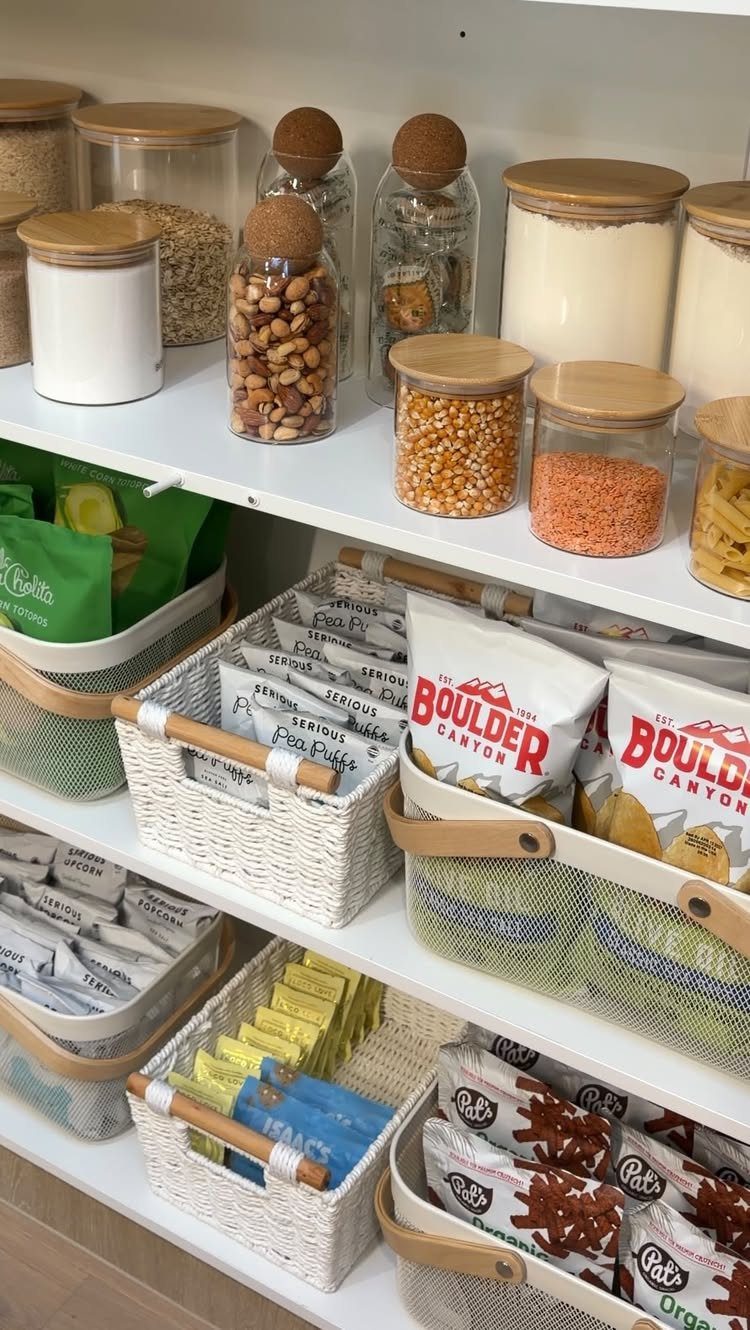
Woven and wire baskets alongside glass jars split the difference between display and concealment: jars for the pretty stuff, baskets for the crinkly bags that never stack well.
I use baskets for anything in original packaging, since matching jars for every snack size gets expensive fast. Check basket depth against your shelf spacing; a tall basket on a shallow shelf tips forward when you pull it.
The wire ones let you see contents at a glance, while woven hides the clutter but demands labeling or you end up rifling through 3 baskets to find the chips.
Cleaning Before Organizing
Every cabinet reorganization I have seen go wrong started with someone trying to sort around the existing mess. Take everything out first.
Spread it across the counter or table so you can see the full inventory in one view. That single step stops you from shuffling the same clutter into new positions.
With the cabinets empty, I run a damp cloth across every shelf to pick up dust and the odd crumb that settles in corners over time.
Dust, crumbs, and old spills harden over time, and a clean surface gives the new layout a chance to last. This is also the moment to pull out broken pieces and duplicates you never reach for.
The less you put back, the less you fight the system later. I would rather spend a short stretch on this step now than lose time later rearranging items I should have donated.
Importance of Organization
An organized kitchen earns its keep in speed, not looks alone. Once every item has a fixed home, meal prep moves faster and cleanup shrinks to putting things back where they belong.
The real savings are in groceries: you stop buying a third jar of cumin because you could not spot the first two behind the pasta boxes.
I map a kitchen by zones before touching a single shelf.
Cooking tools live near the stove, glasses near the sink or fridge, and baking gear clusters where the counter space allows. That intentionality matters whether the kitchen is 150 square feet or three times that size.
Without zones, even a generous kitchen turns into a daily scavenger hunt. With them, a small one functions smoothly because nothing travels farther than it needs to.
“By grouping items by function, the kitchen flows effortlessly, and everything feels intentional and easy to find,” McGee tells AD.
Monthly Maintenance
Organization decays the moment you stop tending it. I set a reminder every three months for a thirty-minute cabinet audit: rotate older items forward, check spice and pantry dates, and wipe shelves before grease settles in.
Loose hinges and shelf pins sag doors and tilt shelves over time; tightening them now prevents a wobbly mess later.
A quick monthly check is enough to catch what drifted out of place before it turns into a real mess.
I look for items that wandered out of their zones, containers missing lids, and whether any shelf needs a quick wipe. Catching drift early keeps the system intact; letting it slide for half a year means starting nearly from scratch.
The quarterly pass handles expiration dates and hardware, the monthly one catches habit creep. Either one beats rebuilding the whole layout because nothing stayed where it belonged.
Frequently Asked Questions
How to organize upper kitchen cabinets?
Store lighter items up high and keep daily-use pieces at eye level where you can lift them out without tilting.
I would reserve the highest shelves for occasional pieces you pull down a few times a year, not for anything you reach for weekly.
How should kitchen cabinets be set up?
Map the kitchen into zones first: cooking tools near the stove, glasses near the sink or fridge, baking gear where counter space allows.
Within each zone, layer by frequency: daily items at eye or waist level, occasional pieces higher or lower. Built-in helpers like pull-out shelves and drawer inserts then maximize the space inside each cupboard without changing the room’s footprint.