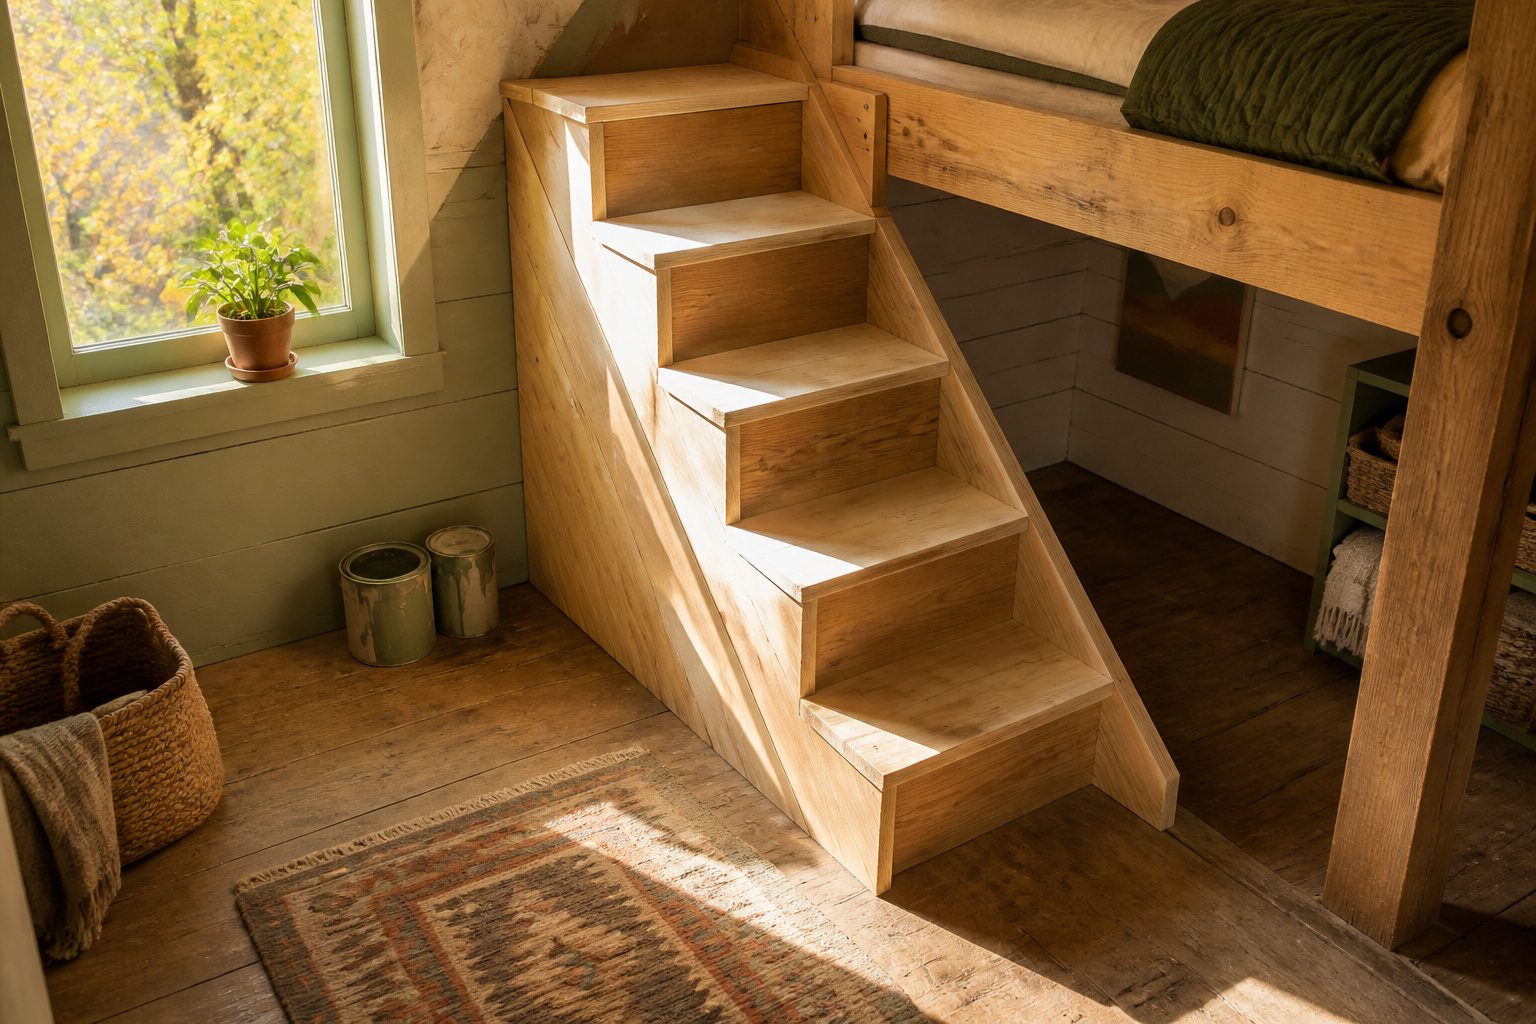
You can finish solid diy bunk bed stairs in one weekend for about $100 to $250, though paint or stain adds a day if you want a finish that survives socked feet and spilled juice.
The part most builders get wrong is the first cut: warped 2×4 stringers throw off every joint that follows, and the pile at the lumberyard always hides a few rejects.
Sight down each board before you buy, and budget for a spare tread while your saw is still set up.
How to Build DIY Bunk Bed Stairs
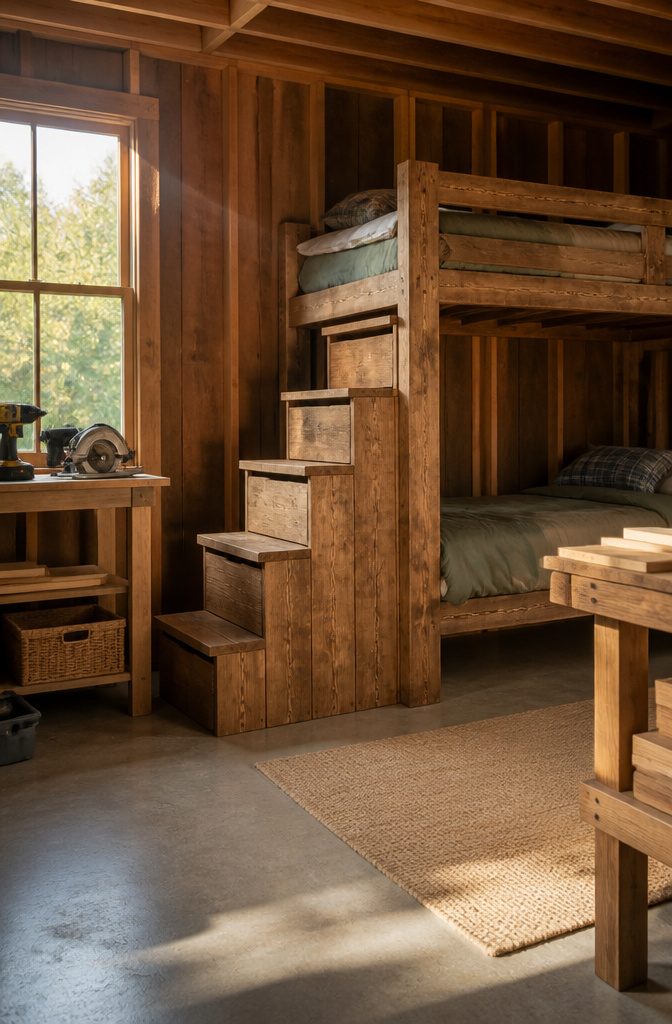
The first choice that shapes every step after it is whether your stairs attach directly to the bed frame or stand on their own.
Frame-attached stairs feel solid underfoot because they borrow the bed’s weight and footprint, which is what I prefer for a permanent setup in a kid’s room.
Freestanding stairs make more sense if the bunk bed might shift against a different wall later, or if you are renting and want to take the whole system with you when you leave.
This guide covers lumber stairs with proper treads, not a ladder.
A ladder saves space, but treads let a small child climb down safely at 6 AM without waking the house. Budget for about $100–$250 in materials depending on whether you already own a drill and a circular saw.
Most builds finish in a single weekend, though paint or stain adds a day if you want a hard-wearing finish that survives socked feet and spilled juice.
1. Cut Lumber to Size
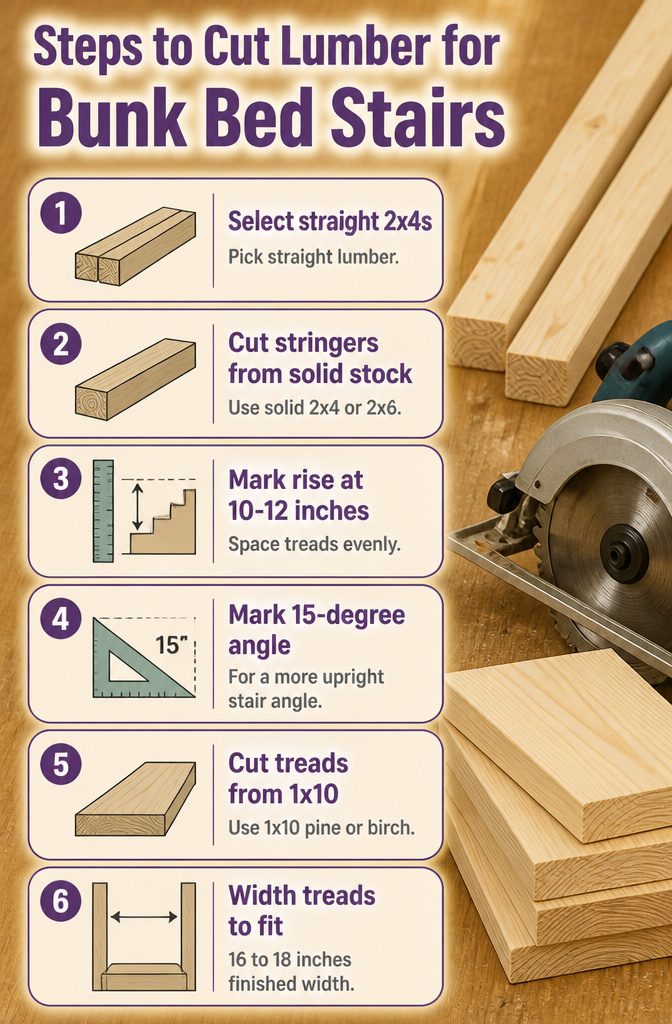
- Pick straight 2x4s for the stringers and sight down each board before you buy. Warped or bowed lumber throws off every cut that follows, and the pile at the yard always hides a few rejects.
- Cut the stringers from solid 2×4 or 2×6 stock, not plywood. The sides carry the load, and plywood in that role needs to be ¾ inch at minimum to feel stiff underfoot. I still prefer dimensional lumber here; it saves edge-banding and holds screws better.
- Lay out your rise at 10–12 inches between treads. A typical 56-inch bunk height needs seven treads total: one at the floor, then six spaced evenly up the stringers. Adjust the count if your bunk sits unusually tall or short.
- Mark a 15-degree floor angle on the stringers if you want the stairs more upright and ladder-like. A 30-degree angle works too, but it eats more floor space. Cut carefully with a jigsaw or circular saw.
- Cut treads from 1×10 pine or birch. I skip plywood for treads because the edge grain shows on stairs, and plywood edges look unfinished unless you band them. A 1×10 gives you a clean front edge and enough depth for a kid’s foot.
- Width the treads to fit between the bed’s support posts, minus about 3 inches to account for the stringer thickness. An ideal finished width lands between 16 and 18 inches. Cut one spare tread while you’re set up; miscuts happen, and a spare saves a second trip.
2. Attach Side Rails
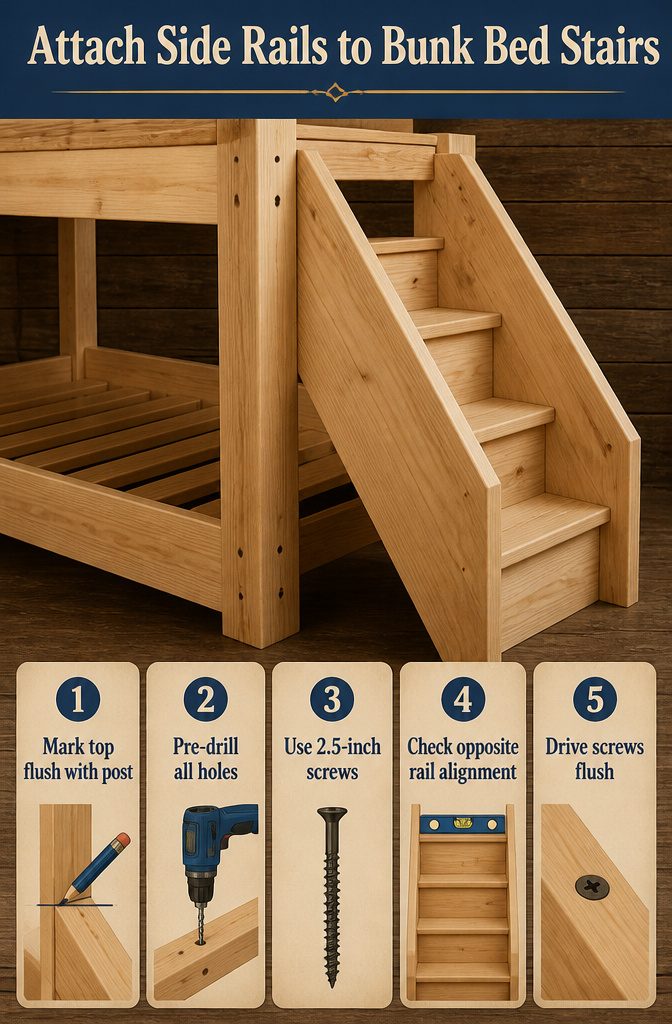
- Set the side rail against the bed frame post and mark where the top needs to sit flush. The frame itself is your only square reference here, not a separate carpenter’s square, because the stairs have to fit this exact structure, not some theoretical right angle.
- Pre-drill every hole before driving screws. Pine and poplar split fast under pressure, and a split rail at this joint weakens the whole stair. I use a bit slightly thinner than the fastener.
- Fasten with 2½-inch construction screws, not nails. Screws hold tension through seasonal wood movement and the racking force of kids climbing; nails loosen and squeak. Drive them until the heads sit flush or just below the surface if you plan to hide them with filler later.
- Check the opposite rail the same way, measuring both against the frame rather than each other. Bed frames often run slightly out of square, and matching the error matters more than correcting it.
3. Install Treads
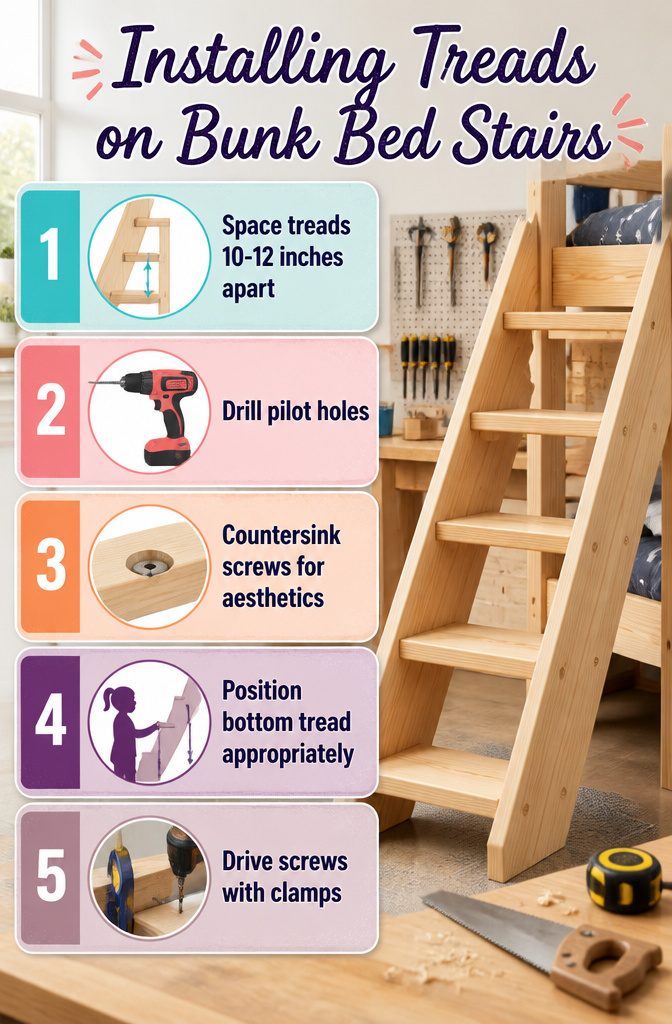
- Space your treads at 10–12 inches apart on center, measured from the top of one tread to the top of the next. I mark both side rails at once with a long level or a straightedge clamped across, so the tread stays level in both directions.
- Drill two pilot holes per side through the rail for each tread, using a bit slightly thinner than the 2.5 inch screws that will follow. A countersink bit lets the screw head sit below the surface; I prefer this for anything that sits in a bedroom, since wood filler and light sanding after makes the fastener disappear.
- Leave screws exposed only if this is a shop build or a utility loft where no one cares how it looks. The five minutes per tread to countersink and fill is worth it for a kid’s room.
- Set the bottom tread so the shortest regular user can reach it from the floor without a stretch. I space for the smallest child who will climb these, not the tallest, because overreaching is where kids lose their footing on bunk stairs. A tread too high for a six-year-old becomes a step they skip or miss.
- Drive the screws through the rails and into the tread ends, checking with a level as you go. Clamps matter here; a second pair of hands matters more, since the tread wants to shift as soon as the drill starts.
4. Add Railings
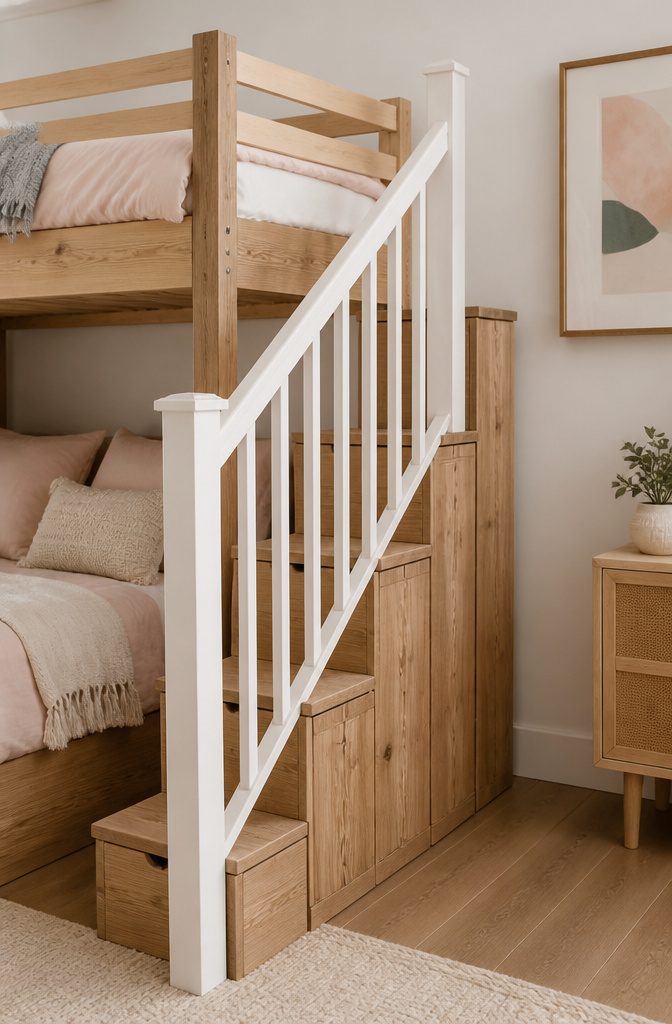
Railings turn a staircase into something you can let a child climb without hovering.
I treat this stage as optional only in the strictest sense. If the bunk bed sleeps anyone under twelve, railings are part of the build.
- Cut two 2×2 posts to 37.5 inches for the stair-side railing. This height catches a falling child at the torso, not the chin, which matters more than it sounds.
- Space balusters no more than 4 inches apart center to center. That gap matches crib safety standards, and the math is simple: a four-inch sphere should not pass through. Small heads are the shape you are guarding against, not just bodies.
- Fasten the top rail to the posts with countersunk screws, then attach balusters from the inside so no hardware shows on the climbing face. A scrap block cut to 3.5 inches makes a quick spacer and keeps the layout honest.
Railings add visual weight, which is the real downside.
Full railings make tight bedrooms feel tighter. I still install them, but I keep the top rail slim, a 1×3 instead of a 2×4, so the stairs do not read like a cage.
5. Sand and Finish
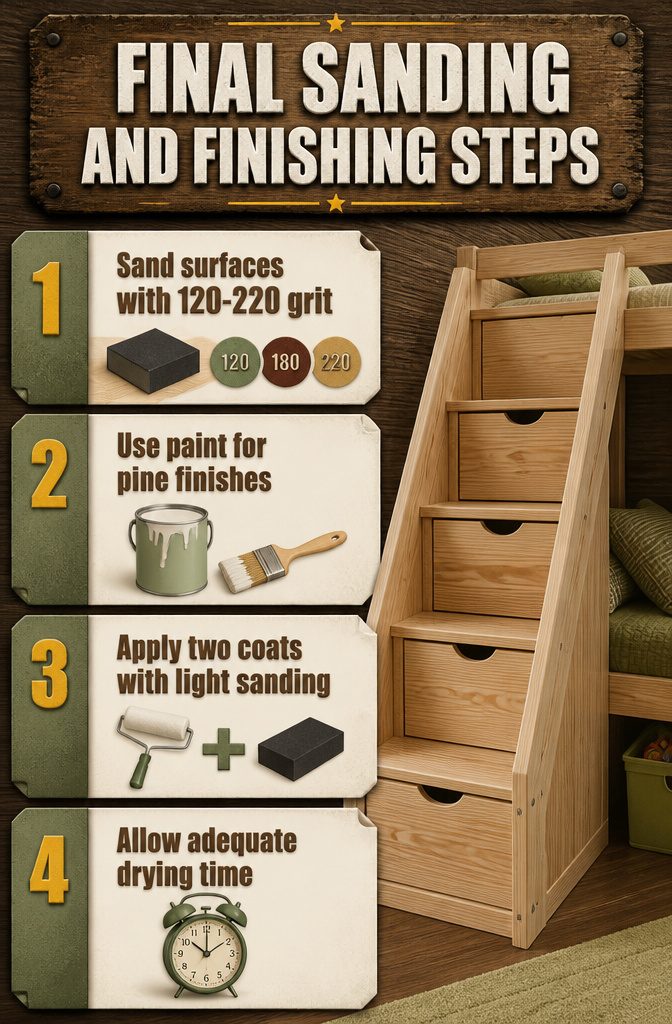
- Sand every surface that a hand or bare foot might touch, working through 120 grit, then 180, then 220 if you plan to stain. Paint hides scratches that stain will spotlight, so stain demands the full 220 finish or the wood looks scratched under light from a window.
- On pine stairs for a kids’ room, I paint instead. Pine blotches unevenly under stain, and six months of socks and toy bins beating against the treads turns that patchiness into something that looks worn out before its time. Paint gives a harder surface and a more even color.
- Apply two coats of paint or stain plus sealer, sanding lightly with 220 between coats. Let the final coat cure fully before anyone climbs; a week is safer than the can promises if small children use the stairs daily.
6. Final Assembly and Testing
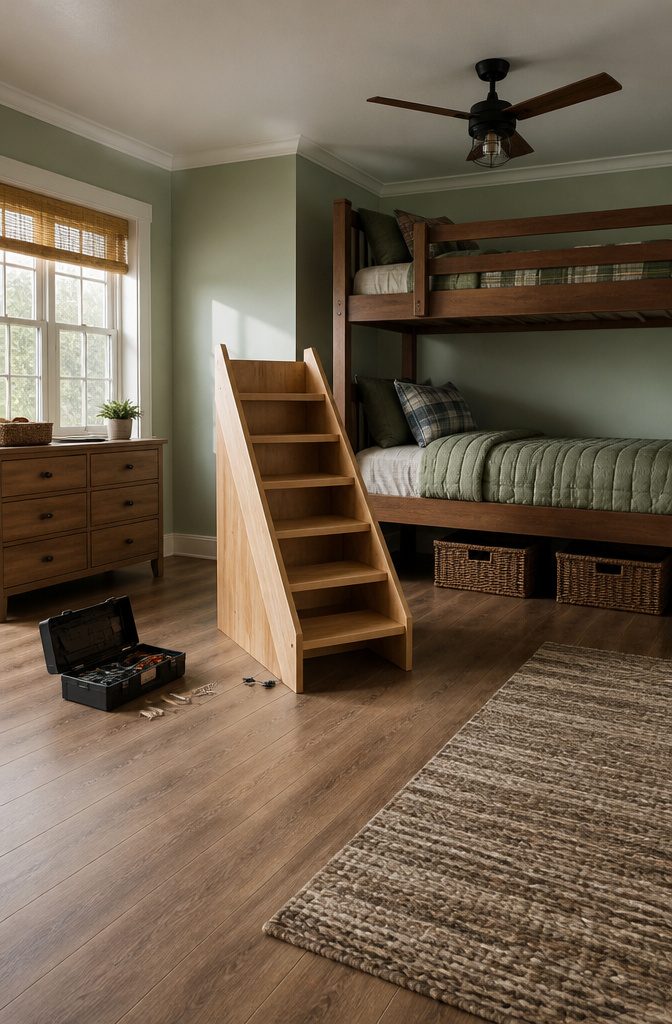
- Stand on the outer edge of each tread and shift your full body weight onto it, one foot at a time. Any flex or bounce means the joint still needs work.
- Grip the stair frame and rock it side to side. A unit that shifts even a quarter inch needs bracing before a child ever climbs it.
- Climb slowly and listen. Squeaks come from movement, not from the wood itself, so each sound marks a spot to fix.
- Drive a thin shim between the tread and stringer where you heard noise, then reseat the screw through it. If the squeak persists, swap the original screw for one half an inch longer to bite fresh wood.
- Repeat the weight test and the rock test after every fix. Only when both pass silently do I call the stairs finished.
7. Plywood Stairs
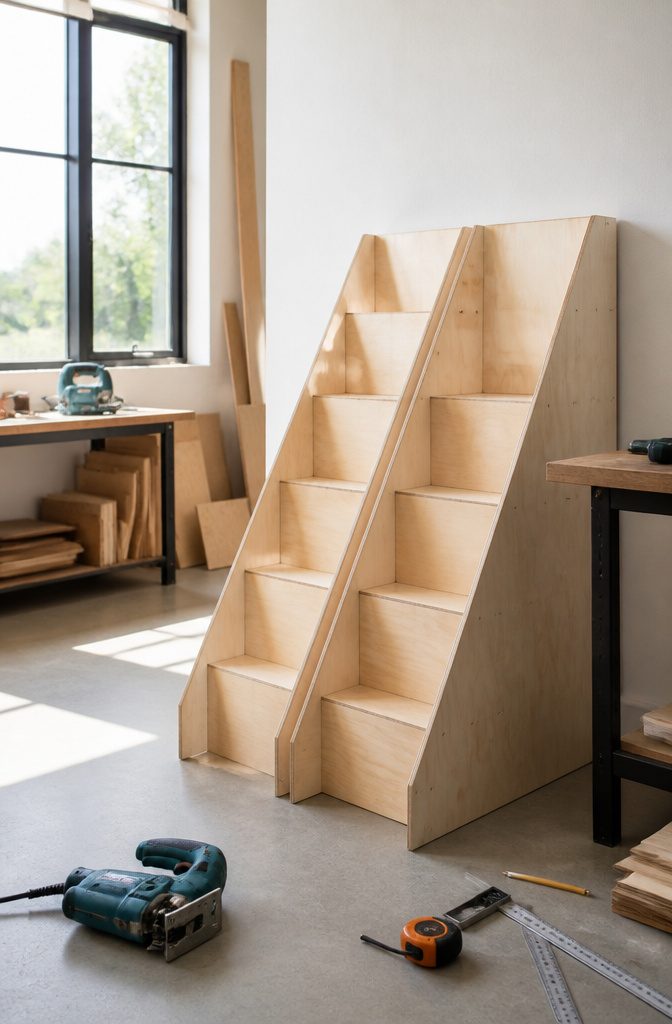
Plywood stairs are the method I default to when the run is straight and the budget is tight.
Two 2′ x 4′ sheets of ¾-inch plywood give you both side stringers in one purchase, and the geometry stays simple enough that most of the cuts repeat.
I mark a 6-inch run and 12-inch rise, adjust if the bunk height demands it, then trace the finished stringer onto the second sheet rather than measuring twice. A jigsaw handles the notches fine.
The edge is where this design shows its limits.
Every ply shows on the cut faces, so edge banding or a solid facing strip is non-negotiable if you want the stair to read as furniture rather than shop class. I have built these without and regretted it.
If you find a DIY staircase plan that utilizes plywood that’s thinner than .75 inches (1.9 cm), or creates stairs that are less than 18 inches (46 cm) wide or more than 12 inches (30 cm) high, keep looking for a safer alternative.
— WikiHow
That ¾-inch minimum is the floor; anything thinner flexes under a climbing kid.
For the treads and risers, scrap ½-inch and ¼-inch plywood fills in, glued and screwed, though I skip the router roundover if the sander is closer at hand.
The whole build paints up clean in a weekend, which is exactly the timeline this audience is working with.
8. Wooden Stairs with Drawers
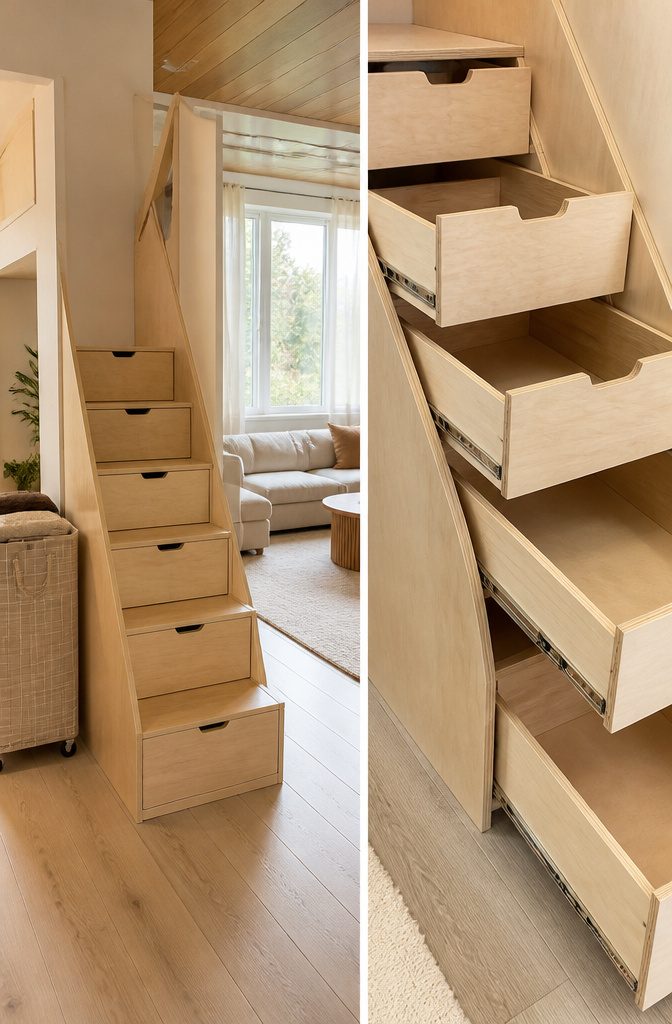
Storage built into the stair treads sounds efficient until you account for what the hardware demands.
Each drawer needs clearance for side-mount slides, which pushes the overall stair width outward by 3–4 inches per side. That extra bulk can block door swings or crowd a narrow bedroom in ways the open-frame designs never do.
I build these only when the room has zero closet space and every square foot of floor needs to earn its keep.
The real cost is complexity.
Every drawer introduces joints that must stay perfectly square while kids step on them daily. A simple open stair takes a Saturday; adding four to six boxes with working drawers doubles the build time and the chance of misalignment.
The material cost climbs too. Between hardwood faces, quality slides, and the plywood for the boxes, you are looking at the $400–1,500 range rather than the sub-$200 weekend project most searchers picture.
If storage is the deciding factor, I would rather add a rolling bin under a basic stair than commit to the drawer route. The bin pulls out, costs less, and does not require the stair itself to act like furniture.
Drawer stairs look clever in photos. In practice, they are worth the trouble only when the alternative is clothing piled on a chair because there is nowhere else for it to go.
9. IKEA Hacks
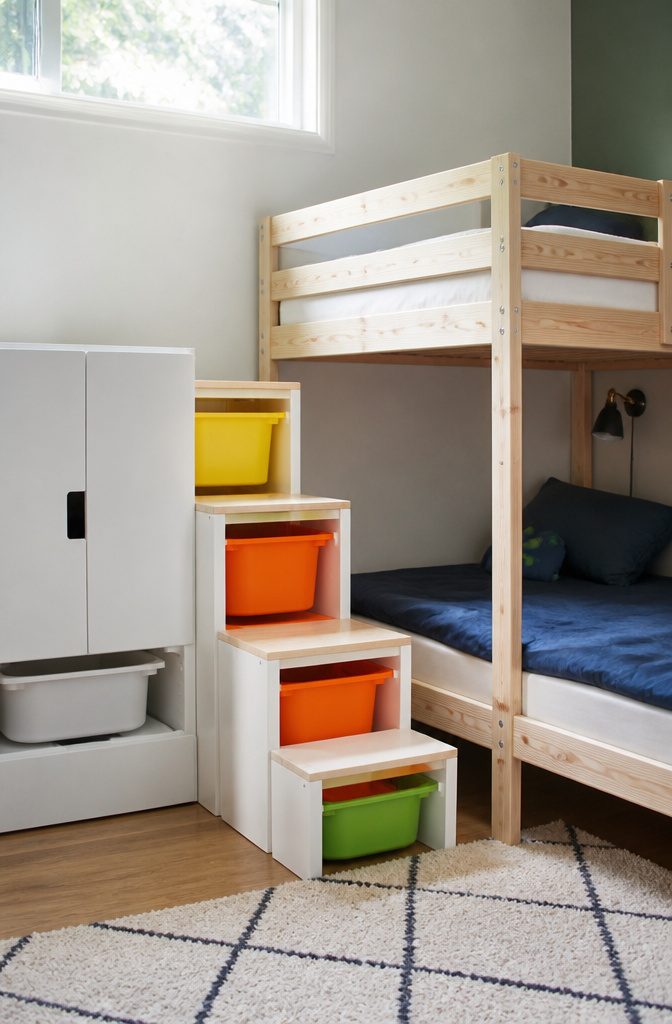
IKEA hacks for bunk bed stairs work best when you accept what the system can and cannot do.
The TROFAST and STUVA frames are the units that show up most often, and for good reason: they are boxy, rigid, and sized for a child’s stride.
I have used TROFAST frames as open stair treads with the storage bins slid underneath, which keeps toys and spare bedding within a kid’s reach.
The 20-inch unit height is where IKEA hacks get tricky. That dimension rarely matches a standard bunk bed rail height without modification, so you end up building a platform or trimming legs to close the gap.
The STUVA frame solves the height problem in some setups. It is taller than TROFAST, and paired with the right mattress stack it can land close enough to the top bunk that a child steps across rather than climbs.
I would not trust the STUVA alone for a tall loft bed, and neither unit is solid wood, so you anchor with metal brackets rather than expecting screws to bite hard.
A 1×2 pine railing screwed to the TROFAST side keeps the assembly lightweight and cheap, though you may want to add a second rail later if your kids treat furniture like a jungle gym.
This approach wins on speed and cost, not on flexibility. If your bed height does not match the IKEA unit, you are modifying instead of hacking, and at that point a plywood box stair might be less work.
10. Custom-Built Stairs
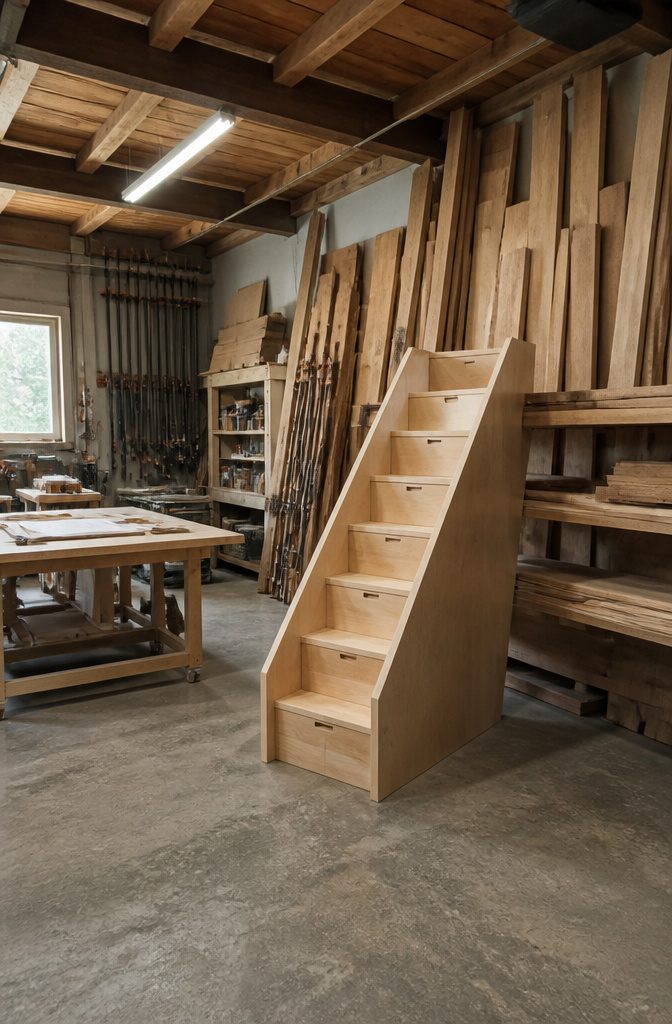
Custom-built stairs make sense only when the bunk bed itself refuses to cooperate with off-the-shelf solutions.
I send people this direction for three situations: a mattress platform sitting at a non-standard height, a staircase that has to wrap around an angled wall, or a design that needs to flow into existing built-in cabinetry.
Each of those breaks the geometry that prefab kits or simple lumber builds are designed for.
This is also the path into the $400–$1,500 cost range, and the jump is not in materials alone.
The hours multiply fast once you are cutting stringers to an irregular rise-run ratio or scribing treads against plaster that has settled over ninety years.
For anything curved or spiral, I skip the DIY conversation entirely and point people toward a local cabinet shop.
Those forms demand a bandsaw and jigs most home shops do not keep, and the safety stakes on a staircase a child will use twice a day are too high for learning on the job.
11. Ladder-Style Stairs
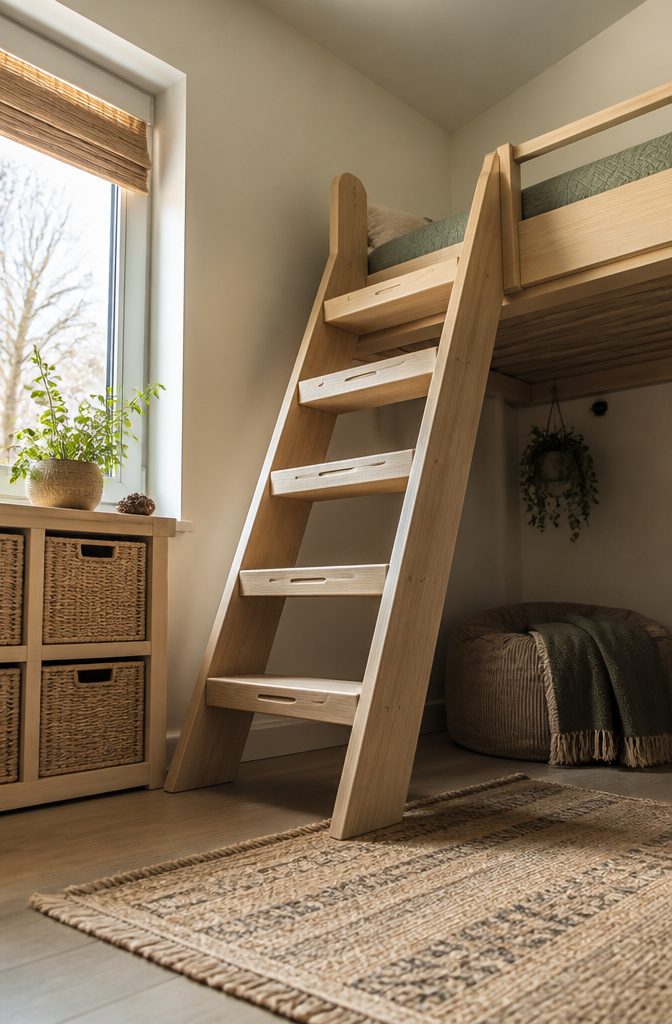
Ladder-style stairs sit at the angle where a ladder and proper stairs overlap, and that geometry is what makes them worth considering for a narrow room.
You keep more floor space than any boxed-in stair design allows, but the footprint shrinks because the base never plants as firmly as true stairs. I build these only when the room is tight enough that every lost inch matters.
The detail that changes how they feel is the tread joinery. I use 2×6 sides with deep routed grooves for the treads rather than surface-mounted rungs.
The grooves set each step into the rail so the foot lands on something that reads as a stair, not a rung you grip with your toes.
The angle still climbs steeper than I’d want for a toddler, but for a grade-schooler or a guest bed used twice a month, the compromise holds.
The routed groove takes more setup than screwing a dowel across the face, yet it keeps the rail profile slim and avoids the hardware that catches shins in the dark.
Materials and Tools
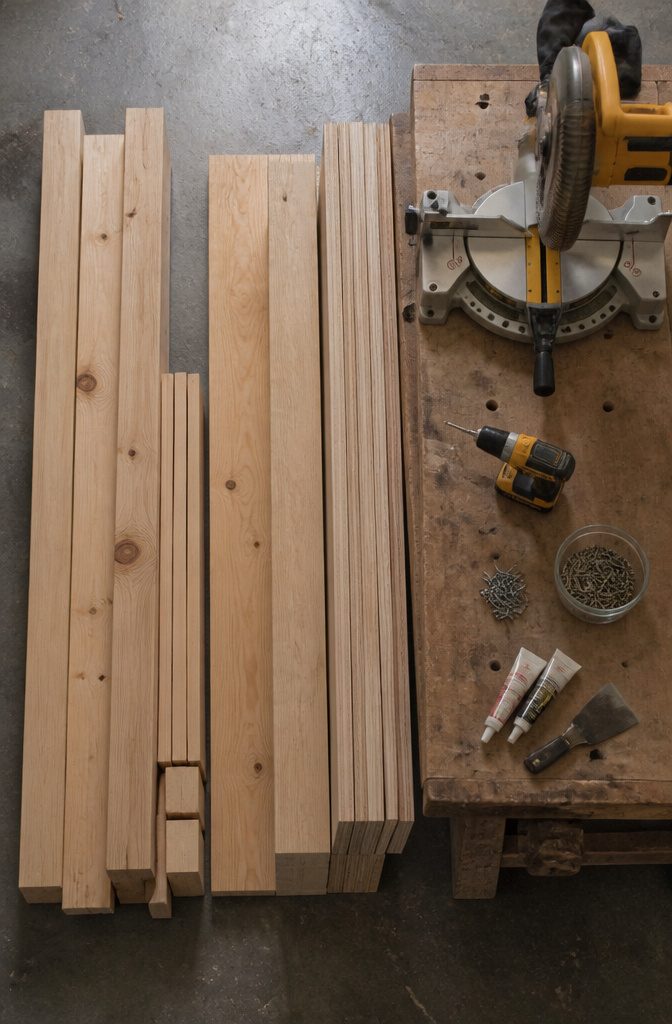
You can build solid stairs from 2x4s, 1x10s, or ¾ inch plywood, depending on the look you want and what your local lumberyard stocks cheap. I keep a running list for every bunk bed project, and it rarely changes:
- Wood: 2x4s for the stringers, 1x10s for treads if you want a traditional open look, or ¾ inch plywood if you are cutting a single-piece staircase. Plywood saves time on a simple straight run; dimensional lumber looks better if the stairs are visible from the room.
- Screws: 2½ inch construction screws for joining treads to stringers, plus 1¼ inch for any backing or bracing. I buy exterior-grade even for indoor use; the coating prevents snap-off during assembly.
- Wood filler: Pick a stainable formula if you plan to finish the wood rather than paint. One tube covers a full stair set with tread holes and a few mistakes.
- Drill and miter saw: The saw does not need to be sliding; a basic 10 inch chops straight ends and the occasional angle cut for a landing.
- Kreg jig: I consider this optional for standard stairs. The loads run vertical, and end-screwing into treads holds fine. I pull it out only for drawer stairs, where pocket holes hide the joinery you will stare at every time you open the step.
- Random orbital sander: 120 grit to knock down construction marks, 220 before finish. A quarter-sheet palm sander works, but the orbital leaves fewer swirl marks on soft pine.
Safety Features That Matter
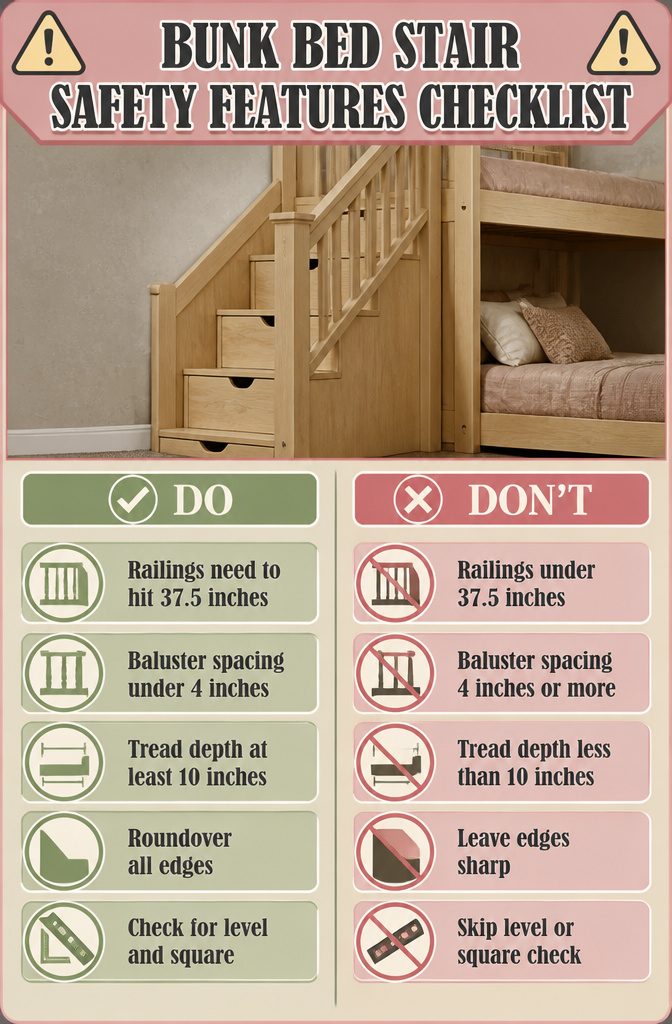
I treat the safety details on diy bunk bed stairs as non-negotiable, because a wobbly tread or a gap a toddler can slip through turns a weekend project into a hazard. Here is what I check before anyone climbs.
- Railings need to hit 37.5 inches at the top edge, measured vertically from the tread nosing. Anything shorter and a sleepy kid has nothing to catch on the way down.
- Baluster spacing stays under 4 inches center to center. A 4-inch sphere should not pass through, which is the standard that keeps small heads from getting stuck.
- Tread depth runs at least 10 inches front to back. Less than that and half a foot hangs off on every step, especially with bigger kids or bare feet.
- All edges get a ⅛-inch roundover bit in the router. Sharp corners on bunk stairs catch shins and snag pajamas; the slight radius costs nothing and saves skin.
- I set a level on every finished tread and reject anything with more than ⅛-inch slope. I also hold a carpenter’s square to each corner where tread meets stringer. Out-of-square joints loosen over time, and I would rather recut one board now than rebuild the whole stringer later.
Design Choices Compared
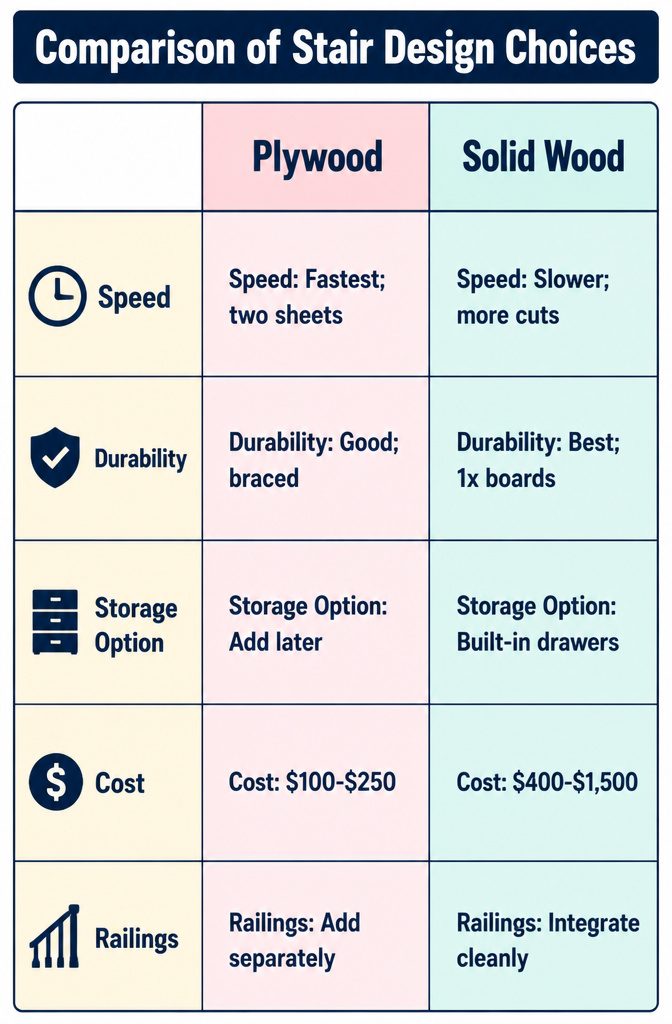
Plywood wins on speed, solid wood wins on durability, and drawers only make sense when storage is the actual problem you’re solving. That is the decision tree I use every time.
| Plywood | Solid Wood | IKEA Components | |
|---|---|---|---|
| Speed | Fastest; two 2′ × 4′ sheets of ¾" plywood, jigsaw, done | Slower; more cuts, more joinery | Fast if you find matching parts; often requires hacking |
| Durability | Good; braced with 2×4 stringers holds up | Best; 1x boards take daily kid use without flex | Varies; not designed for this load |
| Storage Option | Add later with effort | Built-in drawers work cleanly | Limited; hack-dependent |
| Cost | $100–$250 DIY | $100–$250 DIY | $400–$1,500 store-bought or custom |
| Railings | Add separately | Integrate cleanly | Rarely included |
Ana White’s "pancake" style, built from 1x boards with no pocket holes, hits the right balance for most parents: solid wood durability at plywood simplicity. Drawers add a weekend and complexity; skip them unless the closet is already full.
Store-bought staircases run $599.95 to $750 and still need checking for exact bunk fit. I would build before I would buy, and I would build wood before I would build plywood unless the saw skills are still developing.
Cost Breakdown
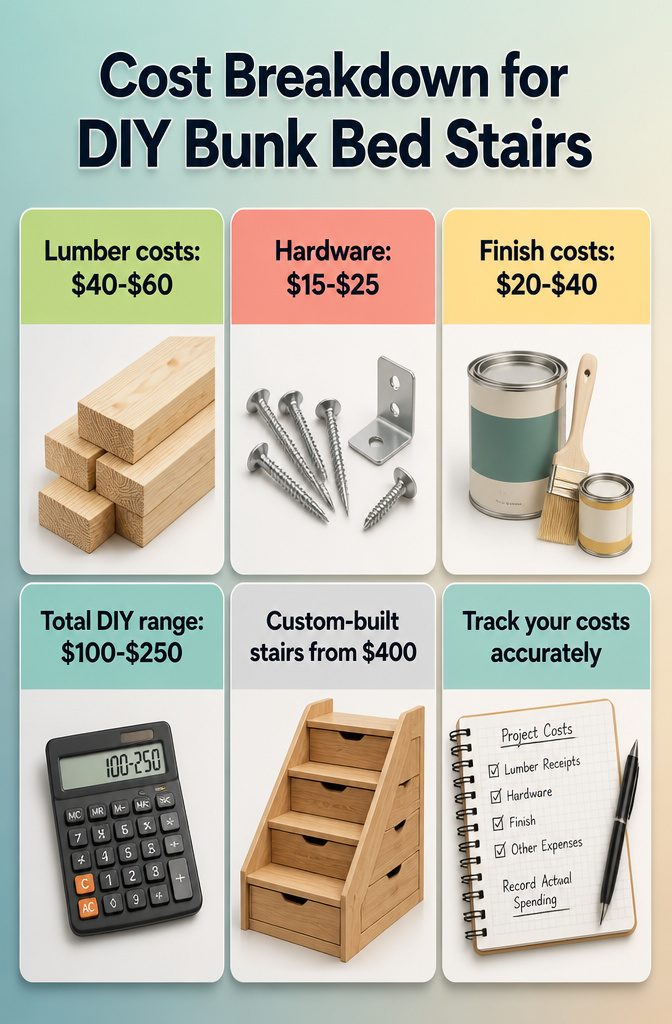
A basic 4-tread stair unit built from 2×4 and 1×10 pine will run about $40–60 in lumber, with another $15–25 for screws and hardware. I like star-drive flat-head screws for this kind of work; they seat cleaner and strip less than Phillips.
Finish is where the range widens: a simple paint or stain you already own keeps you near $20, while buying new primer, paint, and brushes can push you toward $40.
- Total DIY range: $100–250, depending on what you have on hand and how finished you want it to look.
- Custom-built stairs from a shop start around $400 and climb to $1,500 once you add drawers, hardwoods, or complex joinery.
- I track costs per project in a spreadsheet, and this is where I would drop a downloadable template if the site supported it. For now, a notebook works fine: list your actual lumber receipts, not what you think you spent. The difference is usually $20 you forgot about.
Frequently Asked Questions
What materials do I need to build bunk bed stairs?
You need 2x4s for stringers, 1×10 pine or birch for treads, and ¾-inch plywood if you want a faster single-piece build.
Grab 2½-inch construction screws, wood filler, a drill, and a miter saw. A random orbital sander and optionally a Kreg jig round out the list.
How do I ensure the stairs are safe for kids?
Install railings at 37.5 inches high and space balusters no more than 4 inches apart center to center. Treads need at least 10 inches of depth front to back, and every edge should get an ⅛-inch roundover to avoid catching shins or pajamas.
Test the finished stairs by standing on each outer edge and rocking the frame side to side; any flex or squeak means a joint still needs work.
Can I customize the design of the stairs?
Yes.
You can build frame-attached stairs for a permanent setup or freestanding ones if the bed might move. Adjust the angle from 15 degrees for a steeper climb to 30 degrees for easier stepping, though the latter eats more floor space.
Drawer treads, ladder-style routed grooves, or IKEA component hacks all let you tailor the build to your room and skill level.
How much does it cost to build bunk bed stairs?
A basic DIY build runs $100–250 in materials, with lumber alone at $40–60 and screws and finish adding another $35–85.
Custom-built or drawer-heavy designs jump to $400–1,500. Store-bought staircases start around $600 and still may need modification to fit your exact bunk.
What is the cheapest way to make stairs?
Plywood stairs from two 2×4-foot sheets of ¾-inch plywood cost the least upfront and cut fastest with a jigsaw.
You will need edge banding or facing strips to hide the ply edges, and the finish is paint rather than stain. This keeps you at the low end of the $100–250 range.
What are some alternatives to a bunk bed ladder?
Proper tread stairs let a child climb down safely at 6 AM without waking the house.
Ladder-style stairs with routed grooves instead of rungs save floor space while still feeling like stairs underfoot. IKEA hacks using TROFAST or STUVA frames work for quick builds, and drawer stairs add storage where closet space is gone.