What separates them is not style but permanence: how much of your garage you are willing to give up, and for how long.
A doubled, glued 3/4 inch plywood top shows up in more than one build because a single layer warps the first time you clamp hard.
1. Mobile Workbench
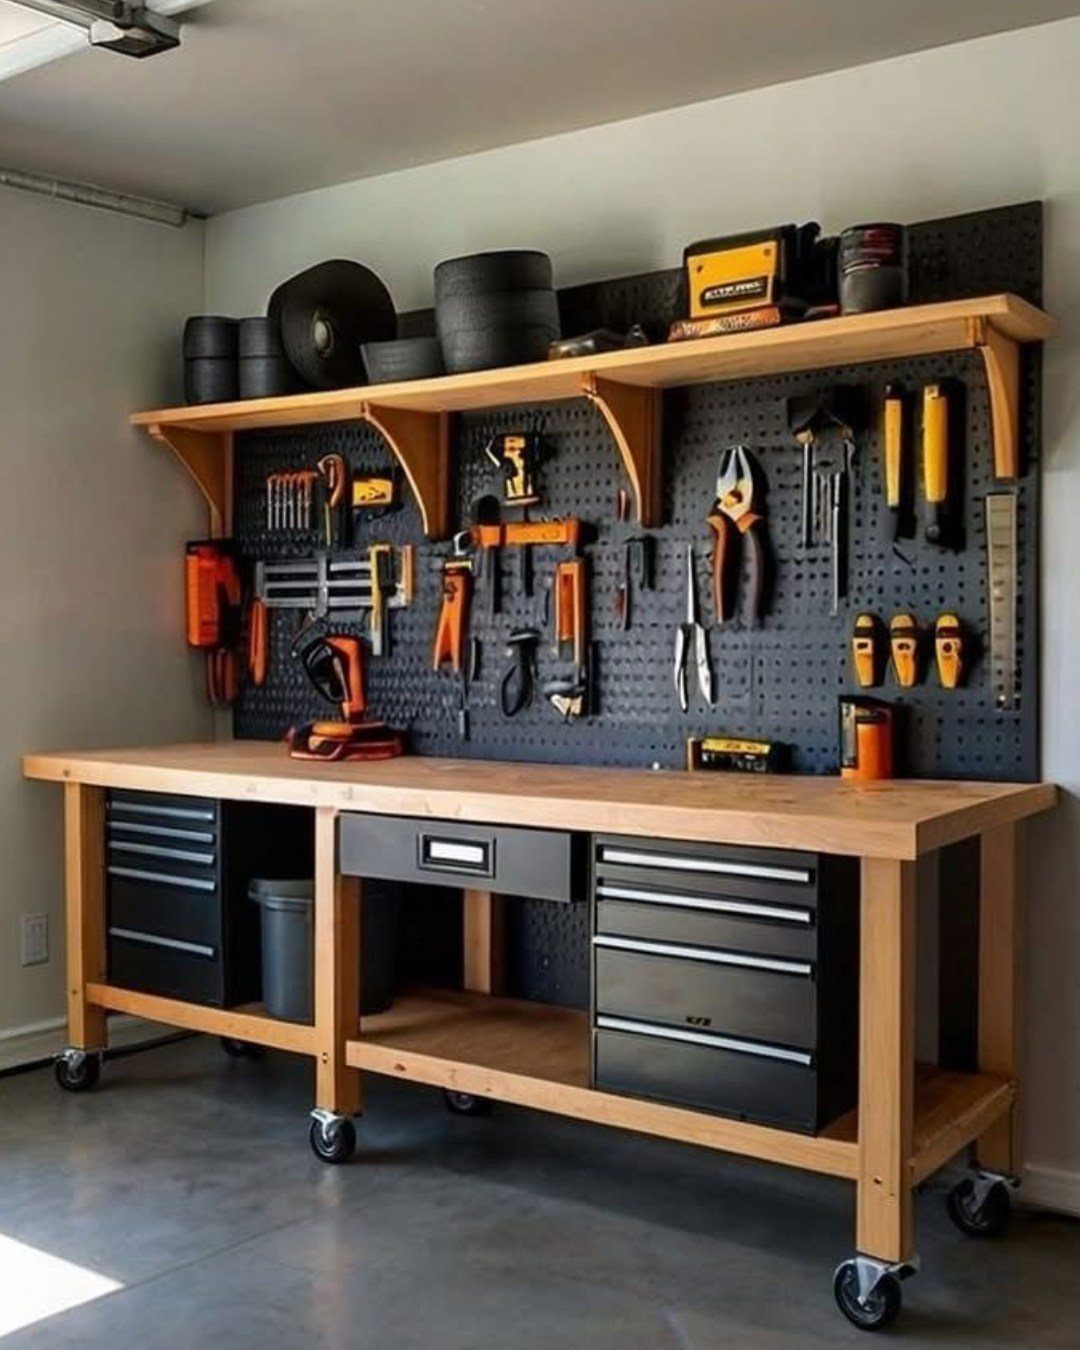
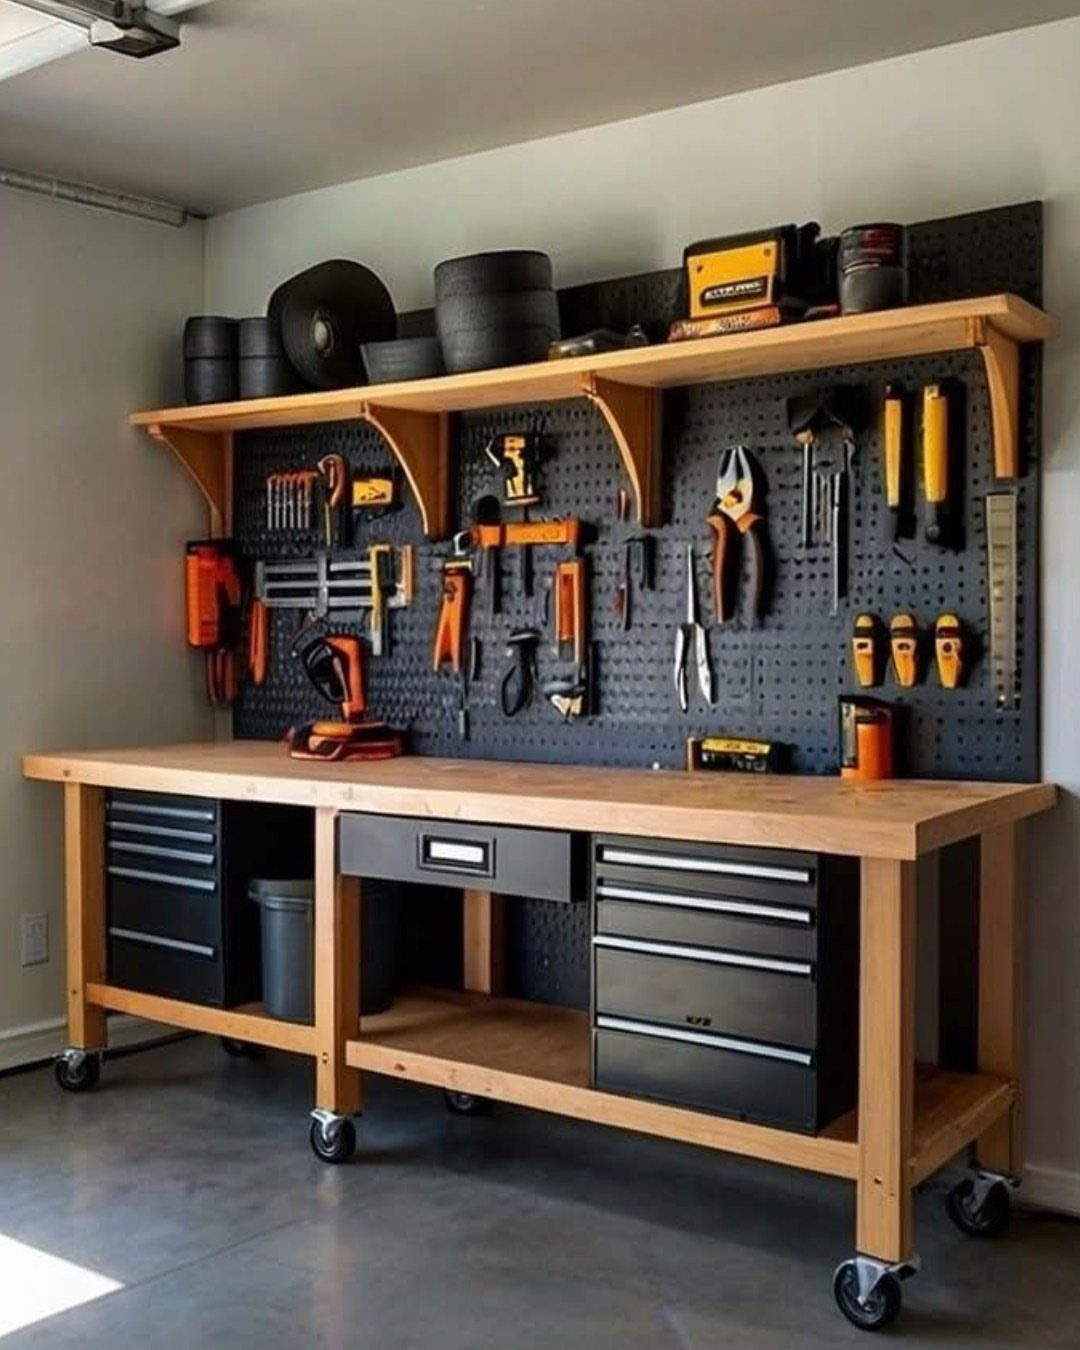
A mobile workbench lets you roll your project to the light, the outlet, or out of the way when the car needs the bay. What I’d check before committing: caster quality and weight rating.
Cheap casters flatten under load and track grit across the floor. Built-in drawers and a pegboard back keep tools close; that overhead shelf adds storage without stealing floor space.
If your garage serves double duty as parking and workshop, this is the format I’d pick. Locking casters help, but a mobile bench will never feel as solid as one bolted to the slab.
2. Folding Workbench
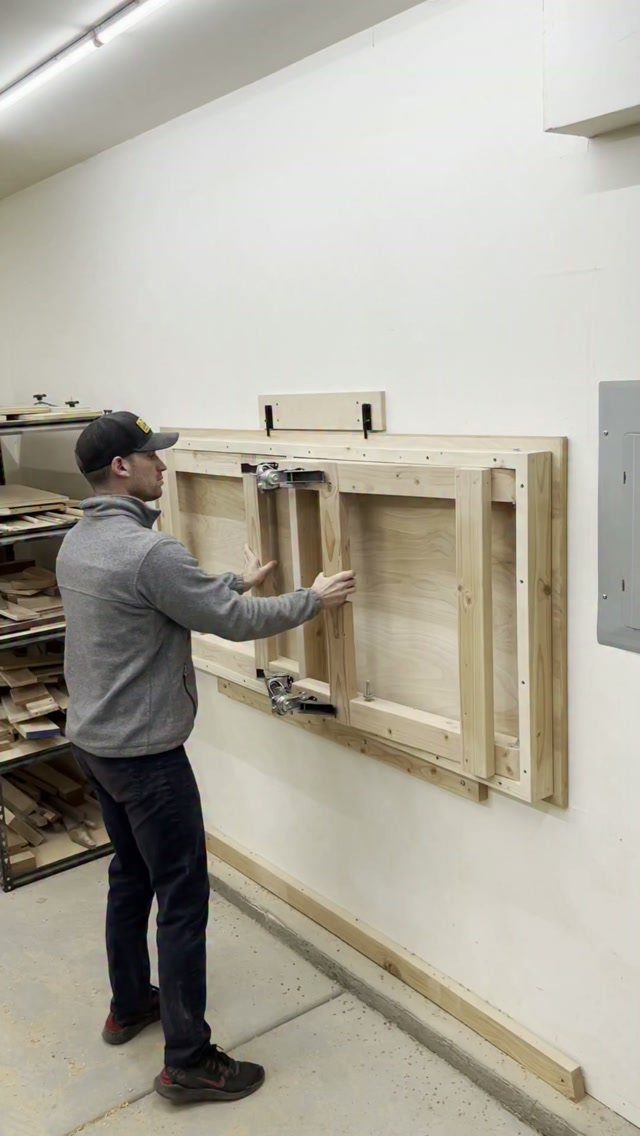
Wall-mounted folding benches suit renters and anyone working in a narrow bay where every square foot counts. A wooden top hinged to fold flat against studs lets the bench disappear when the legs tuck up.
Before installing, I’d verify the wall can take the load: lag bolts into studs, not drywall anchors, and a ledger board below to catch the folded legs. Unfolding it one-handed is possible, which tells me the weight stays reasonable.
I’d keep the surface shallow enough that it doesn’t fight you going up. This is for assembly and light cutting, not heavy pounding.
3. DIY Workbench with Steel Frame
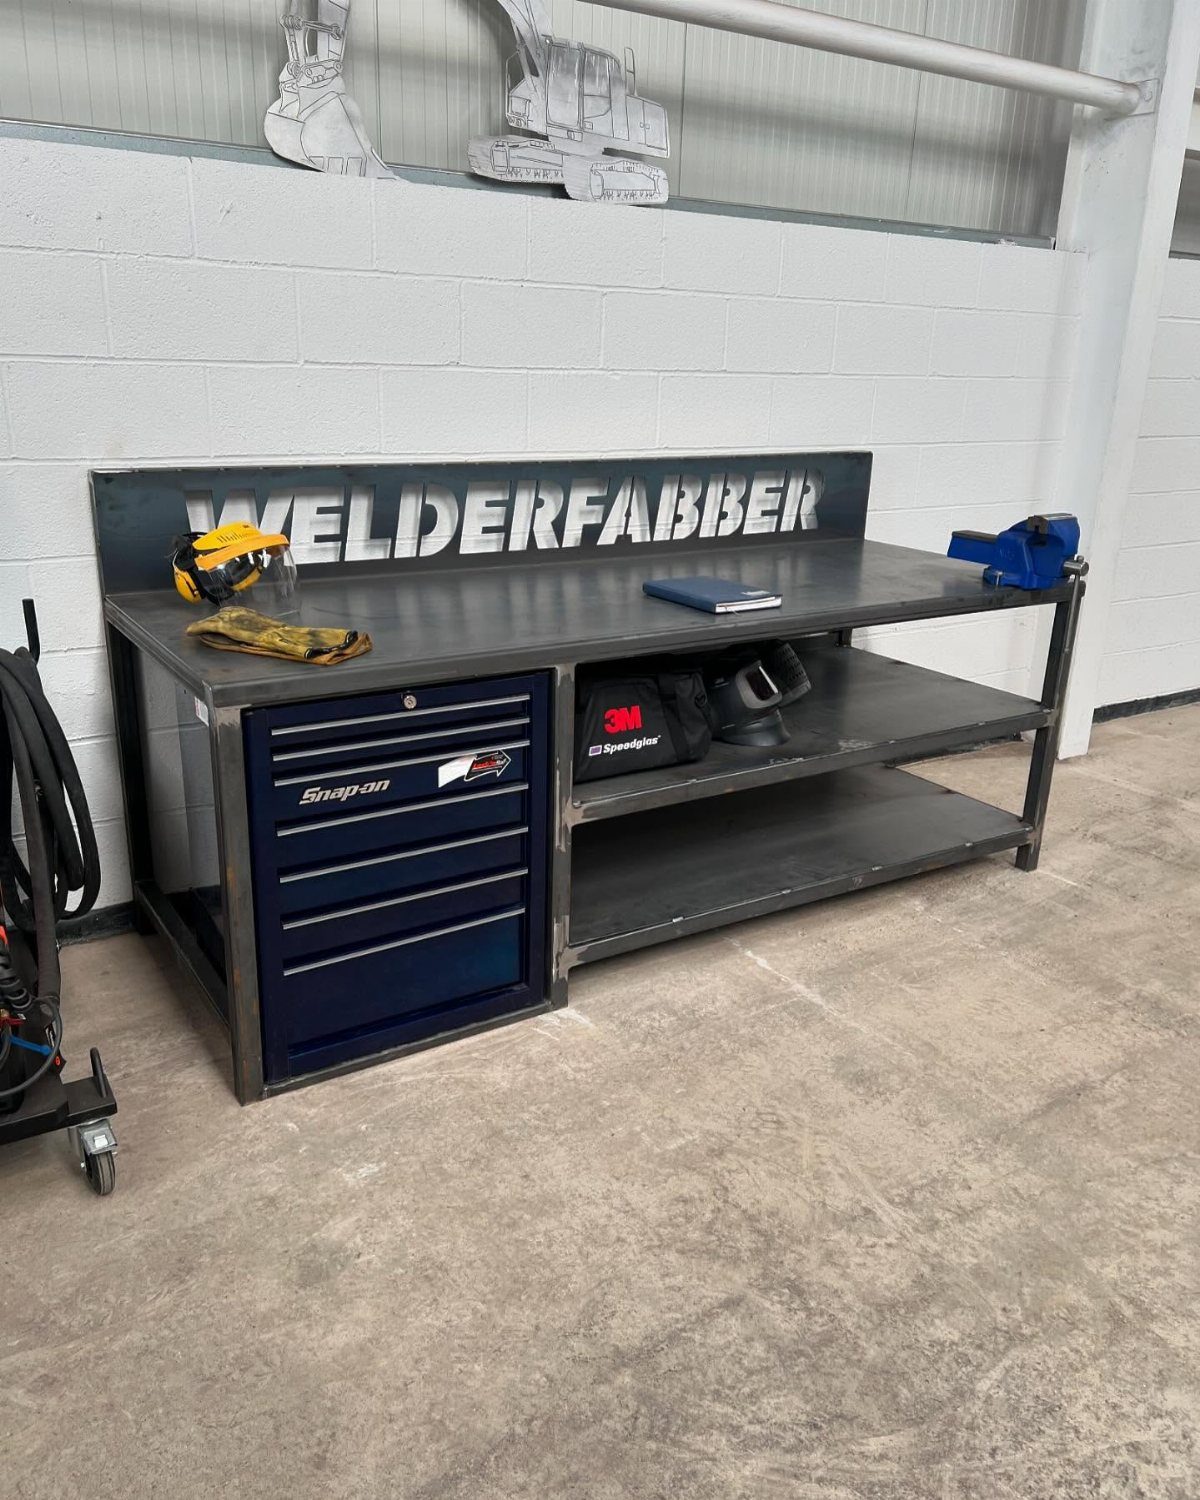
Steel frame benches let you build big without building permanent.
Blue drawers, open shelving, and a vise fill out the frame; the cutout back panel says the builder had scrap plate and a plasma cutter, but the approach works with angle iron from any steel yard.
What I’d decide first: whether to weld the frame or bolt it. Welding is faster and stiffer; bolting lets you disassemble when you move.
The overall size will drift with whatever steel you source, which is part of the appeal. I’d budget for a real countertop, though; 3/4 inch plywood rattles on open steel.
4. 2×4 Workbench
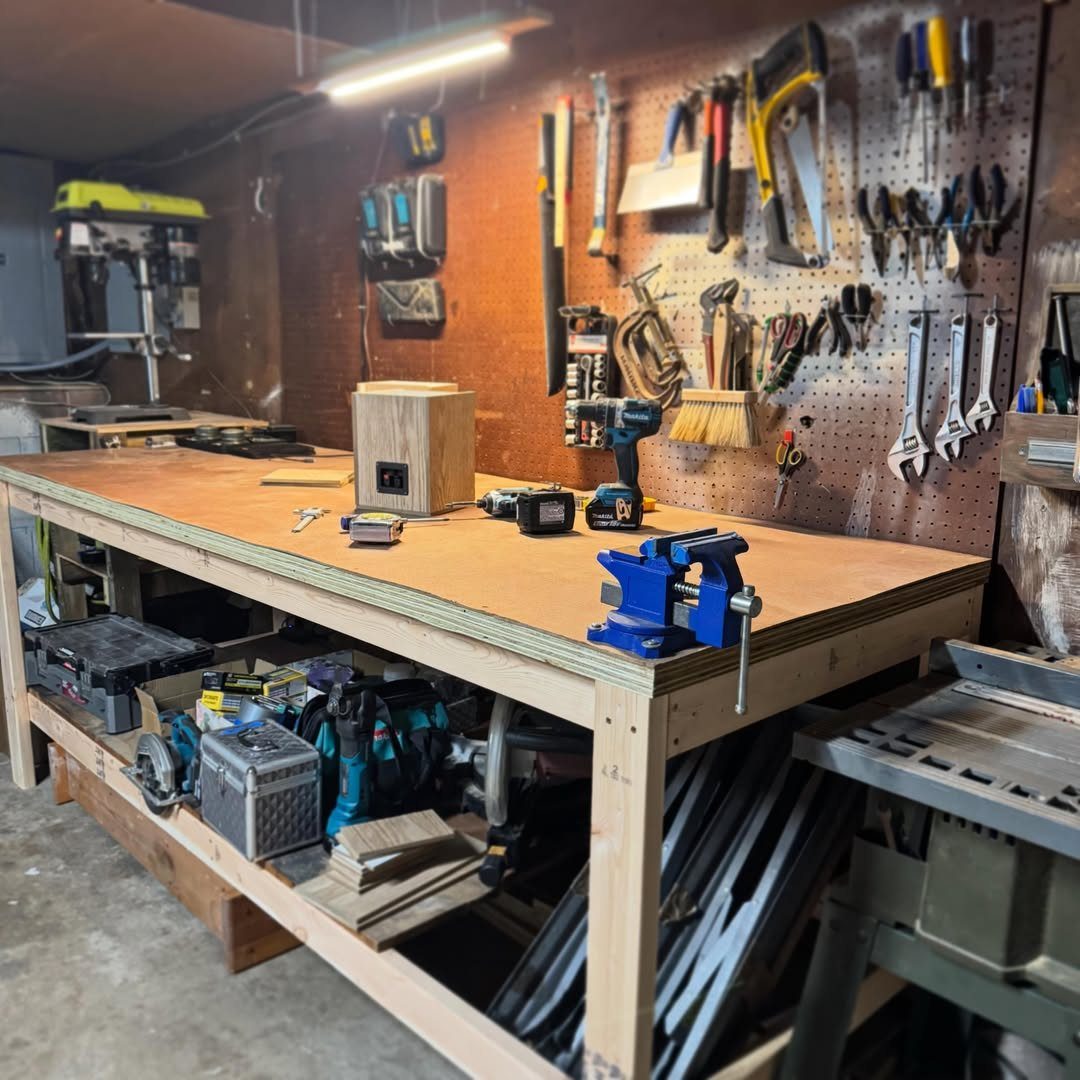
2×4 construction is where I’d send anyone who has never built a bench and owns a saw and a drill.
Plywood decking, a blue vise, and power tools ready at hand, with pegboard behind. The top thickness decides how it behaves; I’d use two layers of 3/4 inch plywood, glued and screwed, so the surface stays flat when you clamp hard.
A single sheet warps. This bench will outlast your first house if you build the legs with two 2x4s sandwiched; one alone twists under racking load.
5. Basic Plywood Workbench
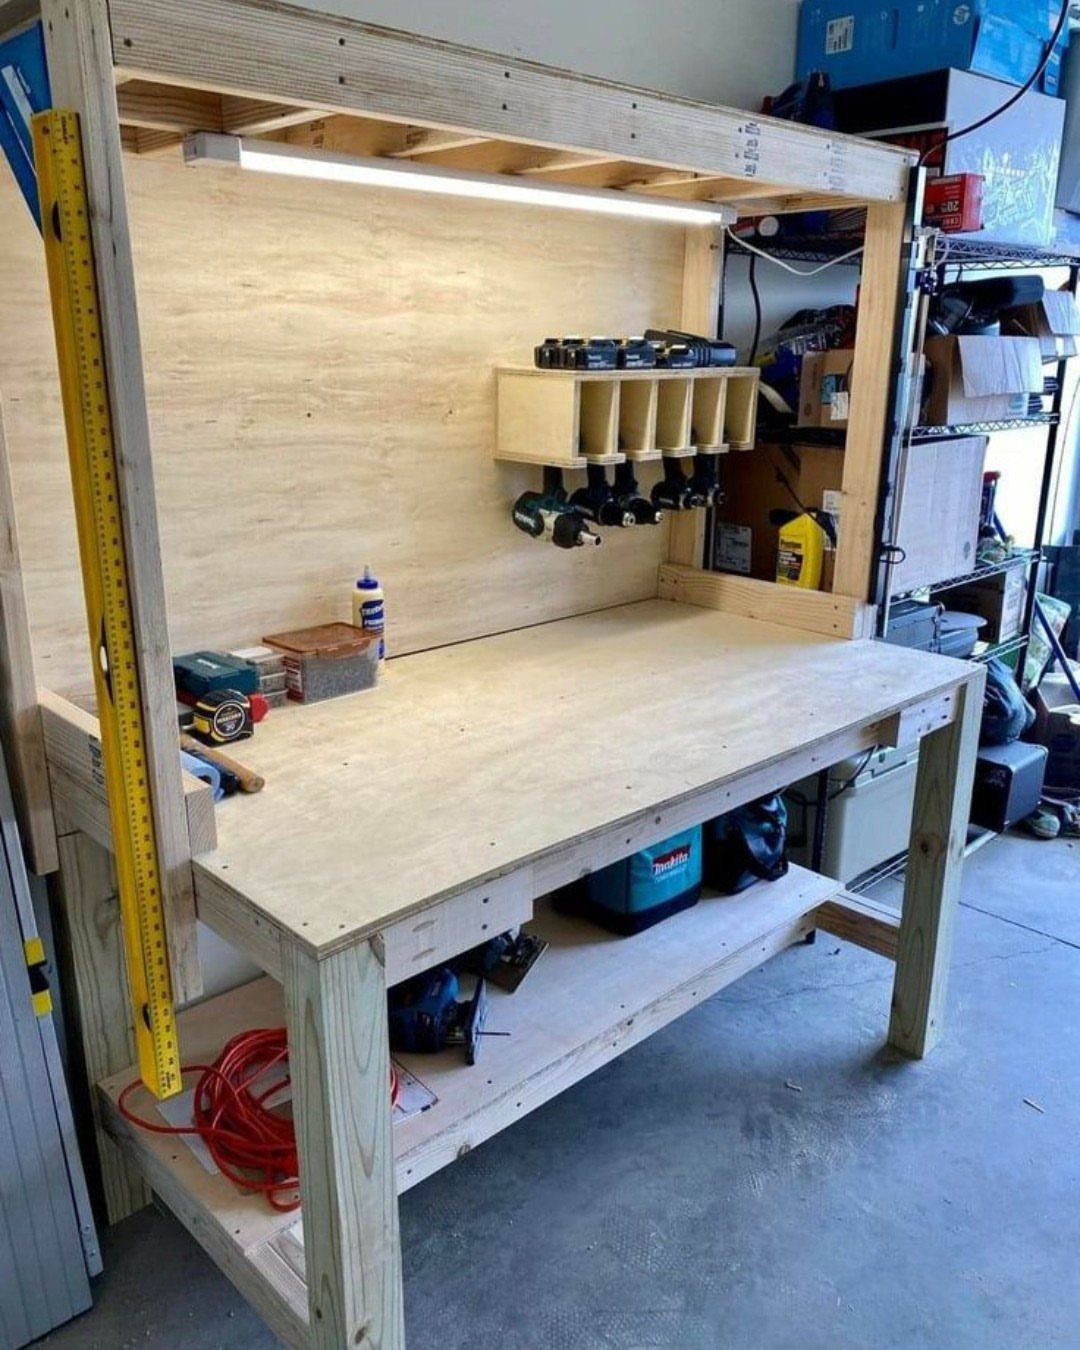
Basic plywood benches reward the builder who wants function this weekend, not a project that becomes its own hobby.
Integrated lighting above and a hanging drill holder below, with Makita gear staged nearby; that lighting is a detail I’d copy, since garage overhead rarely lands where your eyes need it.
What to check: plywood grade. I’d use BC or better for the top, not sheathing with voids that telegraph through paint or catch splinters.
The frame can be simple 2×4 or doubled plywood gussets; either works if the joints are glued. This is the lowest-cost path to a solid surface, and the one I’d choose for a first shop.
6. Flip-Top Tool Cart
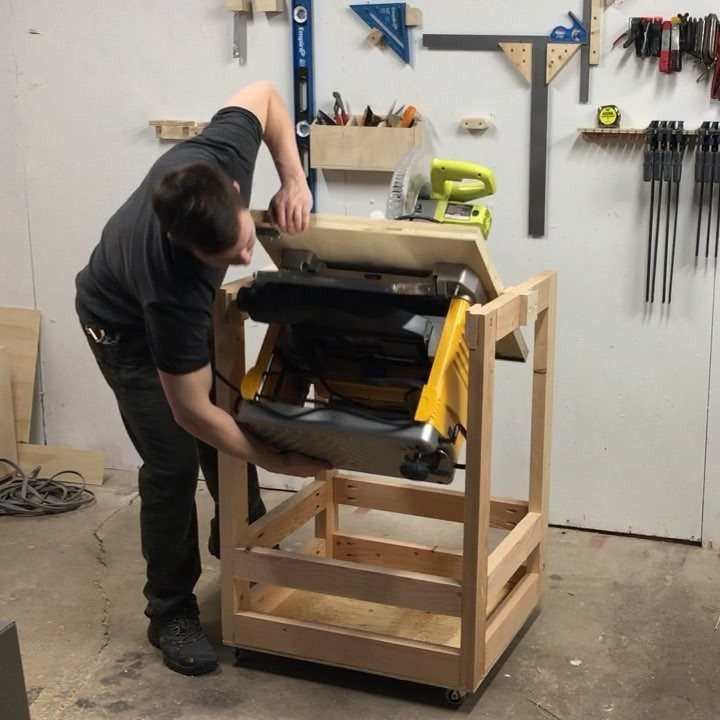
A flip-top cart solves the garage problem I see most often: two large tools, one corner to store them. The pivot hardware carries the whole design; I’d buy a proper flip-top mechanism rather than improvising with pipe and hope.
Balance matters as much as strength; an uneven top wants to fall open or fight you closed. I’d keep each tool light enough to handle and check that the pivot axis sits dead center of the combined mass.
Dust collection takes planning; hoses don’t love rotating with the top, so think through your port placement before you build.
7. Pegboard Tool Storage
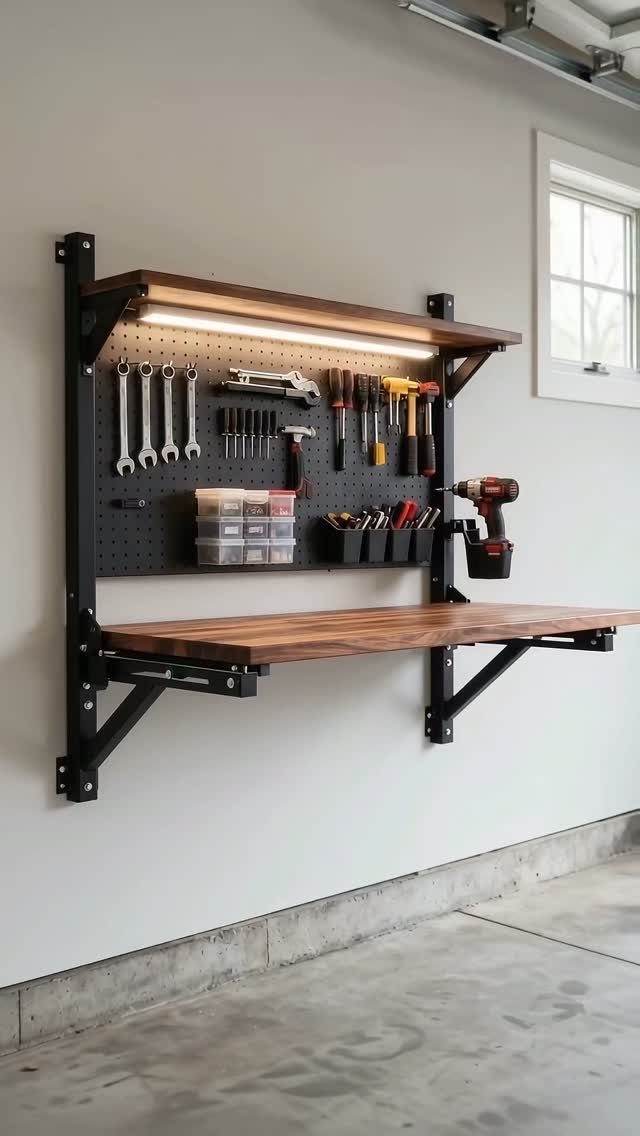
Pegboard above the bench keeps hand tools visible and within arm’s reach, which matters more than it sounds when you’re mid-project and need the right wrench without losing your setup.
I’d check hook gauge against the board holes before buying organizers; standard pegboard takes different hardware than the smaller shop-size holes.
The black metal frame and top shelf in this setup add rigidity and a place for boxes that don’t hang well. Overhead lighting mounted to the frame solves the shadow problem standard garage fixtures create.
I’d keep the heaviest items lower on the pegboard where the hooks have better support; a drill in a fixed bracket is one thing, but a bulky sander bouncing against the wall every time you grab it wears the holes out fast.
8. Pallet Wood Workbench with Storage
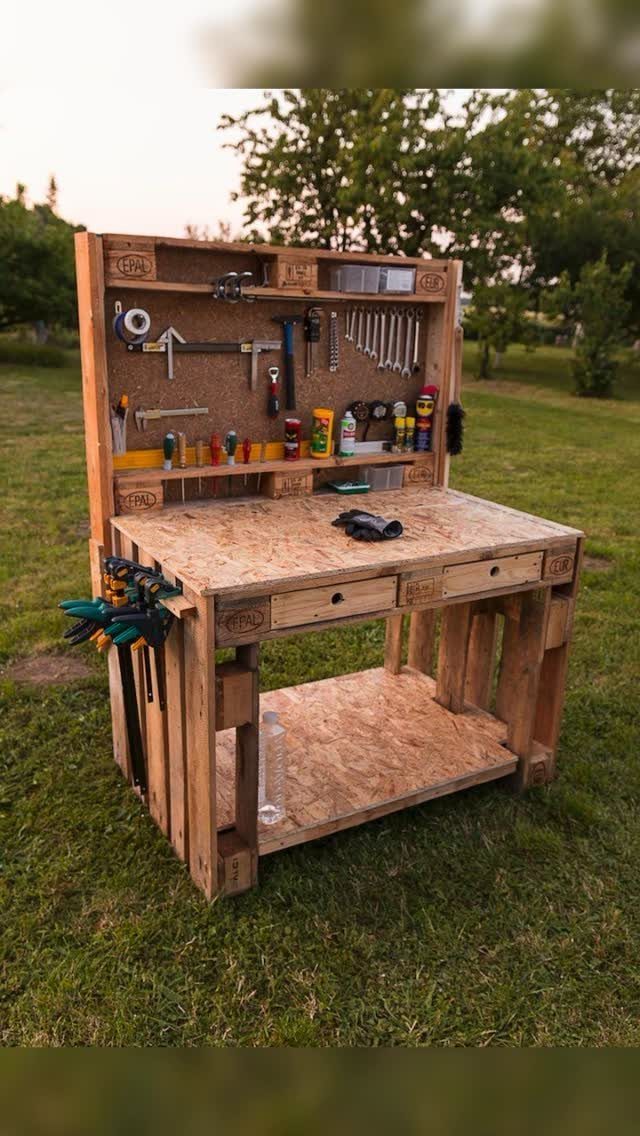
Pallet wood benches appeal to anyone who’d rather spend time than money, but I’d sort the pallets before starting. EPAL marks mean heat-treated, not chemical-soaked; that’s the stamp to look for.
OSB surfaces on the drawers and lower shelf keep costs down, though I’d seal them; raw OSB swells at the edges. The built-in pegboard backboard and small drawers add function that raw pallet builds often skip.
Lower shelf space fits bins or a shop vac. I’d check every slat for embedded grit before planing; nails and concrete fragments dull blades fast.
There are two things that DIYers and home woodworking enthusiasts can never have enough of: work surfaces and tool storage. If you want a quick and easy solution, it’s not too difficult to add a custom workbench to your garage with a wood pallet DIY.
9. Tool Chest Workbench Topper
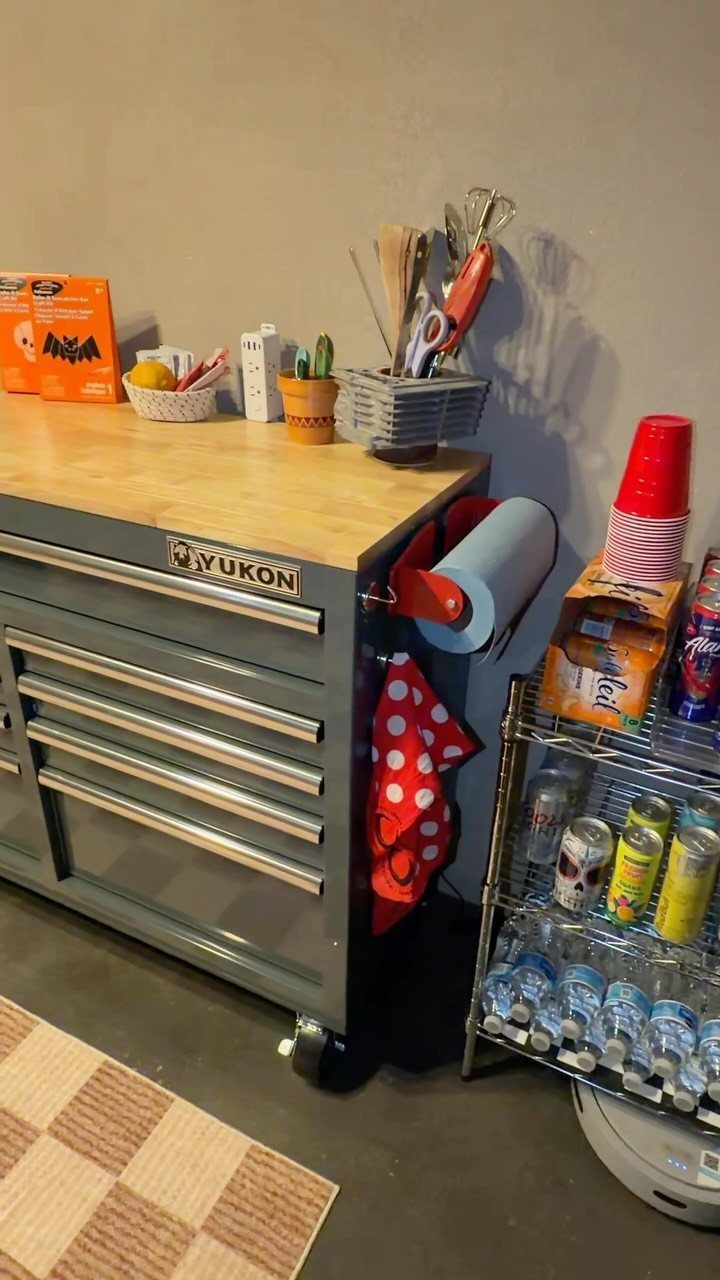
A wooden topper on a rolling tool chest gives you drawers that actually slide straight and a surface that takes clamping without complaint.
The Yukon chest underneath provides the structure; your job is sizing the top so it overhangs enough for clamping but not so much it tips when you lean on it.
I’d bolt through the chest’s top flange rather than trusting weight alone.
This setup moves, which is the point, though I’d park it against a wall for any real hand-planing or chiseling. For light assembly and repair, it’s hard to beat; for heavy pounding, the cart will walk.
10. Modular Garage Storage Workstation
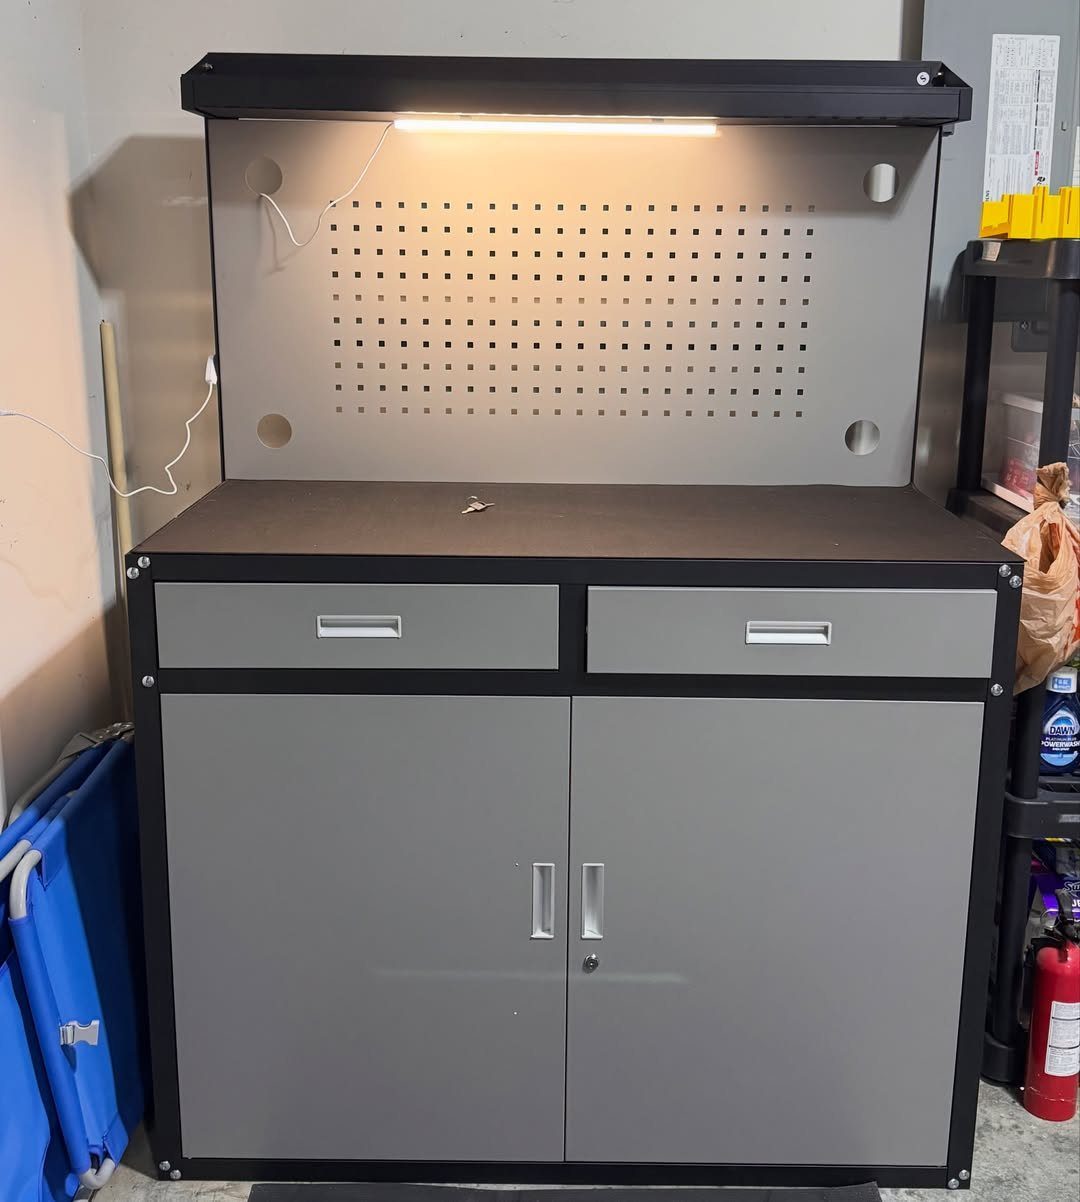
Integrated units like this save the weekend you’d spend building from scratch, and the grey metal finish handles shop abuse better than anything I’d paint myself.
2 upper drawers for small tools, lower cabinets for bulk storage, and the pegboard back panel keeps daily-use items accessible.
The overhead light is the detail I’d verify first; some factory lights are underpowered for detail work. I like a power strip mounted to the side where cords stay off the work surface and out of the way.
Fire extinguisher placement nearby is smart; I’d keep that habit whatever bench I choose. This is for the DIYer who wants to start projects now, not next month.
Materials for Workbenches
Plywood, 2x4s, and casters cover most garage benches for good reason. A single sheet of plywood and four 2x4s will get you a working surface in one weekend; paint or seal it if you want it to last.
Gluing and screwing two sheets of 3/4 inch plywood together gives you a top that holds its shape when you clamp a project down, something a single layer rarely manages.
Height matters as much as material.
I set mine so my forearms rest level when I stand, which usually lands near waist height; a stool changes the math entirely. A lower shelf costs almost nothing in lumber and doubles your storage.
For casters, I ignore the wheel size and look hard at the weight rating, since the cheap ones deform and drag once you load the bench with tools and lumber.
I’d check the stamp before buying; cheap hardware tracks grit and wobbles.
Key Workbench Design Features
Size first, then everything else.
The bench should fill your available space without blocking the garage door, the breaker panel, or your path to the house. I work from the footprint up: once the length and depth are set, height and storage follow.
A flat work surface is non-negotiable.
Hardwood plywood or MDF both work; what I’d avoid is assuming one thickness is enough. For mobility, casters or wheels let you reposition for light, for power, or to park the car.
Storage belongs in the design from the start, not bolted on after. I’d think through what I reach for most often and keep those items closest.
Safety and Ergonomics
Bench height sets whether your back and arms last through a project or complain the next morning. Waist-high or slightly below works for standing work; any higher and your shoulders tense.
If you alternate sitting and standing, an adjustable bench with a crank handle or locking pins solves it, though the frame needs to stay steady at every setting.
A sturdy surface is safety equipment, not just convenience.
Racking load, uneven feet, or a top that flexes under pressure can tip a project or a tool. I’d check the frame on an adjustable bench especially; movement mechanisms add failure points a fixed bench avoids.
For seated detail work, lower the surface so your forearms stay level.
For heavy pounding, I’d rather stand and let my legs absorb the force than hunch over a too-short bench. The right height is the one that lets you forget your posture and focus on the cut.
Frequently Asked Questions
What is the best material for a garage workbench top?
Plywood and MDF both work well, though I’d use two layers of 3/4 inch plywood glued and screwed together so the surface stays flat under clamping pressure.
Hardwood plywood faces smoother than construction-grade, and voids in sheathing will telegraph through or grab splinters over time. For heavy pounding, steel plate handles abuse better than anything wood offers, but it costs more and needs proper support underneath.
How much does a simple workbench cost?
A basic plywood and 2×4 bench runs about $50 to $100 in new lumber, though scrap or recycled wood drops that figure. Spending a bit more on BC-grade plywood or better pays off; the cheap sheathing grades swell and splinter.
Can I put wheels on any workbench?
Most benches can take casters, but I’d check the weight rating before buying rather than assuming any wheel will do.
Locking casters stop the roll, but a mobile bench still shifts under hand planing or mortising in a way a fixed bench never does.
For anything with real force behind it, I’d rather wheel the bench to its spot and shim it level than work on a platform that can move.