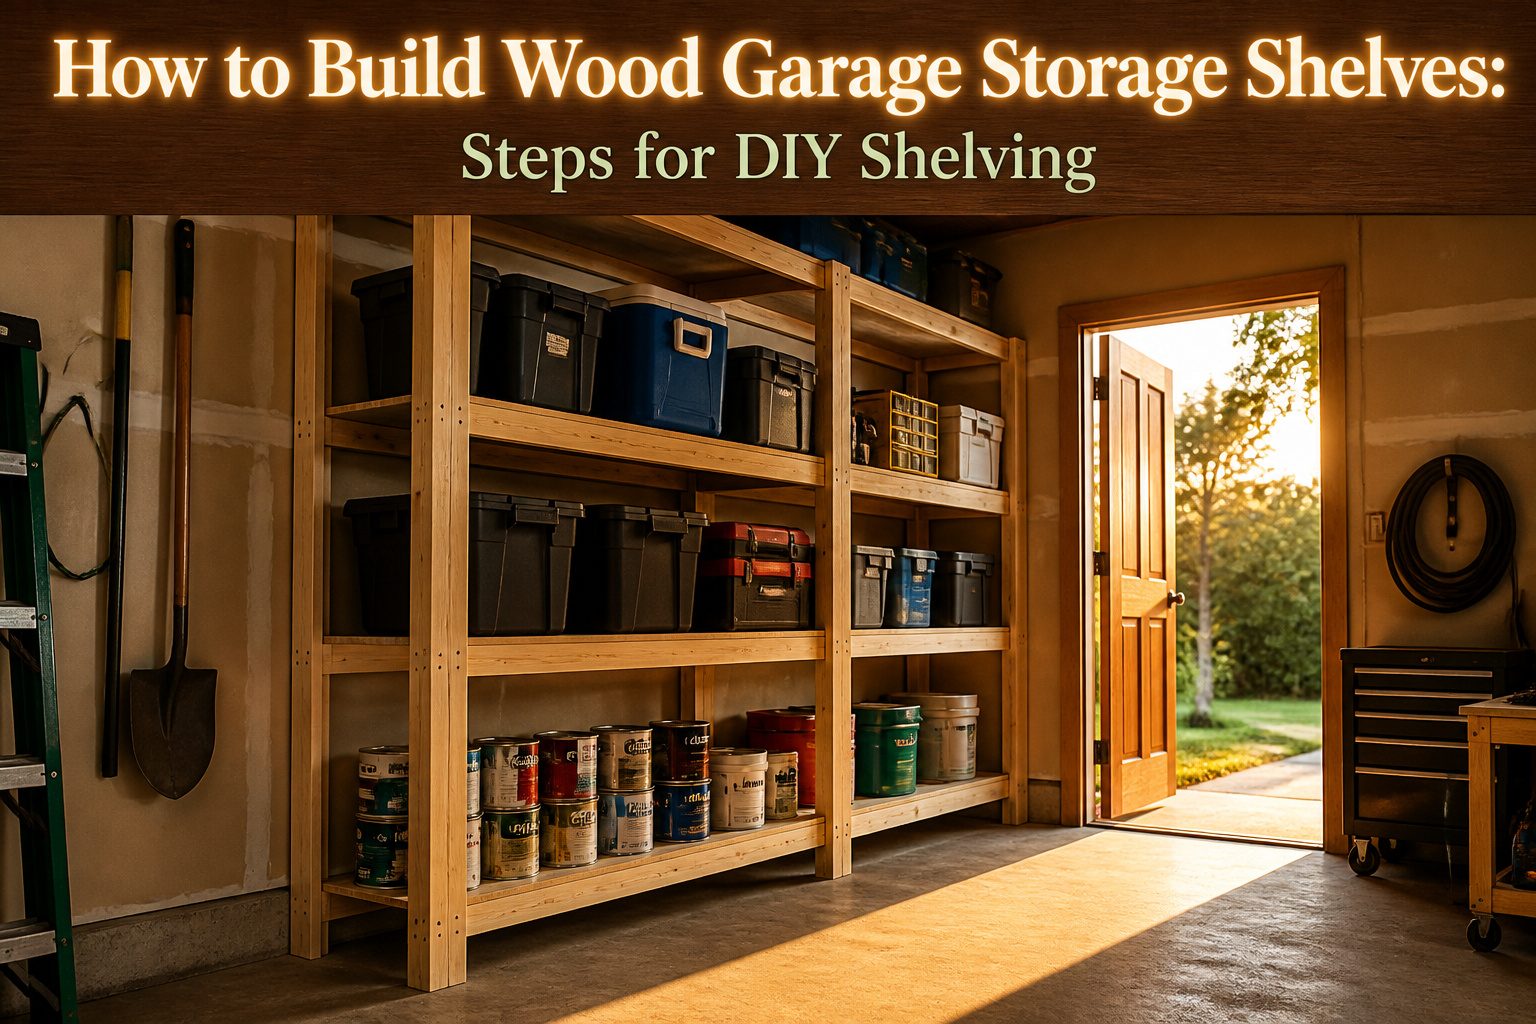
A set of garage storage wood shelves built from 2x4s and plywood can hold paint cans, tool bins, and coolers without sagging, but only if the four vertical supports are cut identically from the same stock.
A quarter-inch variance in one upright telegraphs through every shelf above it, and the unit leans like a ladder no matter how level the frames.
1. Make the Lumber Cuts
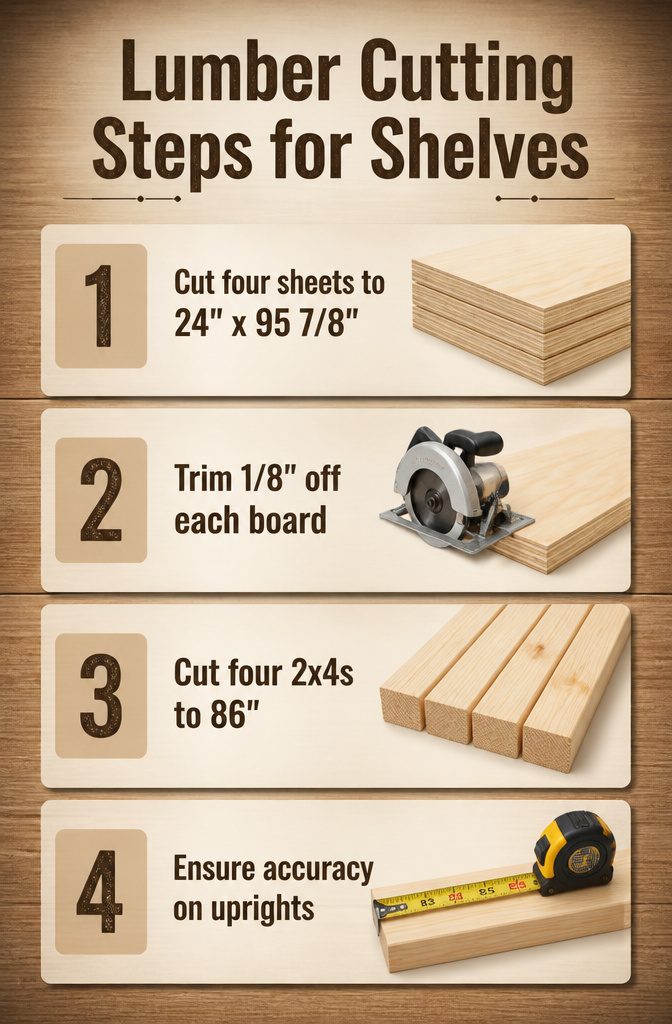
- Start by cutting four sheets of plywood to 24" x 95 7/8" for the shelf surfaces. I usually have these ripped at the store if I can, but a circular saw with a straightedge guide works fine at home. One board will land slightly under 24" after the blade takes its kerf; the plans account for that, so don’t chase perfection.
- Trim 1/8" off the ends of each plywood board so they slide cleanly between the frames later. Skip this and you’ll fight the fit when assembly time comes.
- Cut four 2x4s to 86" for the vertical supports. These determine whether the whole unit stands square or leans like a ladder, so measure against the same tape and cut from the same 10-foot stock to keep them identical.
- Accuracy on those four uprights matters more than anywhere else in the build. A 1/4" variance in one leg telegraphs through every shelf above it.
2. Add Pocket Holes to the Frame Boards
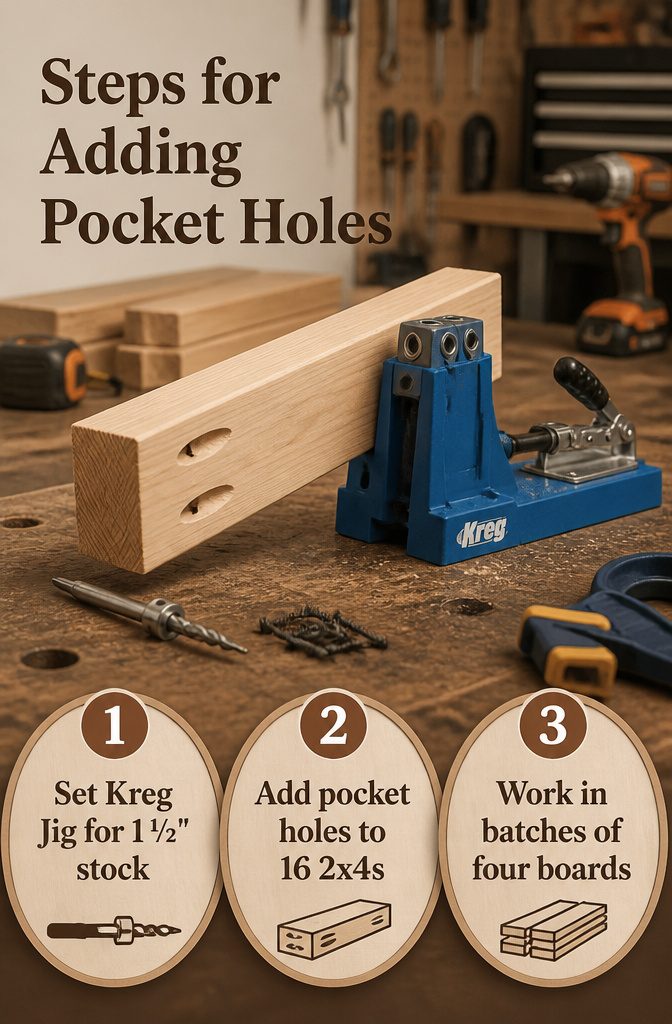
- Set your Kreg Jig for 1 1/2" thick stock before you touch the first board. The collar and drill bit need to match the actual thickness of a 2×4, not the nominal name, or the pocket sits too shallow and the screw blows through the face.
- Add pocket holes to both ends of all sixteen 2x4s cut to 21 inches. I run the front face against the jig base so the holes hide on the back side. That keeps the shelf frame looking clean from the aisle side of the garage, which matters more than you’d think once the unit is loaded and you’re staring at it every Saturday.
- Work in batches of four or five boards, clamping each one flush to the jig before drilling. The step gets tedious, but rushing it leaves ragged pockets that don’t seat screws square. I skip the glue at this stage; it gums the jig base and doesn’t help the drill anyway.
3. Assemble the Shelf Frames
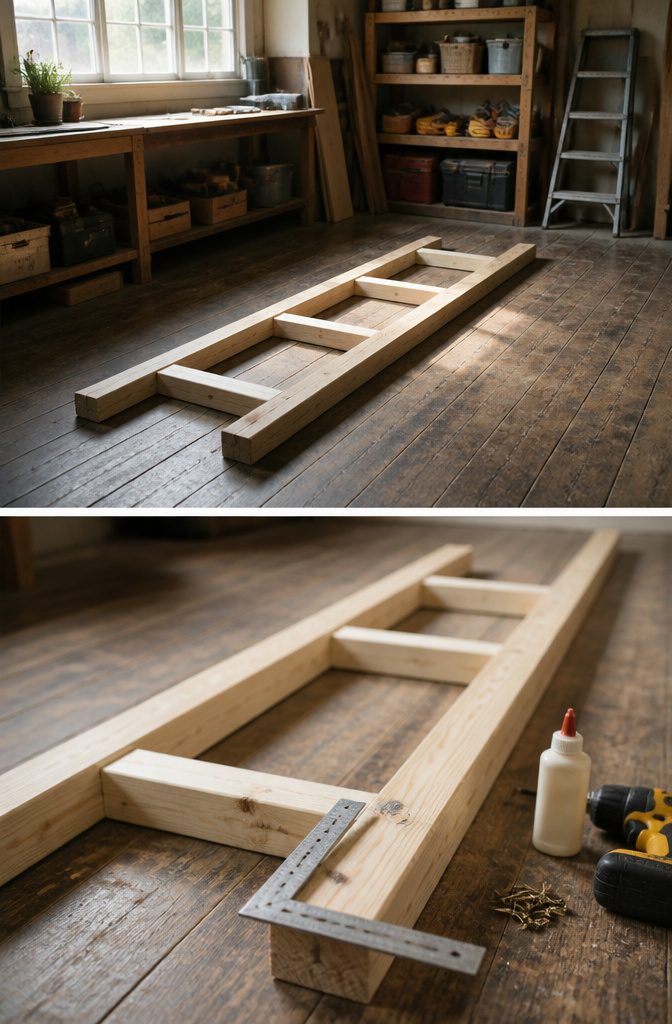
- Lay two 8-foot 2x4s parallel on the floor with the 21" pieces between them, one at each end and two spaced roughly 30" apart in the middle. The spacing matters less than keeping the frame square, so check corners with a framing square as you go.
- Run wood glue on every joint before driving fasteners. Glue plus screws is what keeps these joints stiff under load; screws alone loosen over time in a garage where temperature swings expand and contract the wood.
- Fasten each 21" piece with 2 1/2" pocket-hole screws if you drilled them, or pre-drill through the long sides with a 1/8" bit and use 3" screws driven straight in. Self-tapping screws skip the pre-drilling, but I still drill to avoid splits in construction-grade 2x4s.
- Check the frame for square before the glue skins over. A corner that reads 1/16" off now becomes a shelf that rocks or gaps later. Adjust and re-clamp if needed; the five-minute fix here saves an hour of shimming later.
4. Attach Frames to the Vertical Supports
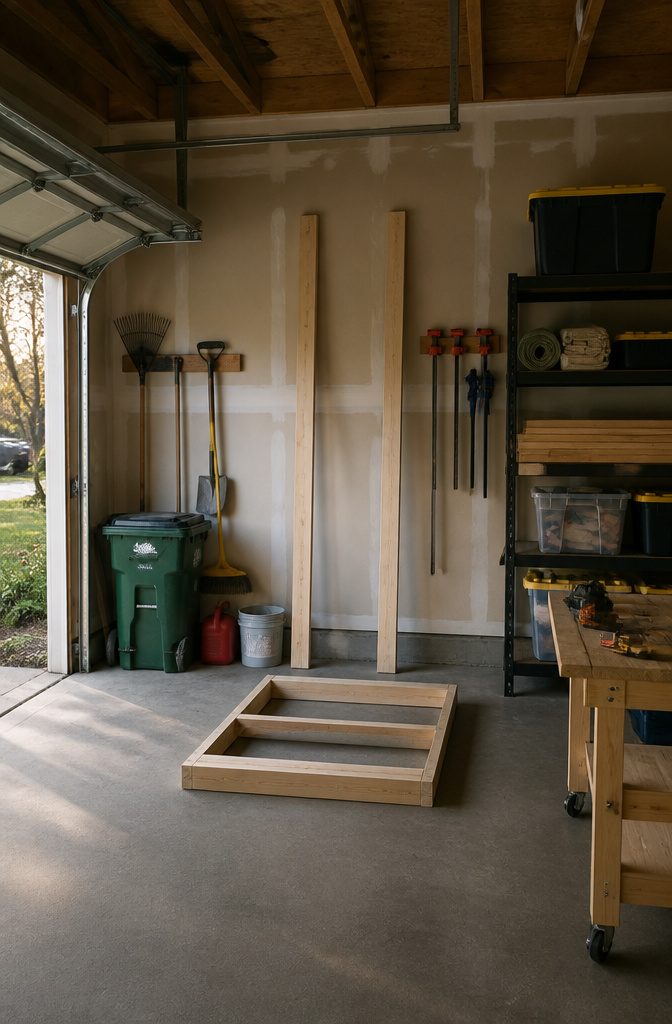
- Mark the shelf heights on all four 86-inch vertical 2x4s at once, clamping them together with a straight edge so your lines stay identical across the set. Account for 4 inches per shelf when you calculate spacing: 3½ inches for the 2×4 frame plus ½ inch for the plywood shelf that sits on top.
- Space shelves to fit what you actually store. One approach sets three shelves 20 inches apart and a fourth at 16 inches, which handles bins of different heights without wasting the top bay. Taller items like shop vacs or camping coolers need that flexibility more than uniform spacing gives them.
- Stand the first pair of verticals and attach the bottom shelf frame, checking that the frame’s bottom edge lands exactly on your mark, not above it. The frame and the shelf above it together eat that 4 inches, so the usable clearance starts above both.
- Level each frame before driving screws. A frame that tilts now tilts every shelf above it. Use wood glue plus 2½-inch self-tapping deck screws through both the inside and outside faces of the joint, or 3-inch screws driven from the shelf frame interior if that is what your build uses.
- Repeat for the remaining frames, then build the matching side. Two people make flipping the assembled unit onto the second pair of verticals far easier than working alone.
5. Paint or Stain the Frame
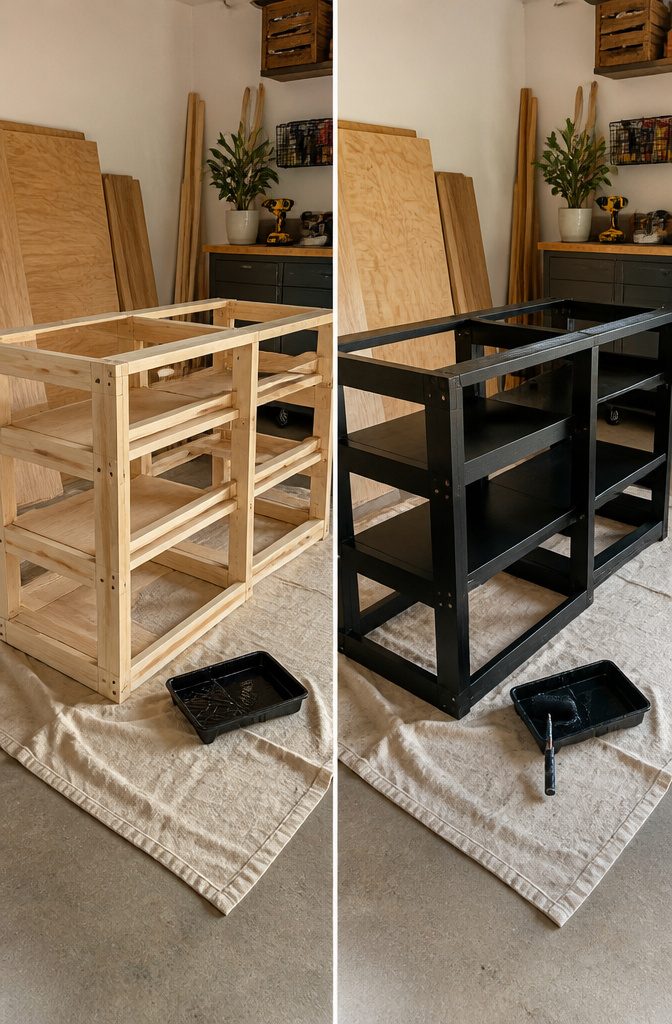
Most garage shelves stay bare wood, but painting the frame now saves you from taping off plywood later. I would do it at this stage every time.
- Paint before the plywood goes on. Once the shelves are in place, you are cutting in against edges and working around corners. With the frame still open, a roller covers the 2x4s in minutes and the paint dries overnight without blocking the build.
- A black frame reads cleaner than raw pine against typical garage walls. Tricorn Black by Sherwin-Williams is the shade I would reach for: it hides scuffs, disappears behind storage bins, and ties in with most garage door hardware and tool chests already in the space.
- If the walls in your garage are a light gray or off-white, the contrast keeps the unit from looking like a forgotten afterthought. I have seen too many DIY shelves turn into visual clutter because the wood frame fought the wall color instead of working with it.
- Stain is the other route, and it is fine if you want warmth. My preference still goes to paint here. Garage floors throw up dust and oil; paint wipes down, and a dark color does not show water rings from snow-melted boots the way a medium oak stain will.
- Two coats on the frame boards, let them cure a full day, then proceed to the plywood. Rushing this step means fingerprints embedded in the finish and shelves that stick where wet paint transferred.
6. Attach the Plywood Shelves
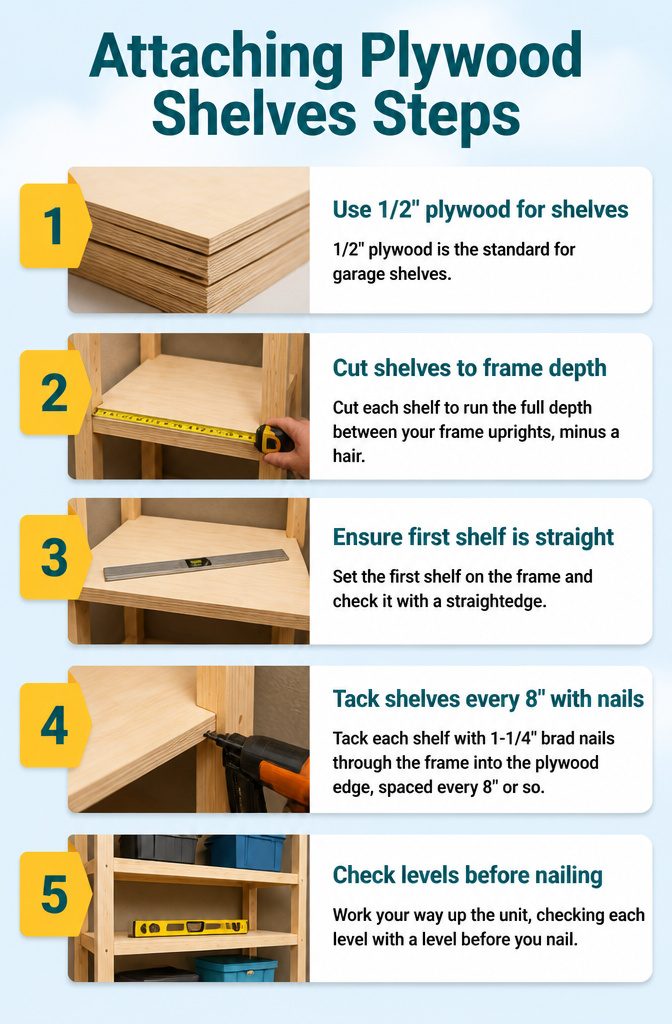
- 1/2" plywood is the standard for garage shelves at this span and load, and anything thinner will sag under paint cans or a bin of tools. I buy BC-grade sanded pine plywood for this; the voids are filled, the face is smooth enough to wipe clean, and it costs less than cabinet-grade stock that no one will see.
- Cut each shelf to run the full depth between your frame uprights, minus a hair so you can slide it in without fighting. I leave about 1/32" play; too tight and humidity will bind it, too loose and the edge looks sloppy.
- Set the first shelf on the frame and check it with a straightedge before you commit. A bowed sheet will rock, and brad nails will lock that warp in place forever. Flip the sheet if you need to; the crowned side goes up, where gravity and load will eventually press it flat.
- Tack each shelf with 1-1/4" brad nails through the frame into the plywood edge, spaced every 8" or so. I drive them slightly below the surface so they don’t snag plastic bins. The nails are mainly to keep the shelf from sliding; the real strength comes from the frame underneath, which is why I don’t bother with screws here unless the shelf is going to hold engine parts.
- Work your way up the unit, checking each level with a level before you nail. A shelf that’s out of true now means everything you stack on it will lean, and you’ll notice every time you slide a box across.
7. Secure the Unit to the Wall
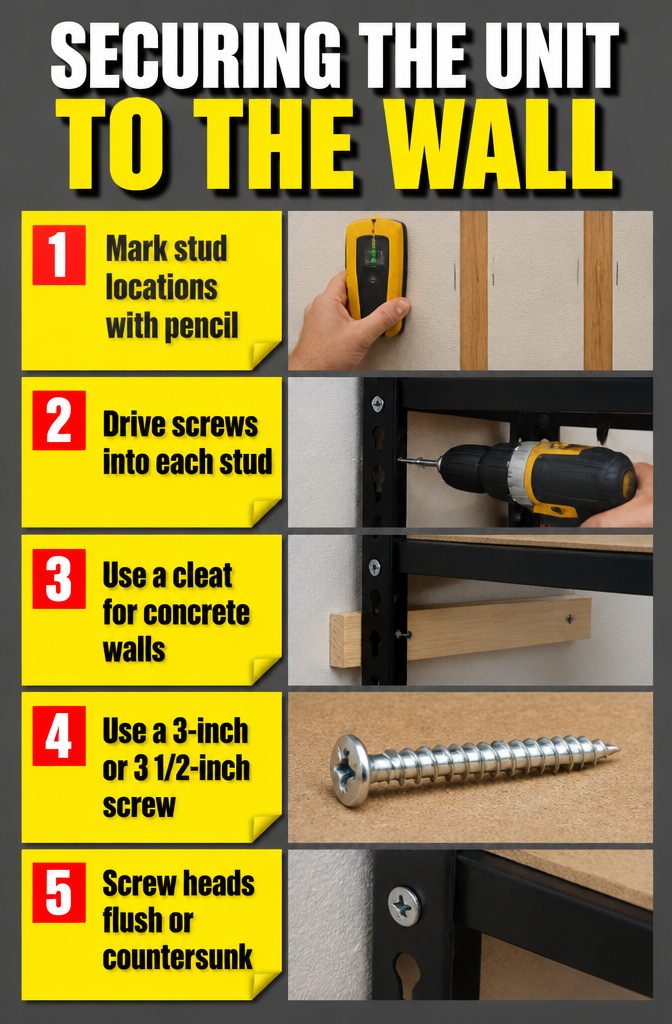
A freestanding shelf unit can hold its own weight, but the moment you load it with paint cans or a cooler, it wants to walk.
Standard stud-framed walls give you the anchor point you need; concrete or block walls need a different approach, and this step assumes the usual 2×4 framing behind drywall.
- Run a stud finder along the wall behind the unit and mark every stud location with light pencil ticks.
- Drive a 3-inch or 3 1/2-inch screw through the back frame of the shelf and into the center of each stud you found. Hit at least two studs, preferably four, one near each corner of the unit.
- If your garage has a concrete ledge along the floor that pushes the unit out from the wall, screw a 2×2 cleat flat against the studs first, then fasten the shelf frame to that cleat.
The screws should bite deep enough that the head sits flush or slightly countersunk. Anything shorter risks pulling out under a heavy load, and anything longer is unnecessary in standard 1/2-inch drywall over a stud.
Plywood, Oak, and Pine Compared
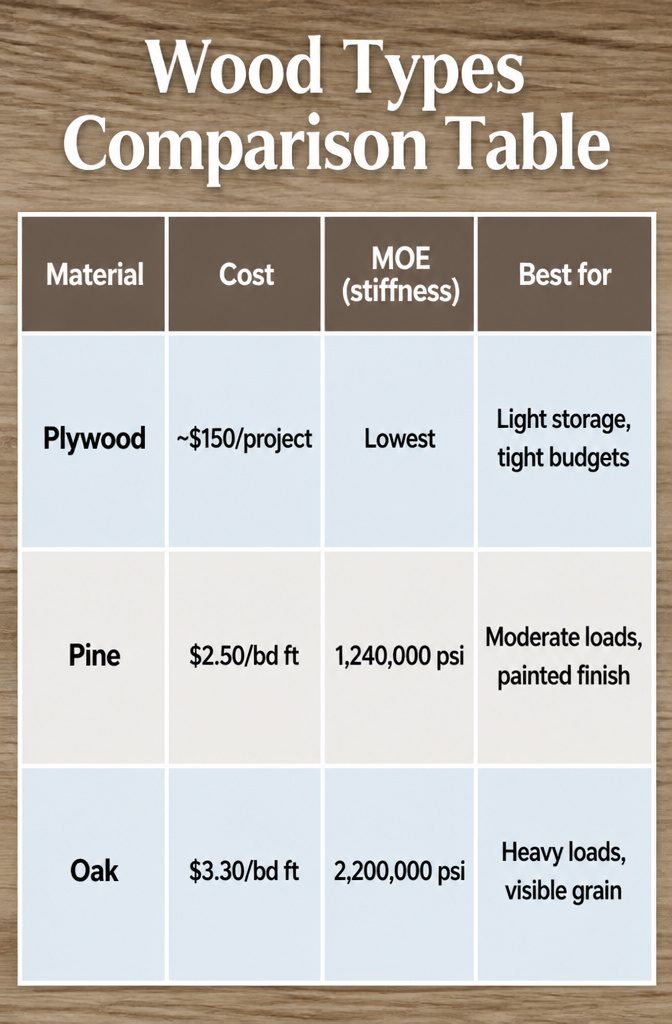
Plywood runs about $150 for a full project if you buy premium stock, which is the grade I’d actually use in a garage.
Stiffness is where you actually feel the difference between these three woods. Plywood sits roughly 15% below pine and 44% below oak on the Modulus of Elasticity scale, meaning it will sag sooner under the same load.
That said, its bending strength runs 4,900 to 6,200 psi, comparable to solid wood, so it won’t snap on you. It just bows.
Oak, specifically red oak, carries an MOE of 2,200,000 psi, nearly double white pine’s 1,240,000.
That extra stiffness means oak shelves carry double the weight before you notice sag. At $3.30 per board foot versus pine’s $2.50, the question becomes whether you’re storing bins of holiday decorations or engine blocks.
| Material | Cost | MOE (stiffness) | Best for |
|---|---|---|---|
| Plywood | ~$150/project | Lowest | Light storage, tight budgets |
| Pine | $2.50/bd ft | 1,240,000 psi | Moderate loads, painted finish |
| Oak | $3.30/bd ft | 2,200,000 psi | Heavy loads, visible grain |
For my own garage, I’d go plywood for overhead racks or anything getting painted anyway.
The sag only matters if you span too far or load too heavy. For a workbench shelf holding tools, I’d spend the extra on oak.
Pine lands in the awkward middle: cheaper than oak, but soft enough that dings and sag show over time. If the budget is truly tight, plywood with a shorter span beats pine with a long one.
What the Build Costs
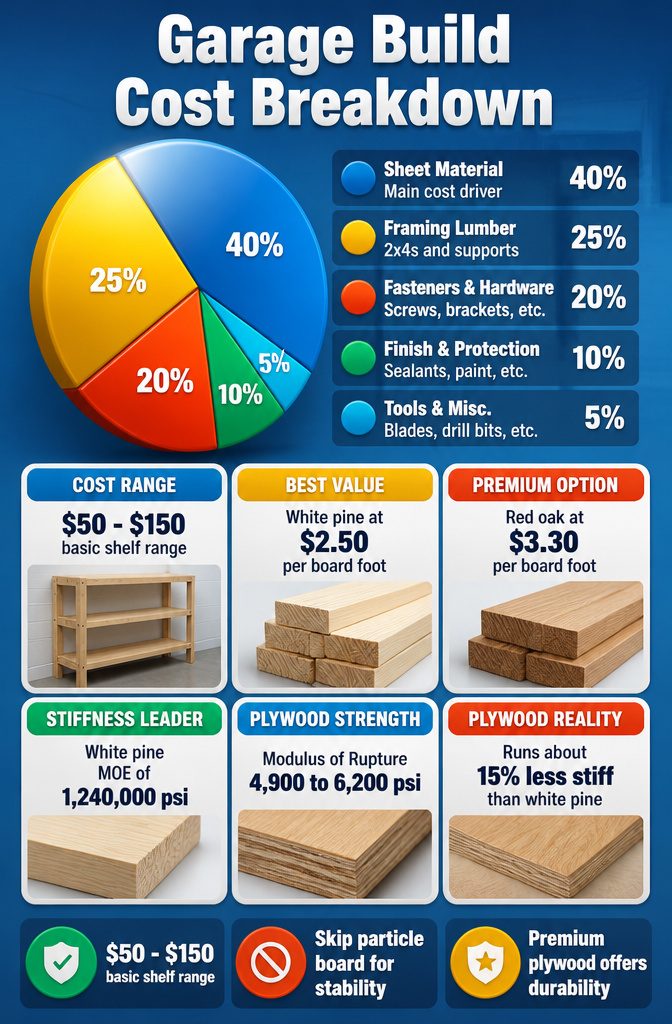
Most sources put a basic garage shelf build between $50 and $150, and the gap comes down to one decision: what sheet material you actually bring home.
At the low end, you’re looking at particle board or the cheapest plywood on the rack, which gets the job done for a weekend but will sag sooner than you’d like.
I would skip particle board entirely for anything wider than 24 inches; it gains weight fast, swells if your garage ever sees moisture, and the savings evaporate the first time you reload it.
The $150 figure assumes premium plywood, and that is where I would put my own money. Plywood runs about 15% less stiff than white pine and 44% less stiff than red oak, so it will sag under lighter loads no matter the grade.
But its Modulus of Rupture, 4,900 to 6,200 psi, keeps it from failing outright, and a better grade simply buys you more years before that sag becomes annoying.
The cheap stuff warps faster, holds screws worse, and often costs you a rebuild inside two or three seasons.
White pine lands in the middle at roughly $2.50 per board foot, 25% below red oak’s $3.30, with an MOE of 1,240,000 psi that still outperforms any plywood on stiffness.
For a garage where appearance does not matter, I would rather build from pine 2x4s and a mid-grade plywood skin than pretend particle board is a bargain.
Measuring Your Garage Space
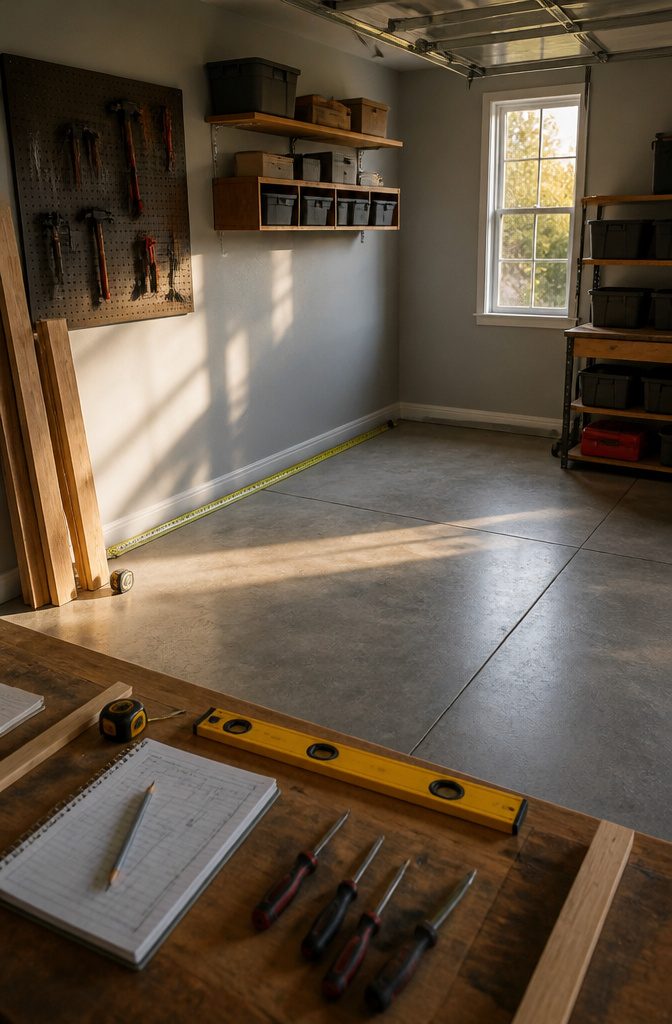
A garage storage wood project lives or dies on the tape measure.
I start with the three dimensions that matter: the width of wall you actually have, the height to the garage door track when it is open, and the depth your storage totes demand.
One of those will cap your design, and you want to know which before you buy a single board.
For a freestanding unit that might move with you, vertical supports need to clear the track by a few inches.
A 105-inch wall with a low track might force an 86-inch total height, not floor-to-ceiling. Depth is what lets you stack those totes two-deep or one; 24 inches is the width that usually works for standard bins without stealing walkway space.
Shelf spacing is where I would spend extra thought. Fixed shelves built around one box size become useless when the next project brings home something taller.
Adjustable spacing, set with screws through the legs rather than permanent cleats, lets you move a shelf from 16 inches up to 20 inches when the holiday bins come back.
That flexibility costs nothing in lumber, just a few extra holes drilled now.
Frequently Asked Questions
What is the best wood for garage shelves?
Plywood, oak, and pine are all solid choices, and the best one depends on your load and budget.
Red oak carries roughly double the weight of white pine before sagging thanks to its 2,200,000 psi Modulus of Elasticity, but it costs about $3.30 per board foot versus pine’s $2.50.
Plywood is the cheapest path for a full project at around $150, and its 4,900 to 6,200 psi bending strength keeps it from failing even though it sags sooner under load.
How do you build garage shelves?
Cut plywood to 24" x 95 7/8" for shelves and 2x4s to 86" for vertical supports, then drill pocket holes into the frame boards and assemble rectangular shelf frames with glue and screws.
Stand the frames between pairs of vertical supports at your chosen heights, paint or stain the frame before sliding in the plywood shelves, and anchor the finished unit to wall studs with 3-inch screws so it cannot tip under load.
How much do DIY garage shelves cost?
Expect to spend between $50 and $150 depending on the sheet material you choose.
The low end gets you particle board or bargain plywood that will sag and swell faster than you’d like; the $150 figure covers premium plywood, which is where I would put my own money for a build that lasts.
White pine 2x4s at $2.50 per board foot and red oak at $3.30 per board foot sit in the middle and high end for solid wood options.