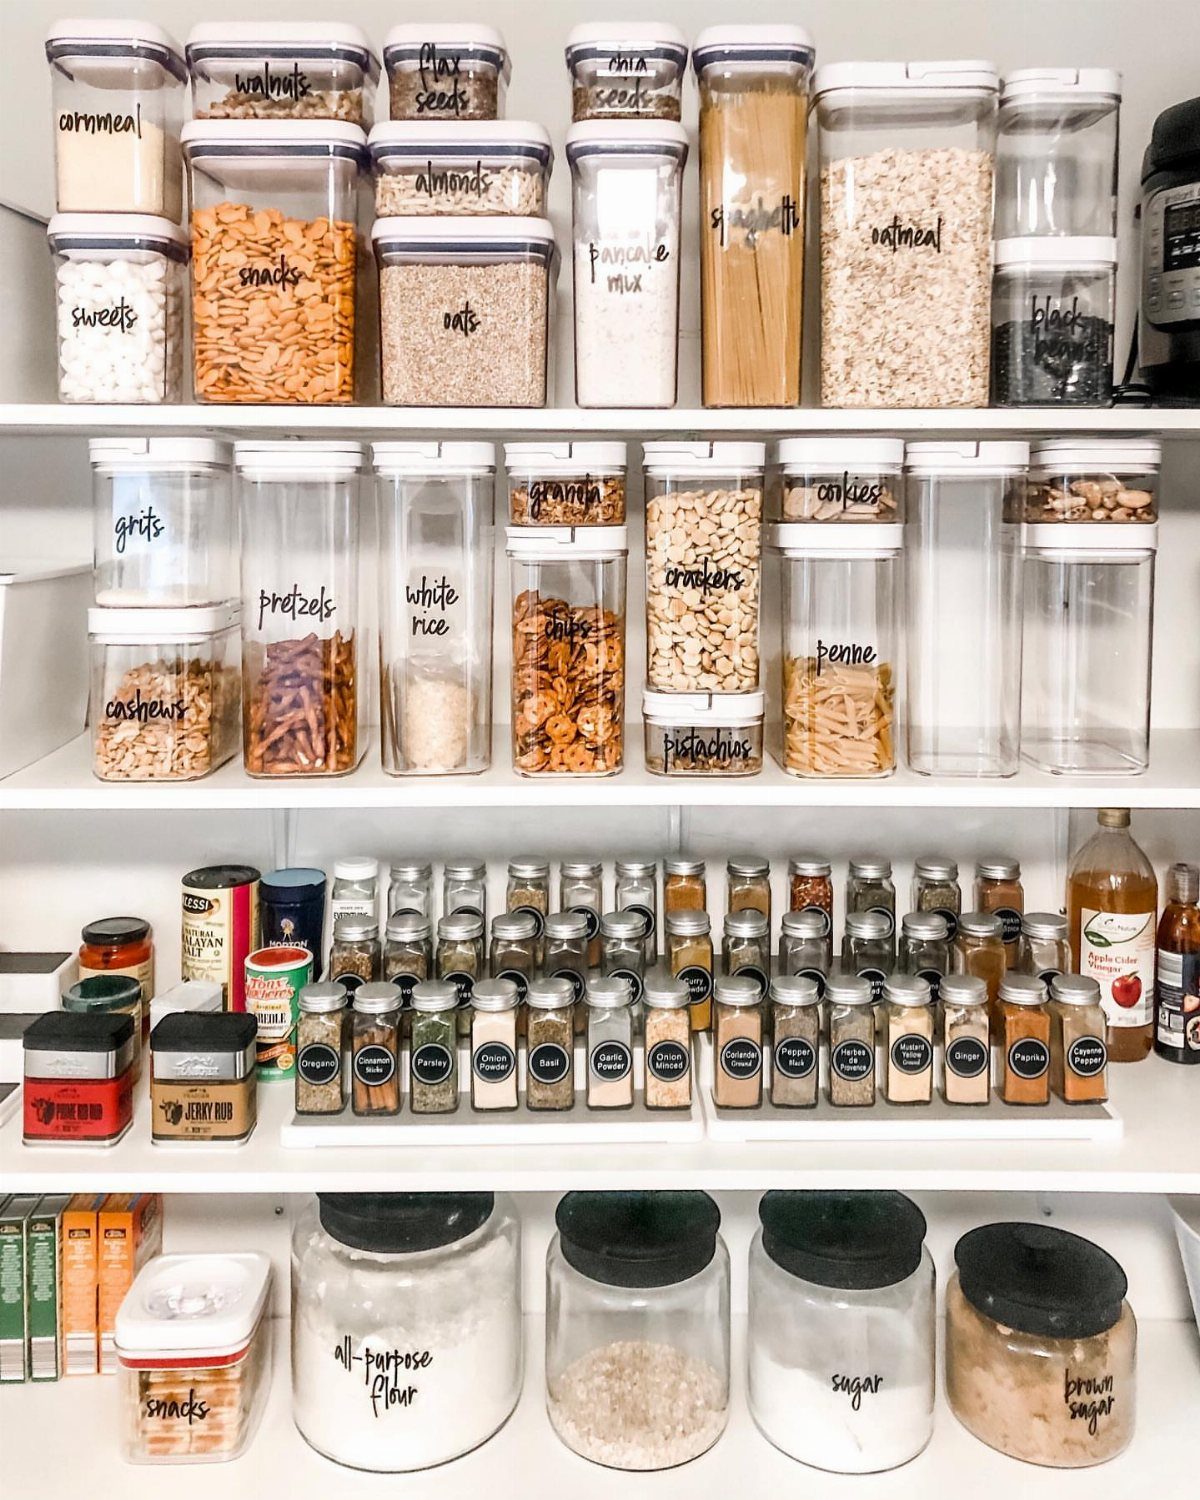
The ideas below run from a simple set of under-shelf hooks to a full pull-out shelf install that needs a drill and a free afternoon.
What decides which one belongs in your kitchen is whether you are working inside existing cabinets or willing to swap hardware.
A tight-sealing lid on flour containers is the kind of small specification that separates a system that lasts from one that lets humidity win.
1. Shelf Risers in Kitchen Cabinet
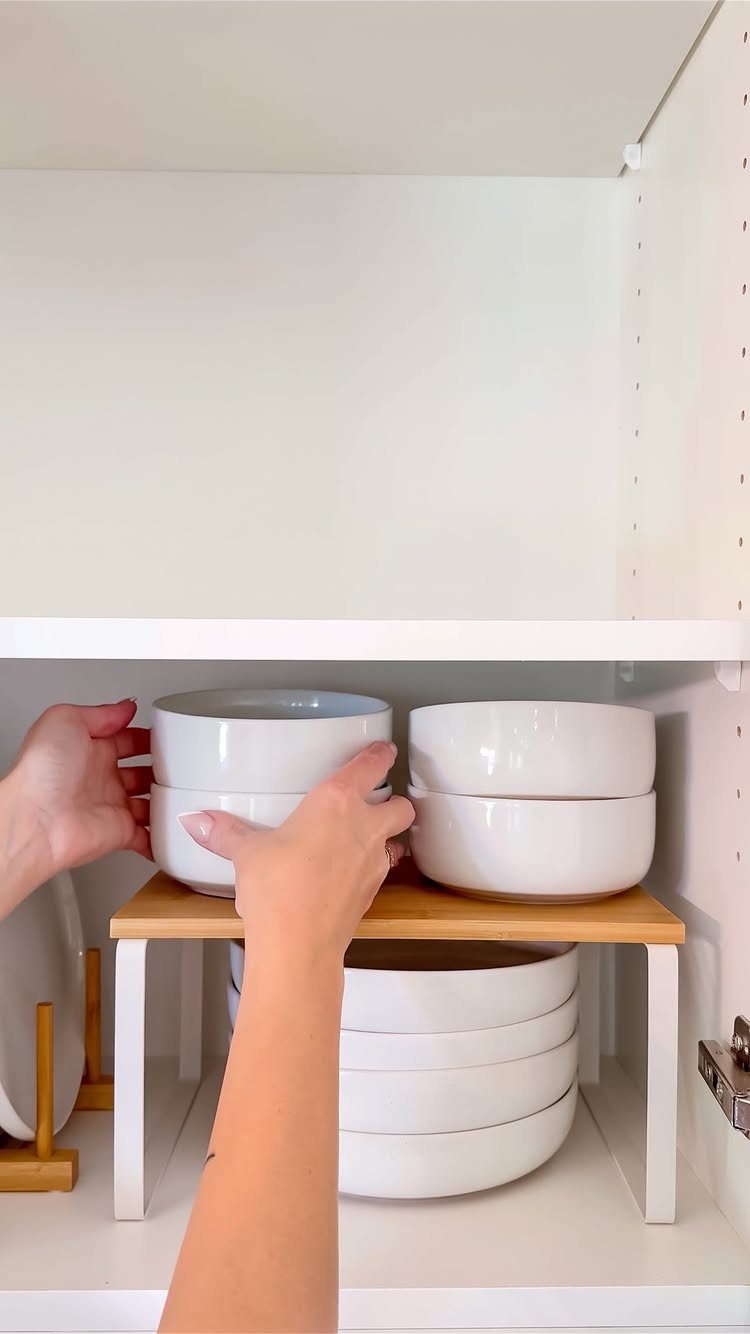
A shelf riser splits one cabinet height into two usable surfaces, which matters most in cabinets where vertical space goes to waste.
I look for risers with a lip or rail at the back so plates don’t slide; the bamboo and metal ones hold up better than wire alone under ceramic weight.
Check your shelf depth before ordering. A riser that fits front-to-back without forcing you to reach around it is the one that actually gets used.
2. Mugs in One Cabinet
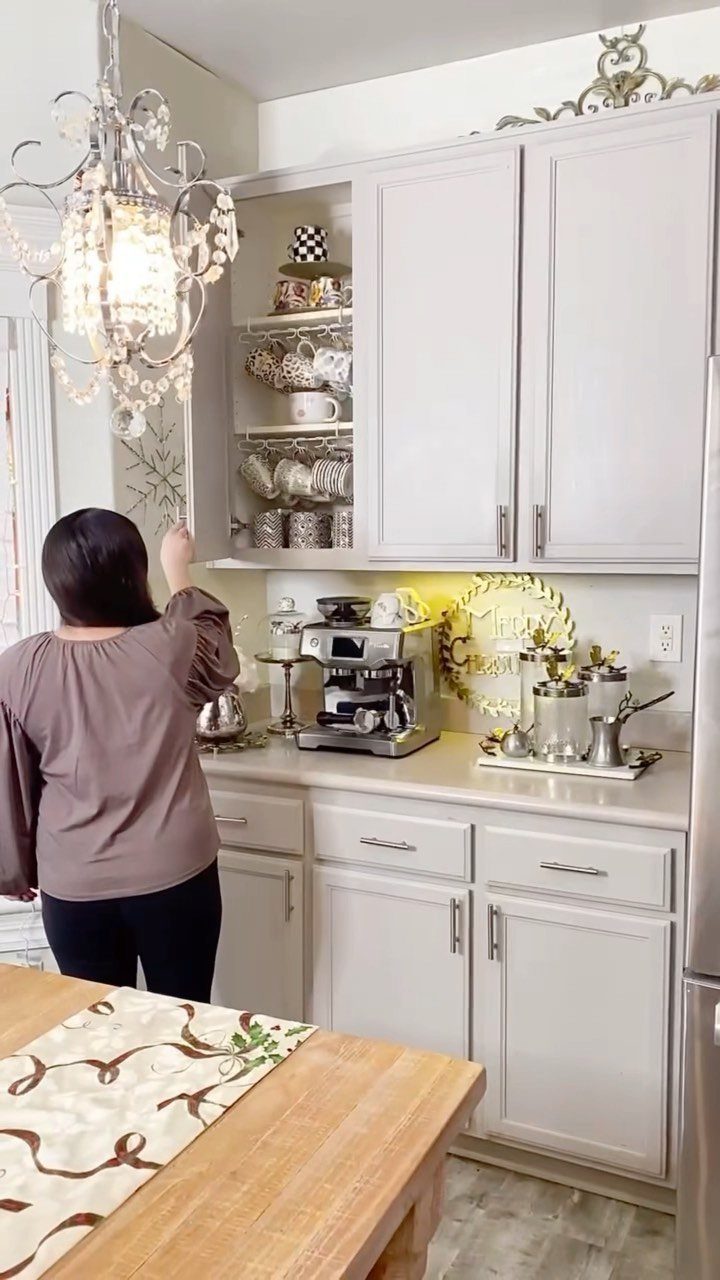
Mugs multiply faster than almost any dish, and spreading them across 3 cabinets is how you lose track.
I keep them in one place, usually above the coffee setup if the cabinet is there, because the shortest path to the machine is what sticks.
The hanging hooks I see in some setups work when the cabinet interior is finished wood or you don’t mind small screw holes; otherwise, stacking with the handles offset saves the same space.
Decide up front whether this cabinet holds only daily mugs or the full collection, including the oversized ones that never stack neatly.
3. Everyday Dishes at Eye Level
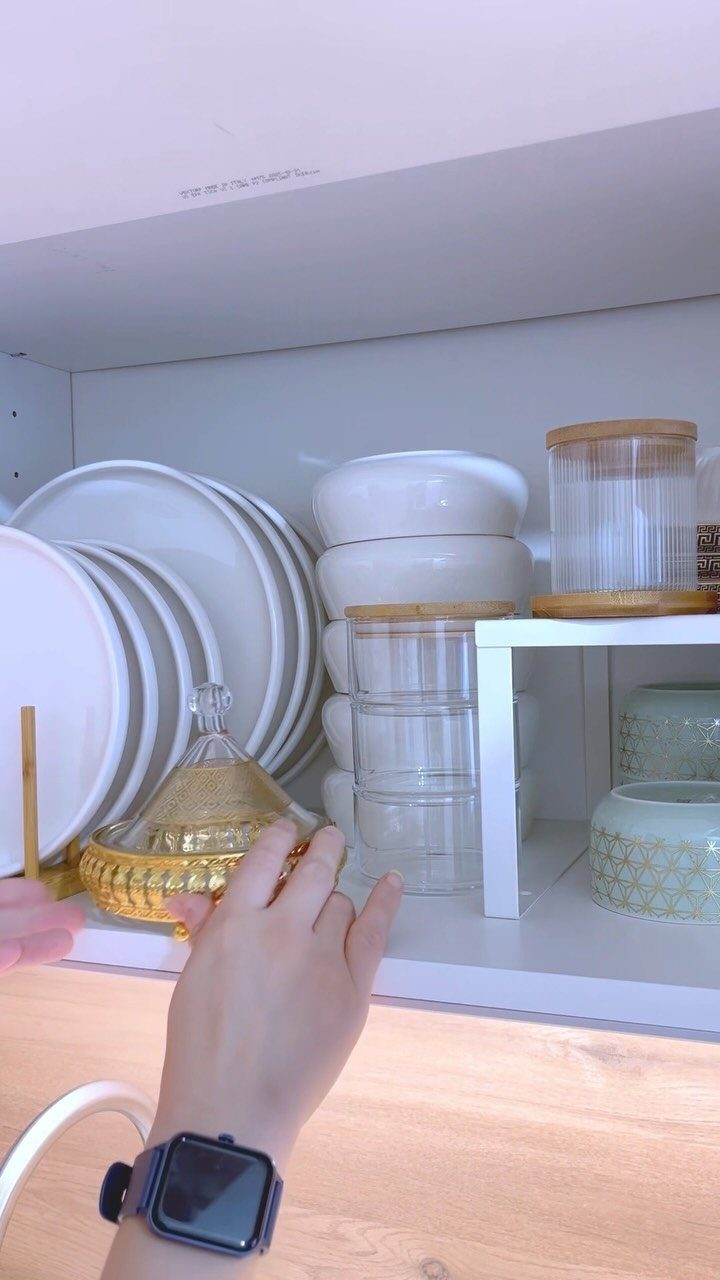
Everyday dishes live where your eyes land first when you open the cabinet, not where you have to bend or stretch.
In my own kitchen, that means the middle shelf of the upper cabinet closest to the dishwasher, because the unload-to-put-away path should be short.
The right density is enough to grab without moving other items, not so tight that one stuck plate topples the stack.
If your everyday set is large, this is the cabinet to thin first; the special-occasion pieces can move higher or to a less convenient spot.
4. Install Pull-Out Shelves
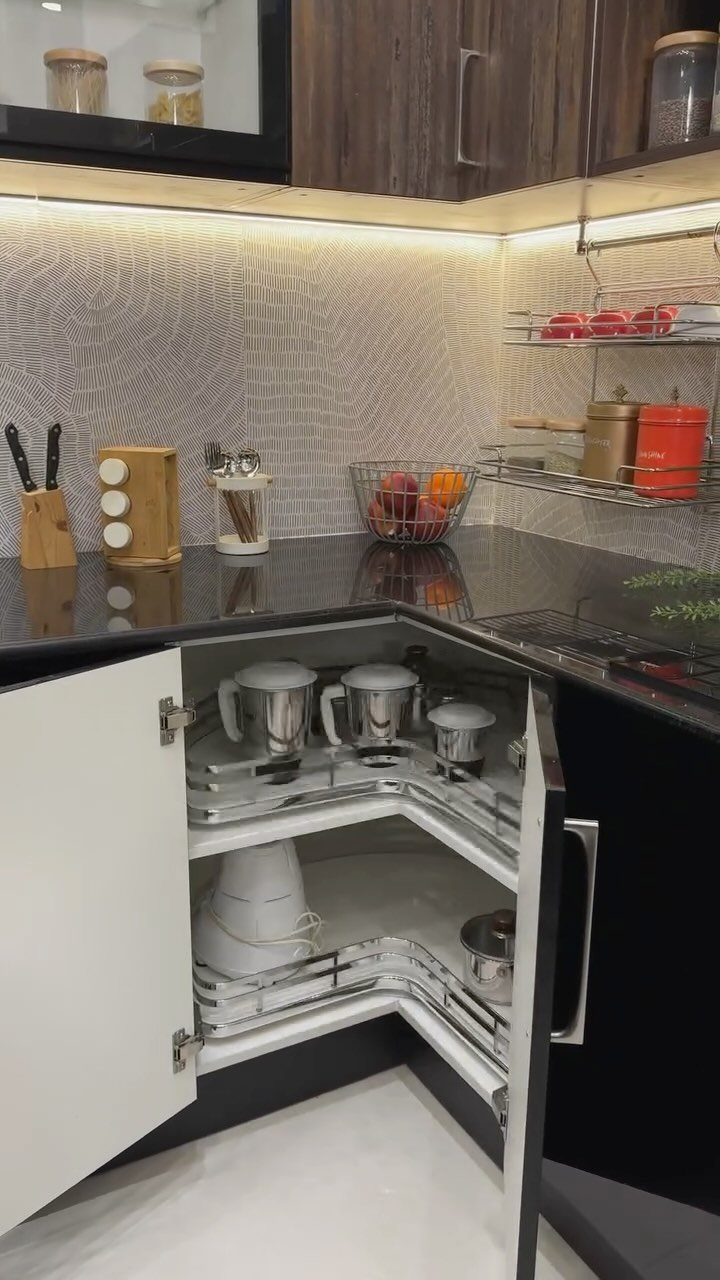
Pull-out shelves turn a deep corner cabinet from a black hole into usable storage. L-shaped chrome shelves that follow the cabinet footprint exactly are what I specify when I want small appliances to roll out to full view.
Measure the cabinet opening against the shelf frame before buying; a quarter inch off and the slide hardware binds.
I install these where I store things I use weekly but not daily, the stand mixer and the food processor, because the motion of pulling out adds seconds that matter for a dinner plate but not for a countertop appliance.
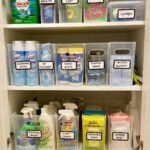
5. Clear Containers for Flour and Sugar
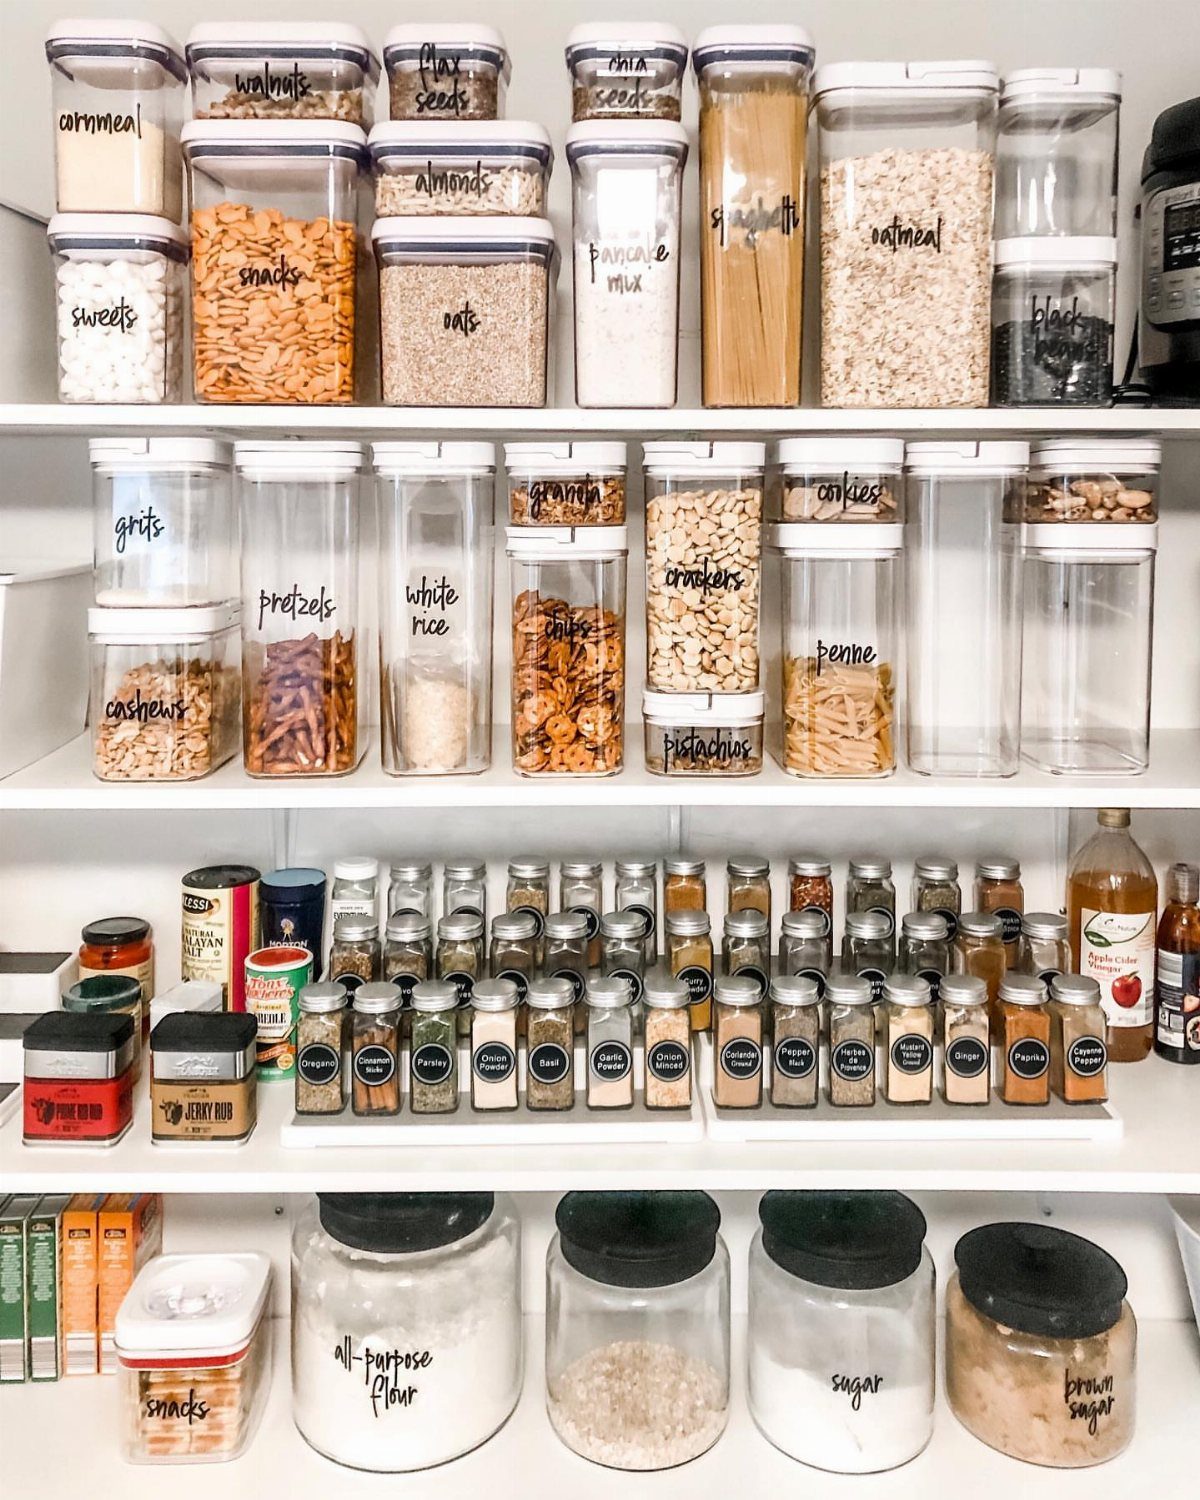
Flour and sugar in their original paper bags are hard to identify at a glance and harder to keep sealed.
I transfer dry goods to clear containers with tight lids, the square or rectangular kind that sit flush against each other without the dead space of round jars.
Large glass containers labeled at the bottom work for standard flour and sugar bags; for smaller amounts, I use the same system in half the volume so I’m not reaching past a near-empty jar.
Check that the lid gasket is silicone, not foam, if you bake in humid months.
6. Use Drawer Dividers
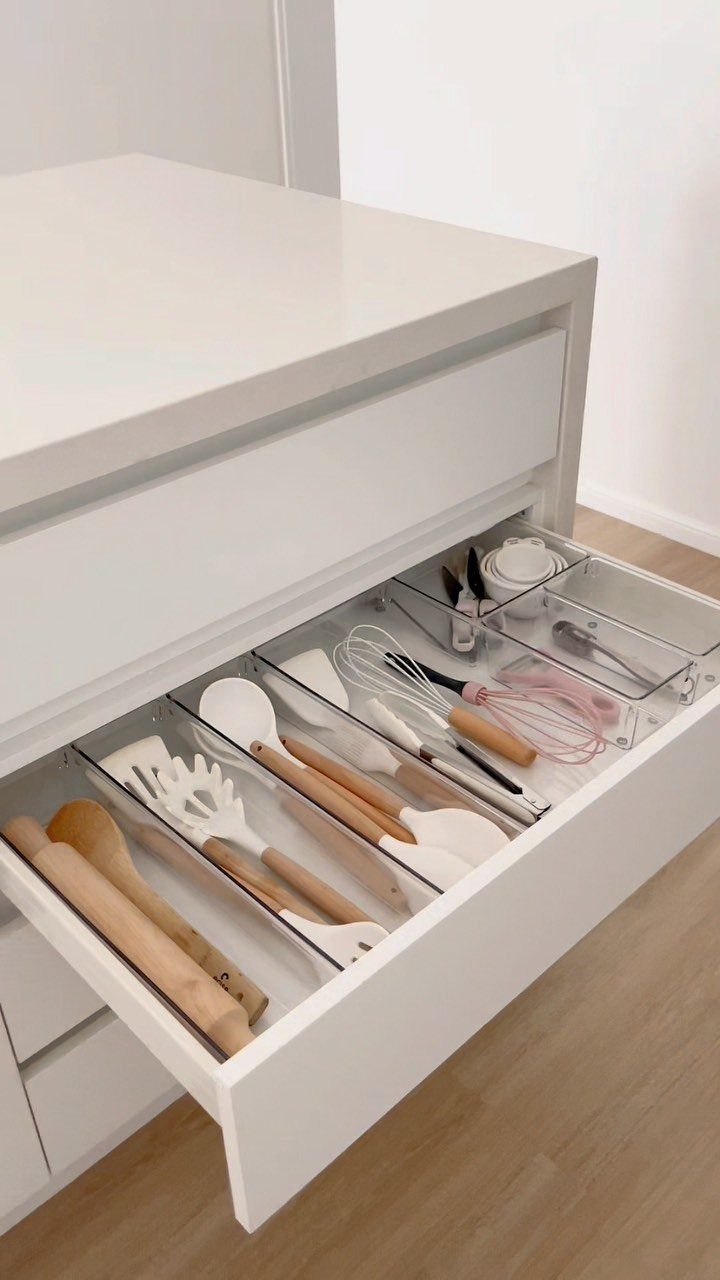
Drawer dividers keep utensils from becoming a single tangled layer where nothing is findable. I prefer clear plastic for visibility, though bamboo looks better if the drawer is opened often in a kitchen where guests gather.
Buy dividers that reach the full drawer depth; any gap at the back collects the spatulas that slide out of place.
Wooden spoons sharing a bin with silicone tools tells me the sort is by function, cooking versus baking, not by material.
Decide your categories before you shop for divider sizes, or you’ll end up forcing a whisk into a slot meant for a teaspoon.
7. Cleaning Supplies Under Sink
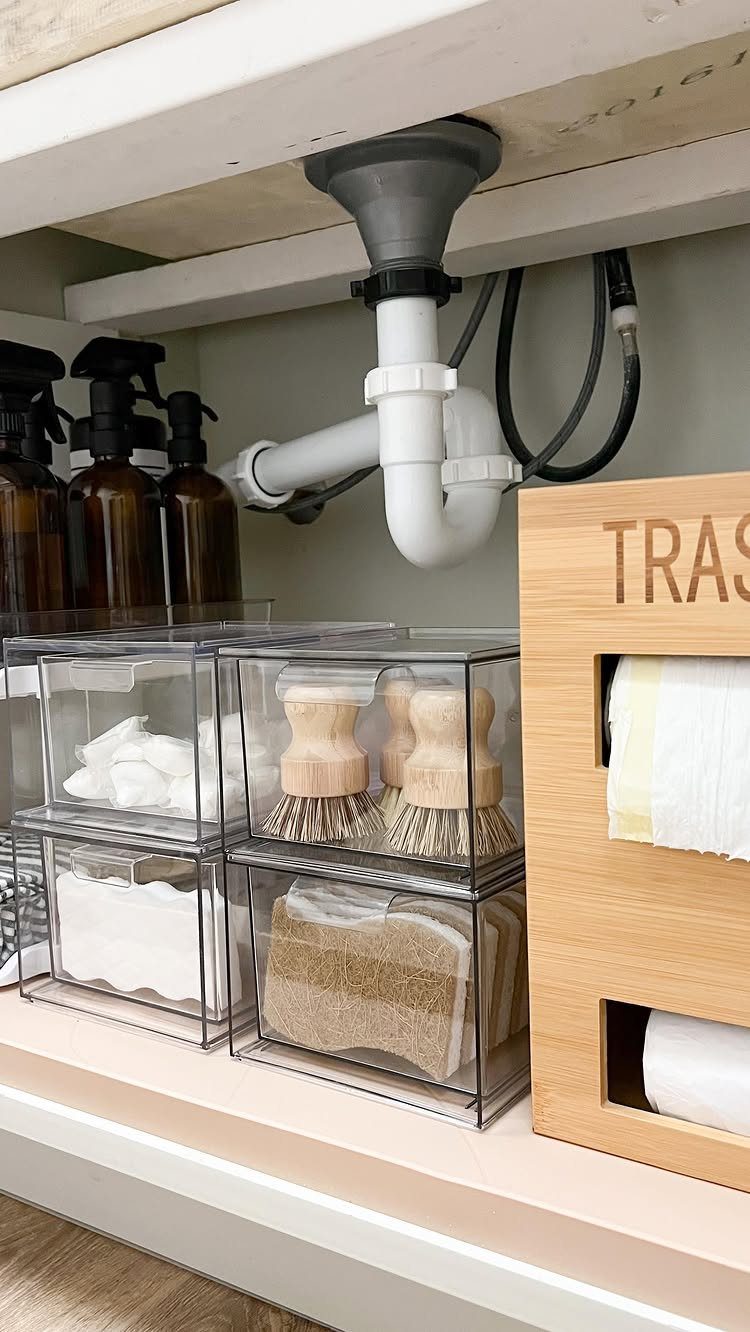
The space under a sink is awkward by nature, cut through with pipes and a disposal. I use clear acrylic drawers stacked to one side because they keep small items dry and visible without relying on the full shelf depth.
The other side holds spray bottles and the bulkier tools. Before you buy anything, trace your plumbing on paper; a drawer unit that bumps the P-trap is one you’ll return.
I skip the tension rods some people use for hanging sprays; they sag in humid cabinets and drop bottles on your toe.
8. Use a Lazy Susan
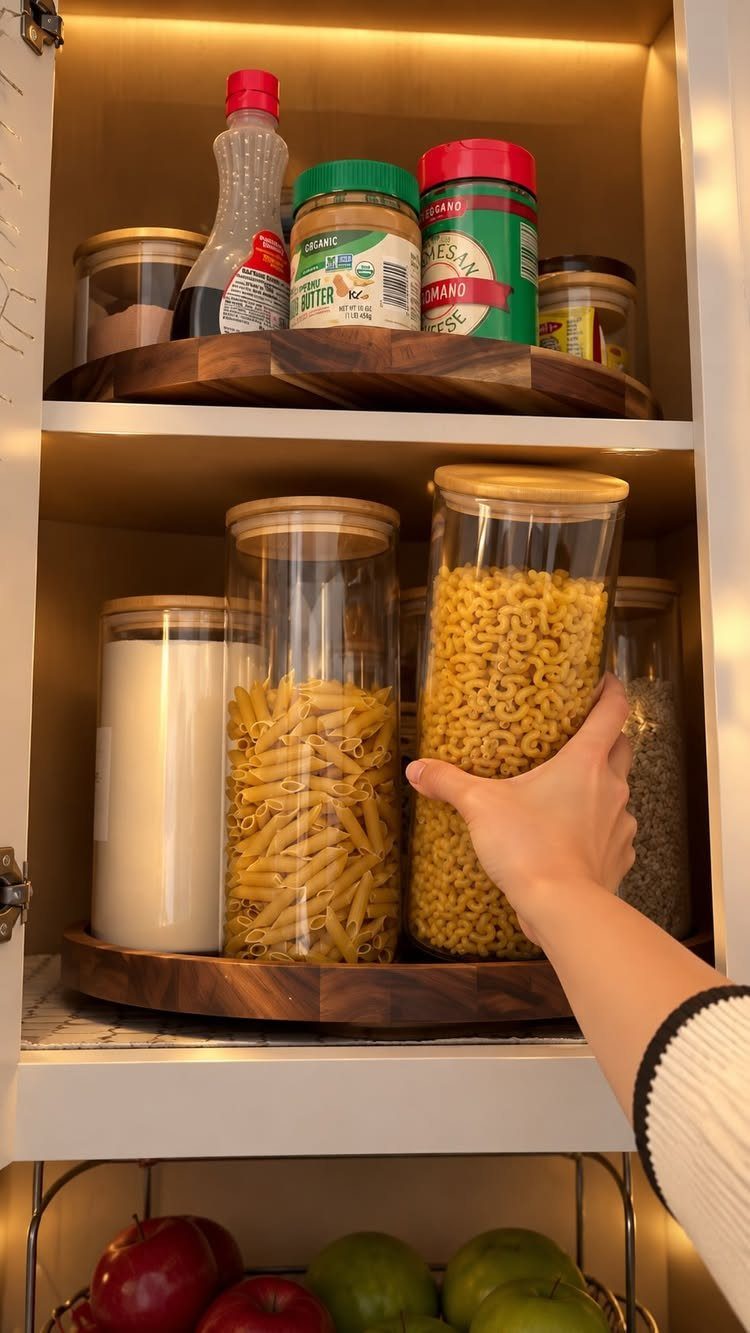
Corner cabinets swallow items whole unless something brings the back corner forward. A wooden lazy Susan does that rotation without the clatter of metal or plastic, and the lip on the edge keeps jars from walking off mid-turn.
I size it to leave an inch of clearance on all sides; too tight a fit and the mechanism grinds against the cabinet face frame.
The ones I like hold enough standard jars for pasta, peanut butter, and the grated cheese that always seems to live in the same zone.
9. Spice Drawer with Matching Jars
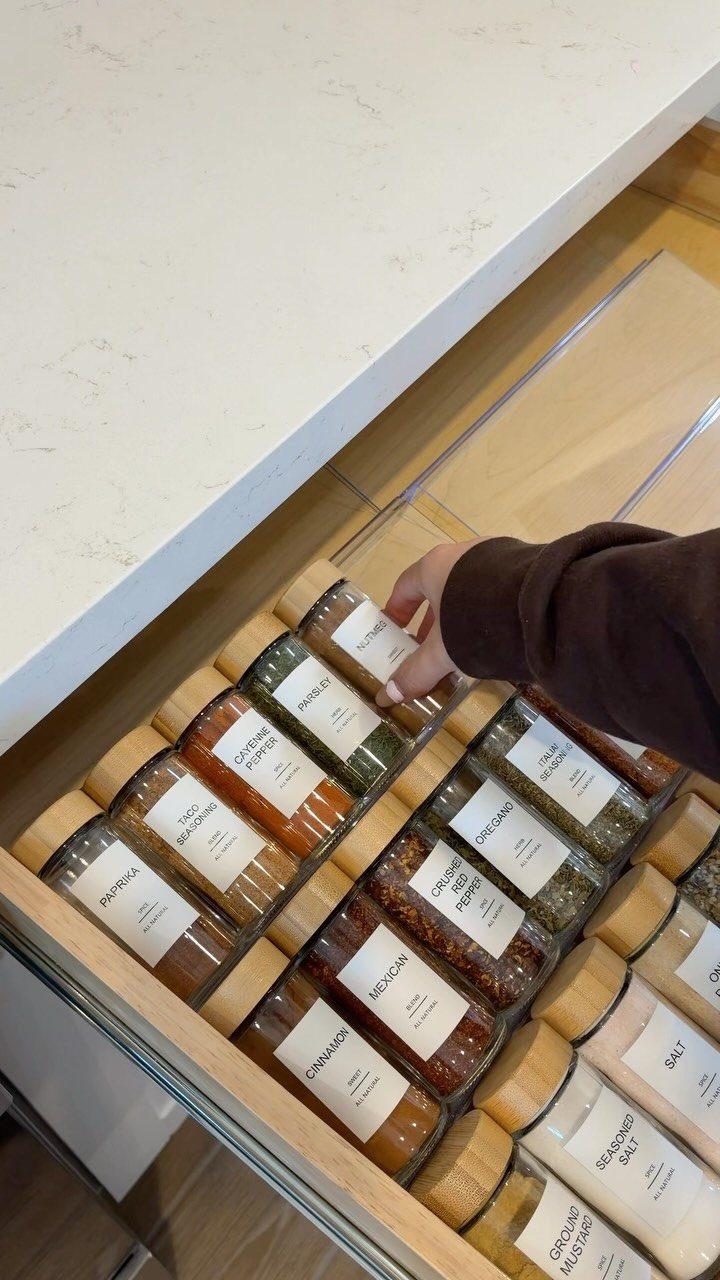
A drawer of matching jars with uniform labels turns spice hunting from squinting into a quick scan.
I use clear glass with bamboo lids because the material matters less than the consistency; every jar the same height means no staggered row hiding its neighbor.
The inserts that hold them at a slight angle are worth the extra cost, since reading a flat label from above is harder than it sounds.
Decide your label system before you commit to jar size; my preference is simple text, no color coding that I’ll forget by the next project.
10. Vertical Plate Racks Inside Cabinets
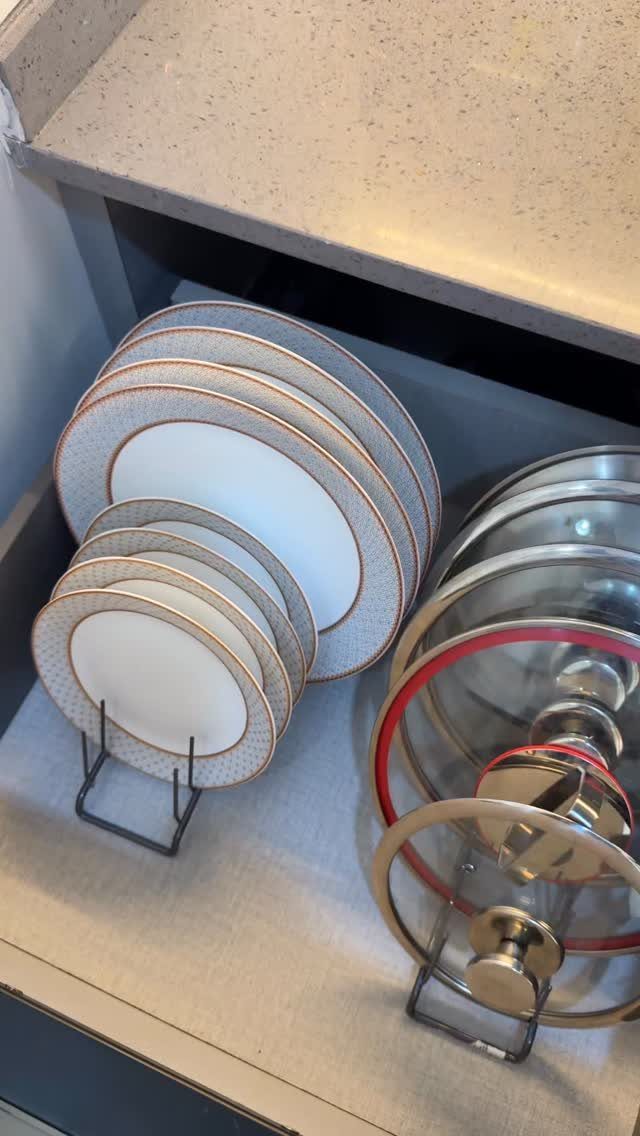
Plates stored on edge in a wire rack take depth instead of height, which changes how a lower cabinet functions.
I specify this where the drawer or shelf is deep enough that horizontal stacks become unwieldy; a standard dinner plate on its edge needs enough vertical clearance that you won’t force it.
The same rack beside it for pot lids keeps the pairing logical. Check your plate diameter against the rack slot width before ordering; a quarter inch too narrow and the plate leans, too wide and it rattles.
11. Cookware Organizer Rack
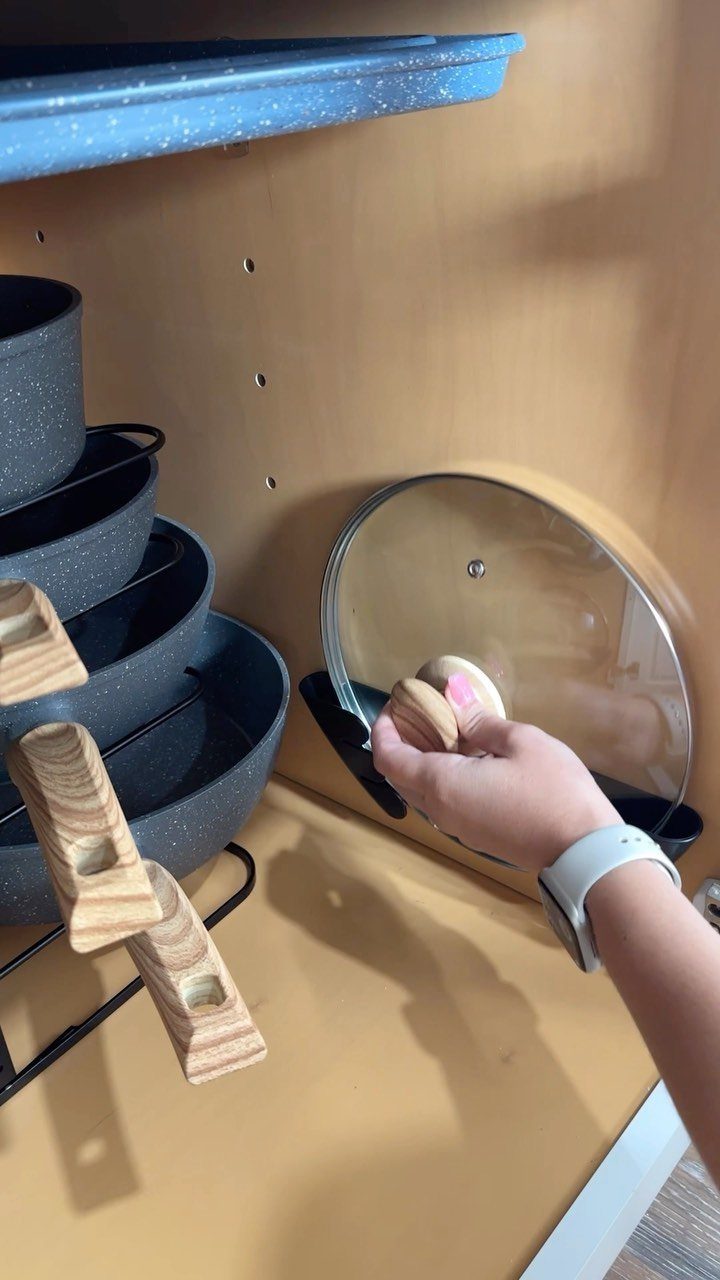
Stacked pans with their lids parked separately is how you stop the morning clatter of digging for the right cover.
I mount a wire lid holder on the cabinet wall at a height a child can reach, because the person emptying the dishwasher should be able to put things where they live. The base rack below takes the nested skillets.
12. Under-Shelf Mug Hooks
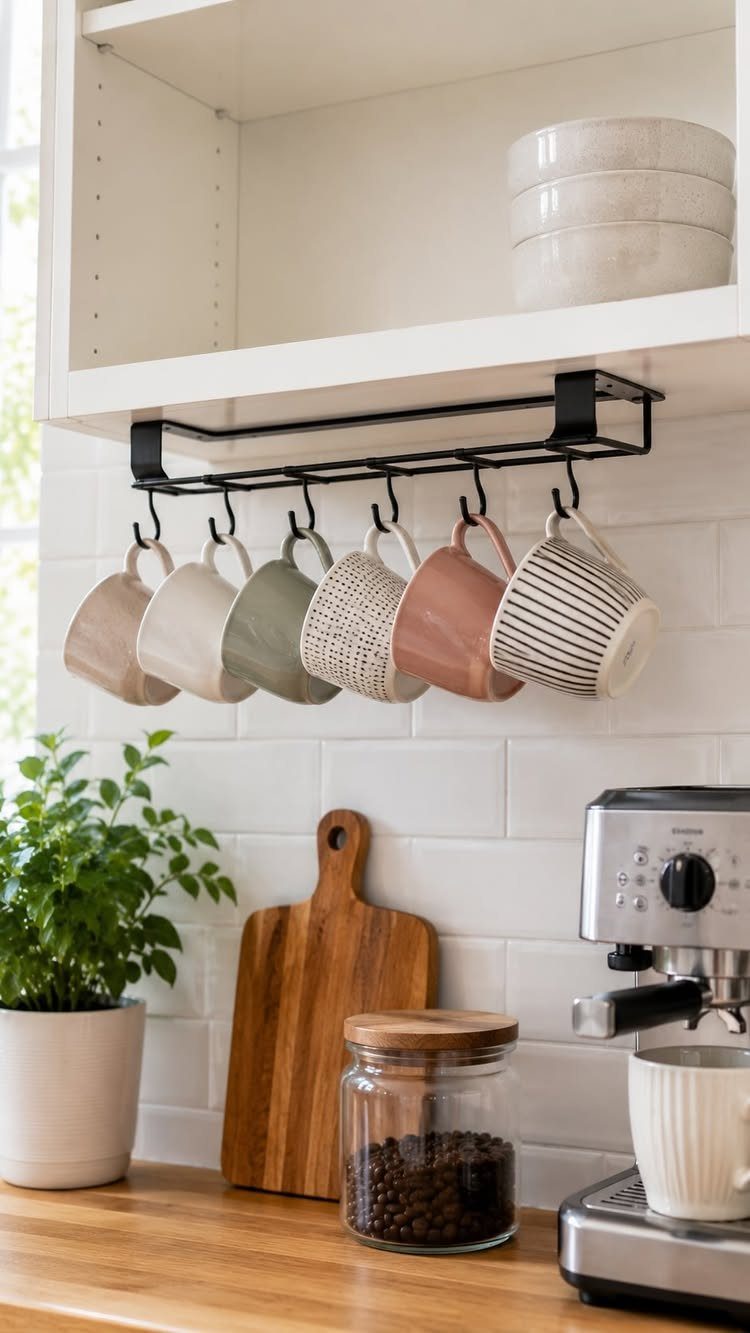
Under-shelf hooks turn the dead zone below an upper cabinet into storage for a morning’s worth of mugs.
I look for a black metal rack with the hooks integrated, not the stick-on kind that peel in steam. The one I keep coming back to mounts with two screws into the shelf base; it holds ceramic weight without sagging.
Check your mug handle width against hook spacing before buying, and measure your tallest mug against the counter below. A mug that swings into the espresso machine is a short-lived solution.
Importance of Decluttering
Decluttering comes before any system works.
Barbara Hemphill’s line that clutter is postponed decisions holds up in every kitchen I have organized. I start with three containers marked donate, sell, and trash, then work one cabinet at a time.
The three containers are donate, sell, and trash; anything that does not land in one of those is something you already decided to keep, so put it back where it belongs.
A full empty-out at least once forces you to see what you actually own.
Most people find duplicates they forgot, or tools they bought twice because the first one was buried. That sight alone justifies the mess of pulling everything onto the counter.
Regular Maintenance
A monthly check keeps the system from drifting. I set a calendar reminder and run through 4 questions: are items still grouped by function, are any snacks or spices expired, do containers have their lids, and do shelves need wiping.
Expired items catch me most often, a spice jar bought for one recipe and forgotten. Missing lids mean a container is probably useless, and keeping it wastes the space.
A quick wipe prevents the sticky residue that eventually glues items to the shelf. This is maintenance, not reorganization; if it takes longer than it should, the original system was too complex.
Functional Kitchen Layout
I organize by zones, not by cabinet size. The 5 zones are food, cleaning, cooking, dishware storage, and preparation, and I store items where the work happens.
Pots and pans live near the stove; the blender and supplements go where the morning routine starts, not where they fit neatly. A corner basket for that health station works in woven, wood, or wire depending on the kitchen’s finish.
The zone idea sounds obvious until you find yourself carrying a cutting board across the kitchen because the prep space and the knives are on opposite walls.
Tailor the zones to your actual day, not a diagram. My breakfast corner would be useless to someone who skips it, and their baking zone would slow me down.
Fortunately, there are some simple strategies to take your kitchen cabinets from dysfunctional to fabulous and from cluttered to stylishly organized.
Frequently Asked Questions
How to organize upper kitchen cabinets?
Everyday plates and bowls belong on the middle shelf, where your eyes go first the second the door swings open.
Shelf risers help split vertical space into 2 usable surfaces, and I look for ones with a lip or rail at the back so plates don’t slide.
What should not be stored in kitchen cabinets?
Items that belong in other zones of your kitchen or home don’t belong in cabinets just because there’s space.
I organize by work zones, not cabinet size, so the blender goes where the morning routine happens, not where it fits neatly.
Things you use less than once a month are candidates for higher shelves, less convenient spots, or leaving the kitchen entirely.
How often should I reorganize my cabinets?
Once a month I run through the cabinets with 4 questions: do the groups still make sense, is anything expired, are lids missing, and which shelves need wiping.
A full pull-everything-out reset at least once a year shows you what you actually have; most kitchens hide a duplicate or three. When the monthly check starts taking forever, the setup itself is the problem.